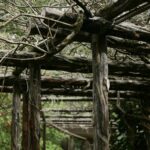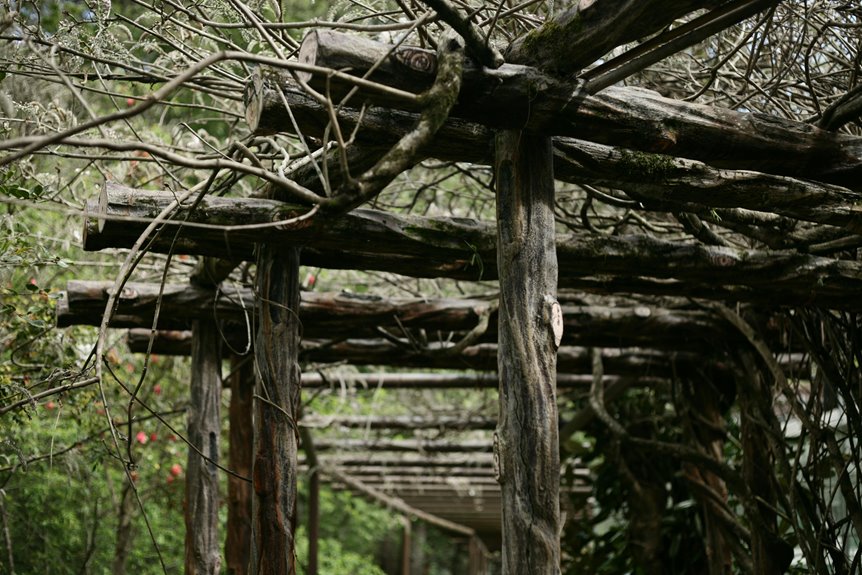
10 Steps to Build Your Own Garden Trellis
A vertical garden trellis requires ten construction steps using cedar boards and wire mesh panels. These materials cost less than many alternatives. You should select a location that receives direct sunlight for at least six hours daily and has adequate soil drainage.
Prepare the ground by loosening the soil to a depth of six to twelve inches. Remove rocks, roots, and debris from the work area. Install vertical support stakes one foot below ground level to anchor the structure firmly.
Assemble the wooden frame using decking screws, which provide stronger connections than nails. Cedar wood resists rot better than pine or spruce. Attach the wire mesh panel to the frame at one-foot intervals, securing it with screws or staples rated for outdoor use.
Drive the completed structure into the ground until it sits level and stable. Check all connections for tightness before planting. Climbing vegetables such as beans (Phaseolus vulgaris) and cucumbers (Cucumis sativus) grow well on trellises because their vines naturally curl around supports. These plants require full sunlight and regular watering. The trellis system saves garden space while improving air circulation around the plants, which reduces disease risk.
Why Vertical Trellises Save Time and Space
Vertical trellises change how gardeners use their garden area. Climbing crops like beans, cucumbers, and tomatoes grow upward instead of spreading across the ground. This method frees up valuable soil space for pathways and additional plantings.
Fruits and vegetables positioned on vertical structures sit higher and become easier to reach during harvest. Gardeners spend less time bending and experience reduced physical strain compared to picking crops from ground level.
Vertical trellises simplify crop rotation practices. You can move climbing crops to different sections each season. This practice helps control pests and maintains soil health.
These structures require affordable materials. Remesh panels and wooden frames cost little money to build. Most gardeners can construct basic vertical systems without significant expense.
Simple or Wood-Frame: Choose Your Design
Your trellis design choice depends on your budget and needs. Option 1 uses a bare remesh panel attached to two tall stakes with zip ties or galvanized wire. This simple DIY trellis costs under $20 and requires minimal materials.
Option 2 adds a wood frame made from cedar or redwood boards, screws, corner brackets, and hose clamps. You assemble the frame first, then attach the remesh to the backside with screws spaced every foot around the perimeter. This design provides greater sturdiness and eliminates sharp edges from bare remesh.
The wood-frame version works better for raised beds and frequent transport. Both options support vertical training of beans and peas. You can install either design freestanding or anchor it to a wall or raised bed structure.
What You’ll Need (Materials & Tools)
Before you build your trellis, gather materials based on your chosen design. The simple option requires a remesh panel measuring 7 ft x 3.5 ft, two tall stakes, zip ties or galvanized wire, and hardware fasteners.
The wood frame version needs four 8-foot boards of redwood or cedar, a remesh panel, decking screws, hose clamps, and optional corner braces. You will also need specific tools: a saw for cutting wood, a power drill for fastening, and basic measuring equipment.
Both designs require stakes that extend at least 1 foot below the remesh panel bottom. This depth ensures proper stability and support for climbing plants.
Pick Your Spot and Prep the Ground

Select a location that receives adequate sunlight for your crops. The area must have proper drainage to prevent water pooling. You need at least 2–3 feet of clearance in front for maintenance access.
Level the ground once you have chosen your spot. Remove weeds and clear any debris to create a stable base. This preparation allows you to anchor your trellis securely without shifting or settling.
Check your local soil conditions before installation. Ensure the area drains well, since water accumulation around the trellis feet causes rot and structural instability over time.
Site Selection Considerations
Trellis placement affects both plant growth and structural stability. Choose a location that receives full sun to partial shade, as most climbing vines require at least six hours of direct sunlight each day.
Test the soil drainage by observing water movement through the area after rainfall. Poor drainage leads to foundation damage and root rot in plants.
Position your trellis away from existing plants and walkways. This prevents traffic blockage and reduces competition for space and nutrients among vegetation.
Place your structure near a water source. Easy access to water allows for convenient watering during the plant establishment period. Planning these details prevents expensive repairs and supports healthy vine development over time.
Ground Preparation Essentials
Ground Preparation Steps for Trellis Installation
After selecting your trellis location, prepare the ground before installation begins. Loosen the top 6 to 12 inches of soil to improve root access and reduce soil compaction around the trellis base. This loosening allows plant roots to penetrate deeper into the earth beneath your structure.
Dig holes approximately one foot deep for your stakes. Proper depth prevents the trellis from tipping and keeps stakes stable during installation and use. Position each stake vertically so it supports the trellis evenly across its entire base.
Remove rocks, debris, and hard, compacted earth from the installation area. These materials can block stake placement and create an uneven foundation. Clearing these obstacles establishes a solid base for your trellis and promotes long-term plant growth and structural durability.
Sunlight and Drainage Assessment
Sunlight and Drainage Assessment
Before installing your trellis, assess both sunlight exposure and soil drainage at your chosen location. Most vegetables like beans, cucumbers, and tomatoes need at least 6–8 hours of direct sun daily. Check your site throughout the day to confirm adequate light reaches your plants.
Next, evaluate drainage by observing the soil after rain. Standing water indicates poor drainage and root rot risk. Well-draining soil prevents moisture buildup and trellis corrosion at ground level.
Test soil moisture before trellis installation. The soil should feel evenly moist throughout the profile to support vine establishment. Grade your soil smoothly and remove debris from the installation area. Consider digging a ground trench to keep the trellis frame above the water line. Add a thin mulch layer to improve drainage and reduce erosion around the base.
Find and Position Your Support Stakes

Choosing and positioning support stakes affects your trellis’s stability and longevity. Select stakes longer than 4 feet for a 7-foot trellis. Stakes should reach at least two-thirds of the trellis height. Textured stakes with grooves or notches grip better and reduce slipping compared to smooth stakes.
Support stakes longer than 4 feet with textured grooves grip better and ensure trellis stability and longevity.
Drive each stake 1 foot deep into the ground. Leave approximately 3 feet above ground for support. Position stakes on the outer edges of your remesh. Alternatively, align them with interior vertical wires for optimal alignment. Space stakes evenly to match your trellis width.
Check that each stake is perfectly straight up and down before attaching the panel. Proper stake positioning creates the foundation your trellis needs.
Cut Your Pieces to Size

Measure your wood pieces carefully based on your trellis design. Determine the exact lengths for vertical and horizontal boards before making any cuts.
Select the right saw for your project. A circular saw works well for straight cuts. A handsaw is better for detail work. The correct saw choice ensures clean, precise cuts that prevent splitting in cedar or redwood materials.
Cut all your pieces according to your measurements. Organize them by size and function immediately after cutting. This organization allows you to locate pieces easily during assembly and verify that your measurements are correct.
Measuring Your Wood Pieces
Precise measurements are the foundation of a sturdy garden trellis. Getting your wood pieces cut to the correct sizes guarantees that all components fit together properly during assembly.
You will work with cedar boards in 1×2 or 1×6 dimensions. Your remesh panel measures 7 feet by 3.5 feet, and you must account for this size when determining your framing dimensions.
| Piece Type | Length | Width | Quantity | Purpose |
|---|---|---|---|---|
| Top Frame | 7 ft | 1.5 in | 1 | Upper horizontal support |
| Bottom Frame | 7 ft | 1.5 in | 1 | Lower horizontal support |
| Side Rails | 3.5 ft | 1.5 in | 2 | Vertical framing |
| Stakes | 4 ft | 1.5 in | 2 | Ground anchors |
| Center Support | 3.5 ft | 1.5 in | 1 | Interior bracing |
After cutting each piece, label it with its intended location. Labels prevent misplacements and confusion during the assembly process. You can use a marker or pencil to write directly on the wood or attach temporary tags to each piece.
Selecting the Right Saw
After you measure and plan your wood pieces, choosing the correct saw improves cutting speed and accuracy. Different saws handle different tasks in your project.
A table saw rips wider cedar boards to custom widths. For example, you can cut boards down to 1 1/2 inches with this tool. A miter saw cross-cuts cedar to the correct length. It also creates precise 45-degree corner joints for vintage-style detailing. A reciprocating saw with a metal-cutting blade trims remesh panels and removes excess ends during frame fitting.
Before you make final cuts, perform dry fits on your driveway. Check that dimensions and alignment match your planned layout. This step verifies that your trellis pieces will fit together correctly.
Organizing Cut Materials
Cutting all pieces to the correct size must happen before assembly begins. Measure your remesh panel and frame opening with care, then use a miter saw to cut cedar or wood frame components to precise lengths. Common frame materials include 2x2s or 1x2s. If you are using wider boards, rip them down to your required width with a table saw or circular saw.
Gather your pre-cut hardware next. This includes decking screws, corner braces, and hose clamps that match your frame size and joint count. Having all hardware organized and ready prevents delays during assembly.
Trim your remesh panel with bolt cutters or heavy-duty snips to fit your exact frame dimensions. The panel should align with your frame edges without gaps or overlaps.
Label each cut piece by its position in the frame. Mark vertical sides, top rails, bottom rails, and cross supports clearly. Labels help you locate components quickly during assembly and reduce confusion about placement. Use a permanent marker or masking tape for labeling so marks remain visible throughout the building process.
Build a Wood Frame (Option Two Only)

Build a Wood Frame (Option Two Only)
For a sturdy wood frame, gather four 8-foot boards made from redwood or cedar. These wood types resist rot and weather damage. You will also need additional support pieces to keep the structure rigid and prevent flexing.
Measure your frame to fit the remesh panel. Account for leg extension and edge alignment in your measurements. Cut your wood to the correct size based on these measurements.
Assemble the frame using decking screws or L-brackets. Add a center or corner support piece to prevent the wood frame from bending under pressure. This support piece is essential for structural stability.
Attach the remesh panel to the backside of the wood frame. Align all edges carefully. Screw the panel down every foot along the entire perimeter to secure it properly.
Secure the Wire Mesh to Your Frame

Position the remesh panel on the back side of your wood frame. Align all edges precisely and square the panel to the frame before fastening. This prevents shifting during installation.
Fasten the remesh with short wide-head cabinet screws. Space the screws approximately every 12 inches along the perimeter and across any internal supports. Start at the corners to anchor the panel and reduce movement.
Keep the remesh flat and taut against the frame with no gaps or warping. Use pilot holes to guide the screws and prevent splitting. Avoid over-tightening the screws, as excessive force can crack or warp the frame.
Alignment and Positioning
Position the wire mesh so its edges align square to the wood frame before fastening. Start by securing the mesh at all four corners first. This initial step prevents the mesh from shifting during installation.
Space your fasteners approximately 12 inches apart along the outer perimeter. Use short wide-head cabinet screws driven close to the edge of the frame. Avoid over-tightening the screws, as this can warp the mesh or damage the frame.
| Positioning Step | What to Check |
|---|---|
| Corner attachment | Mesh remains stationary |
| Edge alignment | Edges form square angles |
| Spacing measurement | 12 inches between fasteners |
After completing the attachment, verify the mesh alignment by measuring diagonals from opposite corners of the frame. Both diagonal measurements should be equal in length. Equal diagonals confirm the remesh forms a true rectangle with proper alignment.
Fastening and Spacing
Fastening and Spacing
Once the mesh sits squarely within your wood frame, secure it with short wide-head cabinet screws. Start at the corners to hold the mesh square to the frame. Then add screws along the midsections and supports. Space screws approximately every 12 inches to prevent shifting. This consistent spacing keeps the mesh tight and secure across the entire frame.
For stake-mounted trellises, align the mesh edges with the stake line. Use zip ties or galvanized wire instead of screws. This method prevents inward bowing that can damage plants. Larger trellises or double-panel designs benefit from center support pieces. These pieces reduce flex and maintain even tension across the mesh.
Before planting, check all edges for sharpness. Trim or sand any rough spots accordingly.
Install and Stabilize Your Trellis

After you’ve built or prepared your trellis frame, anchor it securely into the ground. Drive stakes into the soil at the trellis installation edges. Bury them 12 inches deep for maximum stability. Leave about 3 feet of each stake above ground to support your remesh panel.
Attach the remesh panel to the stakes using zip ties or galvanized wire. Space fasteners approximately every foot along the perimeter. For wood-frame options, use short wide-head cabinet screws to secure the remesh. Fasten corners first to prevent shifting.
For larger assemblies, add center supports or additional stakes for extra rigidity. Anchor base feet several inches into soil or ground cover. This approach ensures your trellis withstands wind and plant weight throughout the growing season.
What to Grow and How to Train It

What Plants Work Best on Your Trellis
Lightweight vegetables perform well in vertical gardening systems. Cucumber, pole beans, snow peas, and snap peas climb naturally and require minimal support. These plants allow for easy harvesting at convenient heights.
Heavier crops need additional reinforcement. Tomatoes, squash, and melons can grow on a trellis when you use slings or hammocks to support their weight. Flowering vines including jasmine, honeysuckle, clematis, and nasturtium also grow on trellises. These vines produce edible flowers and fruits alongside their visual appeal.
How to Train Vines on Your Trellis
Space plants 6 to 12 inches apart along your trellis structure. Use knots or ties to direct the vines upward as they develop. Regular pruning maintains air circulation between plants and prevents them from becoming too dense.
These practices keep your vertical gardening system functioning properly throughout the growing season. Good airflow reduces disease problems and ensures plants receive adequate light.