Transforming your child’s outdoor playhouse into a magical haven doesn’t have to expensive or require professional design skills. We’ve discovered that the interior of these charming backyard structures offers endless possibilities for creativity and imagination. Whether you’re working with a basic wooden frame or an elaborate Victorian-style playhouse, the right interior touches can turn any space into your child’s favorite retreat.
From cozy reading nooks to miniature kitchens, we’ll explore budget-friendly ideas that make the most of every square foot. The key lies in understanding how children actually use these spaces and what elements spark their creativity most effectively.
We’ve compiled practical answers that combine functionality with whimsy, ensuring your outdoor playhouse becomes more than just a structure – it becomes a launching pad for countless adventures. Let’s jump into the design strategies that’ll transform your child’s playhouse into an irresistible outdoor sanctuary.
Create a Cozy Reading Nook With Soft Furnishings
Transforming your outdoor playhouse into a peaceful reading retreat starts with selecting the right comfort elements. We’ll show you how to combine durable materials with child-friendly design to create an inviting space where little ones can escape into their favorite stories.
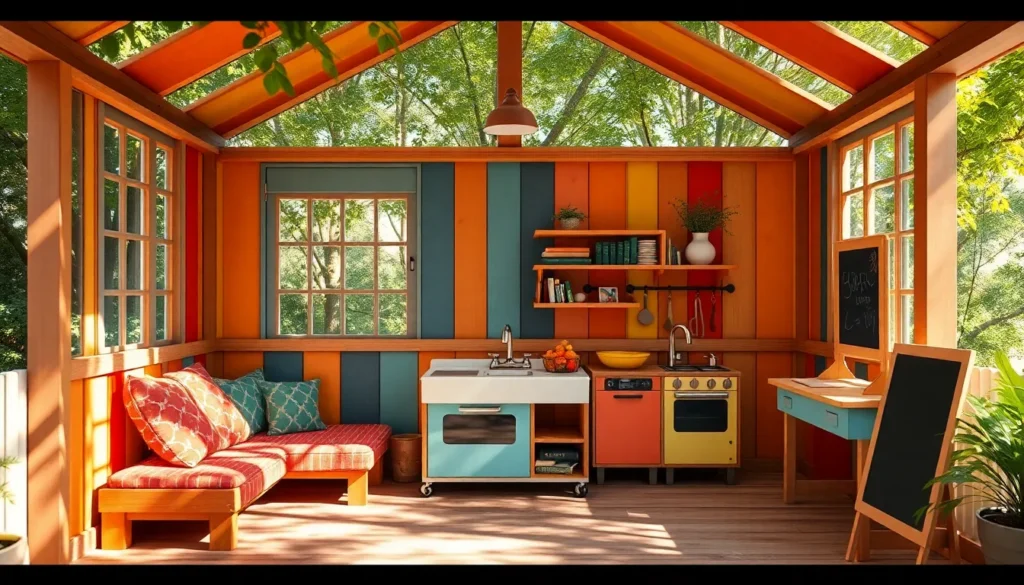
Add Weather-Resistant Cushions and Pillows
Selecting outdoor fabric cushions ensures your reading nook stays comfortable through changing weather conditions. We recommend choosing cushions made from solution-dyed acrylic or polyester blends that resist fading, mildew, and water damage.
Arranging floor cushions in a semicircle creates a natural gathering spot where children can sprawl out with their books. Consider using 18-inch square cushions as bases with smaller 12-inch accent pillows for added comfort and visual interest.
Mixing different textures and patterns adds personality to the space while maintaining durability. Geometric patterns in bright colors like turquoise, coral, and sunny yellow create an energetic atmosphere that encourages reading adventures.
Install Child-Sized Bookshelves
Mounting low-profile shelves at child height makes books easily accessible and encourages independent reading habits. We suggest installing shelves 24 to 30 inches from the floor, perfect for children aged 3 to 8 years old.
Building simple box shelves from cedar or pressure-treated pine provides weather resistance while keeping costs manageable. Each shelf should measure approximately 24 inches wide by 6 inches deep to accommodate standard picture books and early readers.
Organizing books by category or color creates visual appeal and helps children find their preferred stories quickly. Face some book covers forward to create an inviting display that draws young readers to explore new titles.
Include a Small Storage Ottoman
Choosing a waterproof storage ottoman serves dual purposes as seating and organization for reading accessories. Look for options with removable lids that can hold extra cushions, blankets, or reading materials during inclement weather.
Positioning the ottoman near the reading area provides additional seating for parents or friends joining story time. A 16-inch cube ottoman works perfectly for most playhouse spaces without overwhelming the room.
Storing reading supplies like bookmarks, small notebooks, and crayons inside the ottoman keeps the space tidy while encouraging creative activities. This hidden storage solution maintains the cozy atmosphere while providing practical organization for the reading nook.
Design a Mini Kitchen Area for Pretend Play

Creating a miniature kitchen transforms your outdoor playhouse into the heart of imaginative culinary adventures. We’ll show you how to design functional play spaces that encourage role playing while developing essential life skills.
Set Up a Play Sink and Stove
Building or installing a play sink and stove creates the foundation of your mini kitchen area. We recommend constructing these elements from weather resistant wood or selecting durable plastic appliances specifically designed for outdoor use. Position the sink and stove along one wall to maximize the available floor space for movement and play.
DIY wooden versions offer customization options that match your playhouse’s existing design aesthetic. Paint the stove top with chalkboard paint so children can draw burner flames and cooking details. Install a small basin or metal bowl as the sink basin, ensuring it’s shallow enough for safe play.
Commercial plastic kitchen sets provide ready made answers with realistic features like turning knobs and opening oven doors. These appliances encourage fine motor skill development through interactive elements like pretend washing dishes and stirring imaginary meals.
Add Pretend Food Storage Answers
Storage answers keep play food organized while teaching children valuable organizational skills. We suggest installing small wooden shelves at child height to create accessible pantry storage for pretend groceries and cooking utensils. Mount these shelves securely to the playhouse walls using appropriate outdoor hardware.
Baskets and small boxes work perfectly for storing play food items like plastic fruits, vegetables, and packaged goods. Label each container with pictures or words to help young children identify where items belong. This system mimics real kitchen organization and promotes independent cleanup habits.
Consider adding a mini refrigerator setup using a painted wooden box with magnetic closures. Stock it with felt food items or wooden play groceries to enhance the realistic cooking experience. Small drawers built into the kitchen area provide additional storage for utensils, plates, and cups.
Create a Mini Dining Space
A kid sized table with matching chairs completes the kitchen area by providing space for serving and enjoying pretend meals. We recommend choosing furniture proportioned specifically for children’s heights to ensure comfortable seating during extended play sessions. Weather resistant materials like cedar or treated pine work best for outdoor playhouse furniture.
Position the dining set near the kitchen appliances to create a natural flow between cooking and eating areas. This arrangement encourages social play when multiple children use the playhouse together. The table also doubles as a crafting surface for art projects or assignments activities.
Add colorful placemats, plastic dishes, and child safe utensils to enhance the dining experience. Store these items in nearby baskets or shelves for easy access during play. Consider including a small tablecloth or runner that children can easily wash and replace as part of their housekeeping games.
Transform One Corner Into an Art and Craft Station

Creating a dedicated art corner transforms your playhouse into a creative hub where children can express themselves freely. This specialized space encourages artistic exploration while keeping messy materials contained in one organized area.
Mount a Chalkboard or Whiteboard
Installing a chalkboard or whiteboard creates an interactive wall that doubles as educational entertainment and artistic expression. We recommend mounting it at your child’s eye level to ensure comfortable use during extended creative sessions. This reusable canvas provides endless opportunities for drawing, writing, and learning exercises that stimulate imaginative play.
Consider weatherproof options specifically designed for outdoor use to withstand moisture and temperature changes. Magnetic whiteboards offer additional functionality by holding art supplies or displaying finished masterpieces. The installation process is straightforward and transforms any plain wall into an captivating focal point.
Organize Art Supplies in Clear Containers
Clear containers revolutionize create supply organization by making every item visible and accessible to young artists. We suggest using labeled boxes or transparent bins to separate crayons, markers, paper, scissors, and glue into distinct categories. This system teaches children responsibility while maintaining order in their creative space.
Stackable containers maximize storage efficiency in smaller playhouses. Choose containers with secure lids to protect supplies from outdoor elements like dust and moisture. The visual appeal of colorful supplies displayed in organized rows brightens the interior while encouraging independent cleanup habits.
Provide Child-Height Work Surface
A properly sized table serves as the foundation for comfortable crafting sessions and social interactions. We recommend selecting furniture scaled to your child’s height to prevent discomfort during extended creative activities. This child-friendly workspace accommodates various projects from painting masterpieces to building with create materials.
Small kids’ tables with matching chairs create an inviting atmosphere that encourages friends to join creative adventures. Weather-resistant materials ensure durability in outdoor conditions while maintaining functionality throughout seasons. The right work surface transforms simple create activities into memorable experiences that foster creativity and friendship.
Build in Storage Solutions to Keep Things Organized

Smart storage transforms your outdoor playhouse from cluttered chaos into an organized adventure zone. We’ll show you how built-in answers maximize every square inch while teaching kids valuable organizational skills.
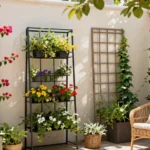
Install Built-In Cubbies and Shelves
Built-in cubbies create designated spots for toys, books, and create supplies that encourage independent cleanup. Position these storage answers under windows to create an attractive mini showcase area where children can display their favorite treasures like seashells, action figures, or art projects. Open cubbies work best since they allow easy access for little hands to grab and store items without struggling with doors or lids.
Wall-mounted shelves at child height ensure everything stays within reach while freeing up valuable floor space for active play. We recommend installing shelves in corners or along walls that don’t interfere with doorways or windows. These built-in features become permanent fixtures that grow with your child’s changing interests and storage needs.
Use Multi-Purpose Furniture
Kid-sized tables with built-in storage compartments serve double duty as both play surfaces and organization centers. Choose weather-resistant options that can handle outdoor conditions while providing practical crafting or game areas for multiple children. Storage benches offer comfortable seating during quiet activities while hiding toys, books, or dress-up accessories inside their compartments.
Multi-functional pieces help contain clutter while maximizing the playhouse’s limited square footage. Tables with drawers or shelves underneath keep art supplies organized and easily accessible during creative sessions. Benches that double as toy chests encourage kids to sit and play while teaching them to put away items when finished.
Add Hooks for Dress-Up Clothes
Wall-mounted hooks provide instant vertical storage for costumes, hats, bags, and other role-play accessories. Install pegs at various heights to accommodate different types of clothing and make everything visible at a peek. This setup keeps dress-up items off the floor while encouraging imaginative play and making costume changes quick and easy.
Strategic hook placement along interior walls maximizes storage without crowding the play space. We suggest installing hooks near the entrance so kids can easily grab costumes as they enter their make-believe industry. Multiple hooks allow several children to store their chosen outfits while maintaining an organized appearance that parents will appreciate.
Add Fun Lighting Options for Extended Play Time

We can transform our playhouse into a magical space that extends well beyond daylight hours with creative lighting answers.
Hang Battery-Powered String Lights
Battery-powered string lights offer the perfect solution for creating a warm, cozy glow without the need for complex wiring. We can easily hang these lights along the walls, around windows, or across the ceiling to instantly transform the playhouse atmosphere. Their portability makes them incredibly convenient since we can move them around as needed or remove them during harsh weather. Safety becomes a top priority with battery-powered options since there are no electrical cords for children to trip over or accidentally damage. The warm illumination creates an enchanting environment that encourages evening storytelling sessions and quiet play time.
Install Solar-Powered Lanterns
Solar-powered lanterns provide an eco-friendly lighting option that charges naturally during the day and illuminates the playhouse at night. We can position these lanterns on shelves, hang them from hooks, or place them on the floor to create soft, ambient lighting throughout the space. Their energy-efficient design means we don’t need to worry about battery replacements or electrical connections. The gentle glow from solar lanterns enhances the magical atmosphere while teaching children about renewable energy sources. These lanterns work particularly well for creating a cozy reading corner or adding subtle lighting to different activity zones within the playhouse.
Use LED Strip Lights Under Shelves
LED strip lights installed under shelves create a modern, sophisticated lighting solution that highlights the playhouse’s architectural features. We can attach these strips along shelf edges, under built-in benches, or around doorways to provide focused illumination for exact activities. The bright, even light distribution makes them perfect for reading areas, create stations, or anywhere detailed work takes place. Their slim profile means they won’t interfere with storage or play activities. LED strips also consume minimal energy and generate very little heat, making them safe for children’s spaces while providing excellent visibility for evening adventures.
Incorporate Interactive Wall Features

Transform your playhouse walls from simple barriers into captivating play surfaces that spark creativity and learning. Interactive wall features turn every surface into an opportunity for hands-on exploration and development.
Create a Growth Chart Wall
Dedicating one wall as a growth measurement area creates lasting memories while encouraging children to track their progress over time. Paint a large ruler design directly onto the wall using bright, weather-resistant paint that can withstand outdoor conditions. Wall decals offer another excellent option since they’re removable and come in various fun designs that match your playhouse theme.
Position the growth chart at an accessible height where children can easily see their measurements. Kids love watching themselves grow taller, and this simple addition transforms routine height checks into exciting milestone celebrations. Consider adding colorful markers or stickers next to each measurement to commemorate special occasions or achievements.
Add a Magnetic Wall Panel
Installing a magnetic surface creates an interactive learning zone where children can engage with letters, numbers, and shapes. Magnetic paint applied to a designated wall section works well, though magnetic boards or panels provide stronger magnetic attraction for heavier play pieces. These surfaces support early literacy development as kids practice spelling words, solving simple math problems, or creating artistic arrangements.
Choose magnetic accessories that match your child’s age and interests, such as alphabet sets for preschoolers or magnetic building blocks for older children. Storage containers mounted nearby keep magnetic pieces organized and easily accessible during play sessions. This feature encourages independent learning while developing fine motor skills through hands-on manipulation.
Install a Sensory Wall With Different Textures
Creating a textured wall panel engages children’s sense of touch while supporting sensory development and exploration. Attach various materials like fabric swatches, carpet samples, sandpaper, cork boards, and soft brushes to create distinct tactile experiences. Each texture offers different sensory input that helps children process information through touch.
Mount these materials at child height using weather-resistant adhesives or screws to ensure safety and durability. Include both rough and smooth textures alongside soft and firm materials to provide comprehensive sensory experiences. Children with sensory processing needs particularly benefit from these tactile exploration opportunities, though all kids enjoy discovering different textures through play.
Design a Sleeping Area for Overnight Adventures

Transform your playhouse into the ultimate overnight retreat where childhood dreams come alive. Creating a dedicated sleeping space opens up endless possibilities for backyard camping adventures and sleepovers.
Set Up a Small Mattress or Daybed
Installing a small mattress or daybed creates the perfect foundation for comfortable rest inside your playhouse. We recommend choosing soft, kid-friendly mattresses that fit your playhouse dimensions while leaving room for movement. Daybeds serve double duty as comfortable seating during daytime play and cozy sleeping spots when night falls. Consider weather-resistant materials if your playhouse experiences moisture, and opt for mattresses with removable, washable covers for easy maintenance.
Add Cozy Blankets and Sleeping Bags
Layering your sleeping area with cozy blankets and sleeping bags transforms any basic mattress into a snug sanctuary. We suggest selecting colorful, soft blankets that reflect your child’s personality while providing essential warmth for cooler evenings. Sleeping bags designed for children offer both comfort and excitement, making bedtime feel like a real camping adventure. Mix and match different textures and patterns to create visual interest, and consider keeping extra blankets stored in your playhouse for spontaneous sleepovers.
Create Nighttime Ambiance With Soft Lighting
Soft lighting establishes the perfect atmosphere for bedtime stories and peaceful rest in your outdoor playhouse. We recommend installing small string lights or fairy lights around the sleeping area to create a magical, starlike effect overhead. Battery-operated lanterns provide safe, portable lighting that children can easily control during their overnight adventures. These lighting options eliminate safety concerns while fostering a warm, inviting environment that makes bedtime something to look forward to rather than resist.
Choose Weather-Resistant Materials and Finishes

Building a lasting outdoor playhouse interior requires careful material selection that withstands changing weather conditions while maintaining safety standards. We’ll explore the essential elements that create a durable foundation for your child’s outdoor retreat.
Select Outdoor-Safe Fabrics and Textiles
Outdoor fabrics transform a basic playhouse into a comfortable living space that resists weather damage. We recommend choosing curtains and cushions made from solution-dyed acrylic or polyester blends that won’t fade under UV exposure. Marine-grade vinyl provides excellent water resistance for seat covers and play mats.
Curtains on windows create privacy while adding personality to the space through colorful patterns or themed designs. Quick-drying textiles like mesh or synthetic blends ensure soft furnishings stay fresh after rain exposure. Mildew-resistant treatments on fabrics prevent moisture buildup that could create unhealthy conditions.
Cushions and pillows should feature removable, washable covers for easy maintenance throughout the seasons. Waterproof backing on fabric items protects the filling from moisture penetration. Sunbrella and similar outdoor fabric brands offer vibrant colors that maintain their appearance for years.
Use Waterproof Storage Containers
Storage answers keep toys organized while protecting them from rain and humidity damage. Waterproof bins with tight-fitting lids create designated spaces for different types of play items. Marine-grade plastic containers resist cracking in temperature extremes and UV degradation.
Built-in storage benches serve dual purposes by providing seating and concealed organization space. Clear containers allow children to identify contents quickly while maintaining weather protection. Elevated storage keeps items off potentially damp floors during heavy rain periods.
Create supplies require special consideration with compartmentalized waterproof organizers that prevent materials from mixing. Books benefit from sealed containers with desiccant packets to control moisture levels. Stackable options maximize vertical space while maintaining easy access for independent cleanup.
Apply Child-Safe, Weather-Resistant Paints
Paint selection impacts both safety and longevity in outdoor playhouse environments. Non-toxic, zero-VOC formulations protect children’s health while providing vibrant color options. Weather-resistant acrylic paints create durable surfaces that withstand temperature fluctuations and moisture exposure.
Bright colors like sunshine yellow and mint green create cheerful atmospheres that stimulate imagination and play. White trim provides contrast while reflecting heat to keep interior temperatures comfortable. Primer application ensures proper paint adhesion and extends the finish lifespan.
Multiple thin coats perform better than single thick applications in outdoor conditions. Specialty wood stains offer natural appearance while providing moisture protection for structural elements. Regular touch-ups maintain the fresh appearance and protective barrier against weather damage.
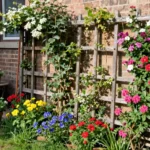
Create Themed Decor to Spark Imagination

Transforming your outdoor playhouse with themed decor customized to your children’s interests encourages imaginative play and creates a magical retreat. Personalized touches like name signs, mailboxes, and flower boxes enhance the charm and make the space feel like a true “home sweet home.”
Design a Fairy Tale Castle Theme
Paint the walls with soft pastel or royal colors like pinks, purples, or blues to establish an enchanting royal atmosphere. We recommend starting with a light base coat and adding deeper accent colors around windows and doorways.
Add castle elements such as turrets, banners, and flags to transform the ordinary playhouse into a medieval fortress. DIY cardboard turrets attached to corners create impressive architectural details without permanent modifications.
Include princess or knight themed furniture and accessories to complete the royal setting. Child sized thrones made from painted wooden chairs and decorative shields mounted on walls enhance the authentic castle experience.
Decorate with fairy lights or string lights for a magical sparkle effect that captivates children during evening play sessions. Battery powered options provide safety while creating an enchanting glow throughout the space.
Use cozy seating with cushions in thematic prints for comfortable reading or resting areas. Royal purple velvet or princess themed fabrics create inviting spots where children can relax between adventures.
Set Up a Space Explorer Adventure
Paint the interior dark blue or black and apply star and planet decals or glow in the dark stickers to simulate outer space. We suggest using chalkboard paint on one wall so children can draw their own constellations.
Add cushions shaped like moons or planets along with space themed rugs to create comfortable seating areas. Silver and metallic accents throughout the space enhance the futuristic space station atmosphere.
Equip the area with kid sized control panels or DIY rocket ship controls made from cardboard and painted silver. Interactive buttons, switches, and LED lights make the control station feel authentic and captivating.
Use shelves to store space books, astronaut costumes, and space toys while keeping everything organized and accessible. Clear storage containers labeled with space themed stickers help children maintain the organized mission control environment.
Add a small telescope or space gadgets to enhance the adventure feel and encourage scientific exploration. Real or toy instruments spark curiosity about astronomy and space exploration.
Create a Pirate Ship Hideaway
Use wood colored paint or textures to mimic a ship’s hull inside the playhouse walls. We recommend applying a weathered wood stain technique to create an authentic seafaring vessel appearance.
Add a ship’s wheel, pirate flags, and treasure chest storage boxes to establish the maritime theme throughout the space. A mounted ship’s wheel on the main wall serves as both decoration and interactive play element.
Use dark, rich colors like browns, reds, and blacks to create the authentic pirate ship atmosphere. Rope accents and nautical hardware complete the seafaring transformation.
Incorporate a lookout window or portholes with curtains to simulate a real ship’s design. Round windows with brass colored frames and navy curtains enhance the maritime authenticity.
Include pirate hats, swords, and maps as props to enhance play scenarios and storytelling adventures. A dedicated costume storage area keeps pirate gear organized and easily accessible for imaginative play sessions.
Add Personal Touches That Reflect Your Child’s Interests

Making your playhouse uniquely theirs creates an emotional connection that transforms it from a simple structure into their personal sanctuary. We’ll show you how to infuse their personality into every corner of the space.
Display Their Artwork and Crafts
Creating a dedicated art display transforms your child’s masterpieces into a rotating gallery that celebrates their creativity. Installing a washing line with clothespins across one wall provides the perfect solution for easy artwork rotation, allowing you to showcase their latest drawings and paintings without permanent mounting damage.
Wall space becomes valuable real estate when you designate exact areas for displaying crafts and school projects. We recommend positioning displays at your child’s eye level so they can proudly show off their work to friends and feel ownership over their creative space.
Storage integration works wonderfully when you provide a create table or supplies station right inside the playhouse. This dual purpose approach means the space doubles as an art studio where inspiration can strike during playtime, keeping creative materials organized and accessible.
Include Their Favorite Toys and Games
Organizing favorite toys requires thoughtful storage answers that keep the playhouse functional while maintaining easy access to beloved items. Installing cubbies or toy boxes provides designated homes for board games, action figures, and building blocks that prevent clutter from overwhelming the small space.
Floor seating options like plush rugs, cushions, or bean bags create comfortable play environments where children can enjoy their toys for extended periods. These soft furnishings also define play zones within the playhouse, making it feel more like a real room than an empty shell.
Themed decorations inspired by your child’s preferred toys or favorite stories stimulate imaginative play scenarios. We’ve seen playhouses transformed with superhero themes, princess castle elements, or dinosaur adventures that directly reflect the child’s current interests and favorite playthings.
Create a Photo Gallery Wall
Dedicating wall space to family photos makes the playhouse feel more personal and comforting for your child. Using lightweight frames, clipboards, or string with clips allows for easy photo updates as your child grows and creates new memories with friends.
Photo integration alongside artwork creates a comprehensive display that celebrates both your child’s creativity and important relationships. This combination approach tells the story of their life while making the space feel truly customized to their industry.
Family pictures positioned at child height ensure they can easily view and share these special moments with playmates. We recommend including photos of extended family, pets, and special occasions that hold meaning for your child, creating conversation starters during social play.
Conclusion
Your child’s outdoor playhouse has unlimited potential to become their favorite retreat with the right interior touches. We’ve shown you how simple additions like cozy reading nooks weatherproof storage and creative lighting can transform any space into a magical wonderland.
The key is choosing durable materials that withstand outdoor conditions while prioritizing your child’s safety and interests. Whether you’re creating themed adventures or personal galleries these budget-friendly ideas ensure your playhouse remains functional and inspiring year-round.
Remember that the best playhouse interiors grow with your child’s imagination. Start with basic elements and add features over time as their interests develop. Your investment in their creative space will provide countless hours of joy and learning adventures.
Frequently Asked Questions
What are some budget-friendly ways to transform a child’s playhouse?
You can create an enchanting playhouse without breaking the bank by using weather-resistant cushions for seating, installing child-sized bookshelves, creating a DIY miniature kitchen with simple materials, and adding battery-powered string lights. Focus on multi-purpose furniture and repurpose household items to maximize functionality while keeping costs low.
How can I create a cozy reading nook in the playhouse?
Arrange durable floor cushions in a semicircle for comfortable seating, install child-height bookshelves for easy access, and organize books by category or color for visual appeal. Add a waterproof storage ottoman that serves as both seating and storage for reading accessories to maintain a tidy atmosphere.
What should I include in a miniature kitchen area?
Install a play sink and stove from weather-resistant materials, add child-height shelves with labeled containers for play food organization, and include a kid-sized dining table with weather-resistant furniture. This setup encourages imaginative play, develops fine motor skills, and provides space for social interactions.
How do I set up an art and craft station in the playhouse?
Mount a chalkboard or whiteboard at your child’s eye level for interactive use, organize art supplies in clear labeled containers, and provide a child-height work surface for comfortable crafting. This dedicated creative space promotes responsibility and encourages artistic exploration with friends.
What are the best storage solutions for keeping the playhouse organized?
Install built-in cubbies and wall-mounted shelves at child height to create designated spots for toys and supplies. Use multi-purpose furniture like tables with built-in storage and storage benches. Add wall-mounted hooks for dress-up clothes to maximize vertical storage and encourage independent cleanup.
How can I add lighting to extend playtime into the evening?
Hang battery-powered string lights for warm ambiance without complex wiring, use solar-powered lanterns for eco-friendly lighting, and install LED strip lights under shelves for focused illumination. These safe, energy-efficient options create a magical atmosphere while teaching children about renewable energy.
What interactive wall features should I consider adding?
Create a growth chart wall with colorful markers for tracking height, install a magnetic wall panel for engaging with letters and numbers to support early literacy, and add a sensory wall with various textures to promote tactile exploration and sensory development.
How do I create a sleeping area for overnight adventures?
Install a small mattress or daybed with soft, kid-friendly materials and layer with colorful blankets and sleeping bags. Use soft lighting like string lights and battery-operated lanterns to create a magical nighttime ambiance that makes bedtime enjoyable during sleepovers.
What materials should I choose for durability and weather resistance?
Select solution-dyed acrylic or marine-grade vinyl for cushions and curtains, use waterproof storage containers to protect toys from moisture, and choose child-safe, weather-resistant paints for vibrant colors. These materials ensure the playhouse withstands various weather conditions while maintaining safety.
How can I personalize the playhouse to reflect my child’s interests?
Display your child’s artwork using a washing line for easy rotation, create a photo gallery wall at child height, and incorporate their favorite toys and themed decorations. Choose decor themes like fairy tale castles, space adventures, or pirate ships based on their preferences to enhance imaginative play.