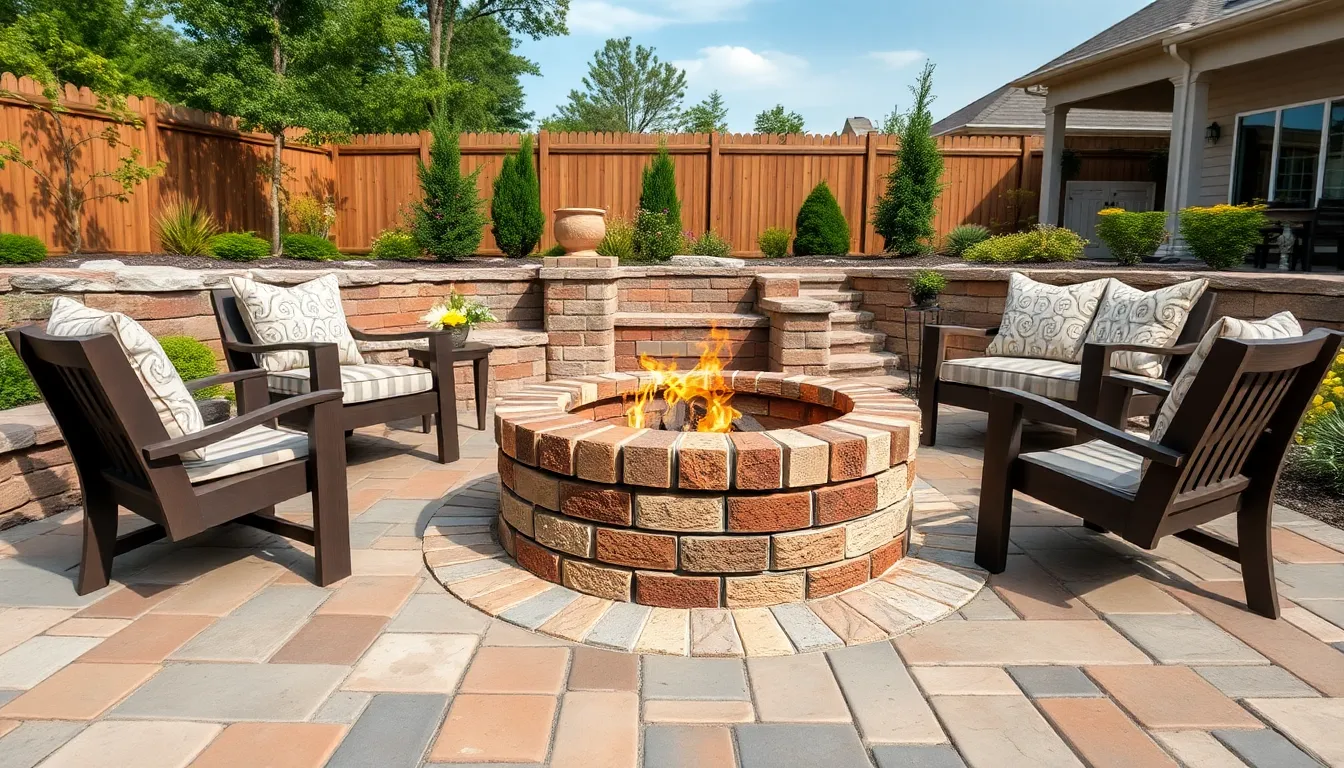
Transform your backyard into the ultimate gathering spot with a stunning brick fire pit that’ll become the heart of countless memorable evenings. We’ve all dreamed of having that perfect outdoor sanctuary where friends and family naturally gravitate – and a well-designed brick fire pit delivers exactly that magic.
Brick fire pits offer unmatched durability and timeless appeal that complements virtually any industry design. Whether you’re envisioning a rustic circular pit surrounded by natural stone or a sleek rectangular design with built-in seating, brick provides the versatility to bring your vision to life. The best part? You don’t need to be a master mason to create something spectacular.
We’ll walk you through creative brick fire pit ideas that range from weekend DIY projects to more elaborate installations. From choosing the right materials to understanding local regulations, you’ll discover everything needed to create your own backyard oasis that’ll keep you cozy year-round.
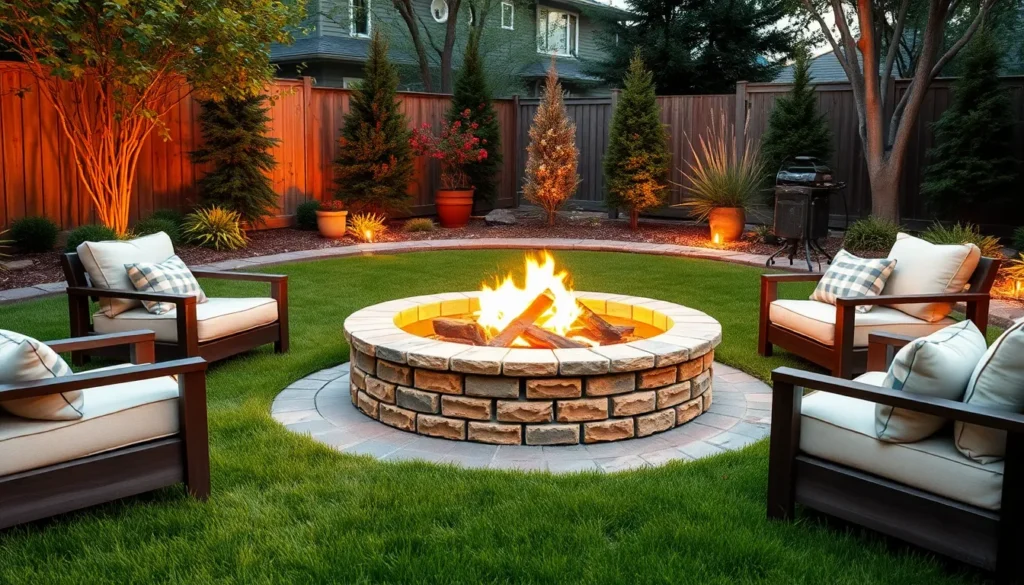
Classic Round Brick Fire Pit Design
Round brick fire pits remain the most popular choice among homeowners who want a traditional backyard focal point. We’ll explore the foundational elements that make these designs both timeless and functional for your outdoor space.
Traditional Circular Layout with Standard Bricks
Standard clay bricks form the perfect foundation for creating a classic circular fire pit that never goes out of style. We recommend using a diameter between 36 to 48 inches for optimal heat distribution and comfortable seating arrangements around the perimeter.
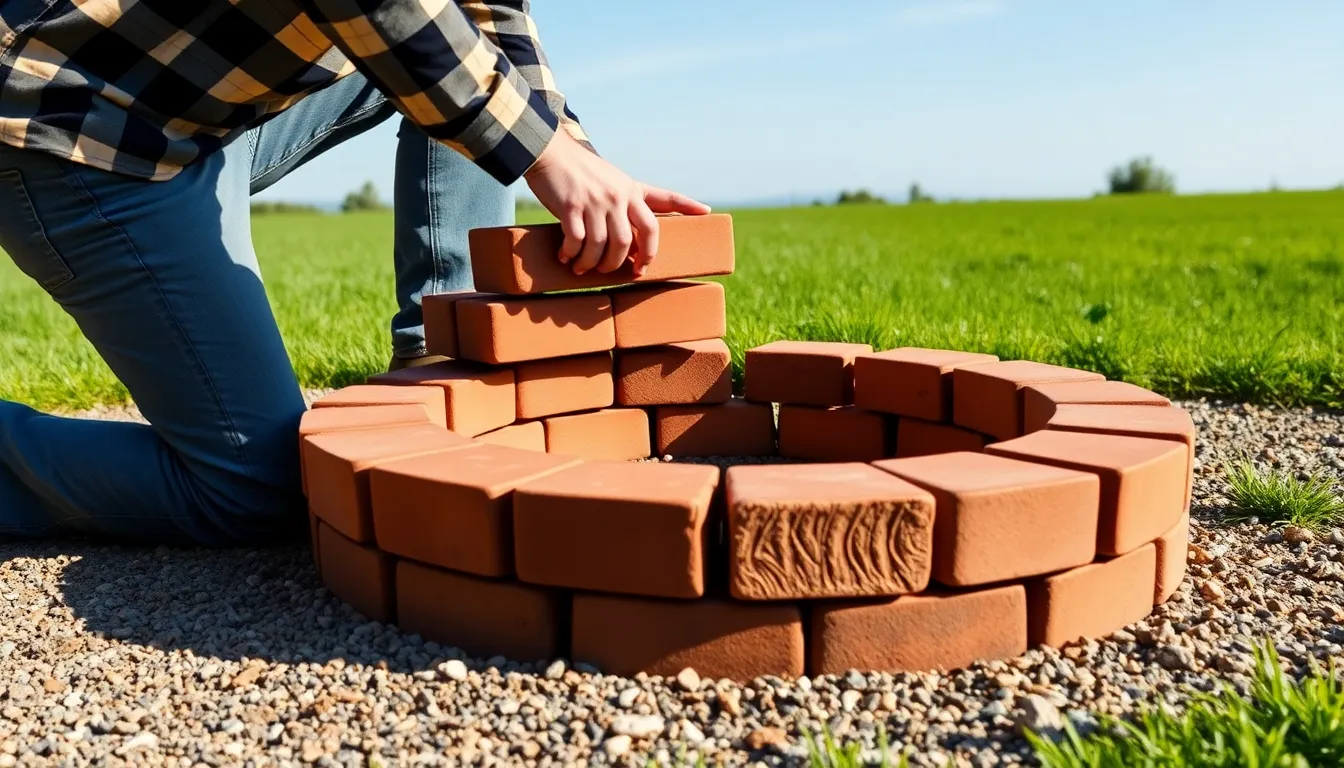
Building your circular layout starts with marking a perfect circle using a stake and string method. Position the stake at your desired center point and tie a string that measures half your intended diameter. Walk around the stake while keeping the string taut to mark your circle with spray paint or flour.
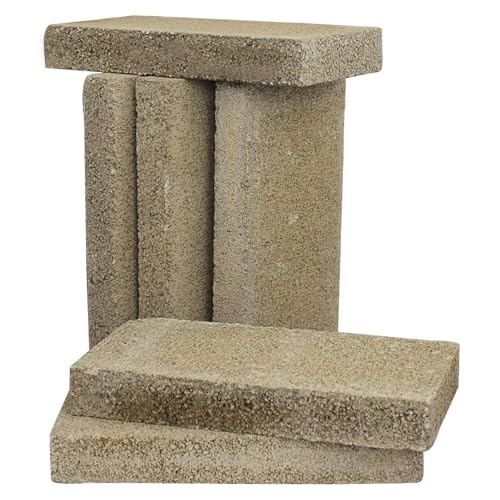
Fire bricks work best for the inner ring where they’ll face direct heat exposure. Standard building bricks handle the outer decorative layers without cracking under temperature changes. We suggest purchasing 10% extra bricks to account for breakage during construction.
Arranging bricks in overlapping patterns creates structural integrity throughout your circular design. Each course should offset the joints from the previous layer by half a brick length. This traditional masonry technique distributes weight evenly and prevents weak points in your fire pit walls.
Mortar vs. Dry Stack Construction Methods
Dry stacking offers beginners an easier approach to building their first brick fire pit without mixing mortar. This method allows you to place bricks directly on top of each other using gravity and careful fitting to hold everything in place.
Mortar construction provides superior durability and weather resistance for fire pits that need to withstand harsh seasonal conditions. High temperature refractory mortar bonds bricks permanently and fills gaps that could allow water infiltration during freeze thaw cycles.
| Construction Method | Difficulty Level | Cost Range | Durability | Rebuild Capability |
|---|---|---|---|---|
| Dry Stack | Beginner | $200-400 | 5-7 years | Easy |
| Mortared | Intermediate | $300-600 | 15-20 years | Difficult |
Dry stack fire pits allow easy disassembly if you need to relocate or modify your design later. Simply remove the upper courses of bricks and rebuild in your new configuration without breaking apart permanent mortar joints.
Mortared installations require proper curing time before your first fire to prevent cracking from rapid temperature changes. We recommend waiting 48 hours after completing your mortar work before lighting any fires in your new brick fire pit.
Square Brick Fire Pit Configuration
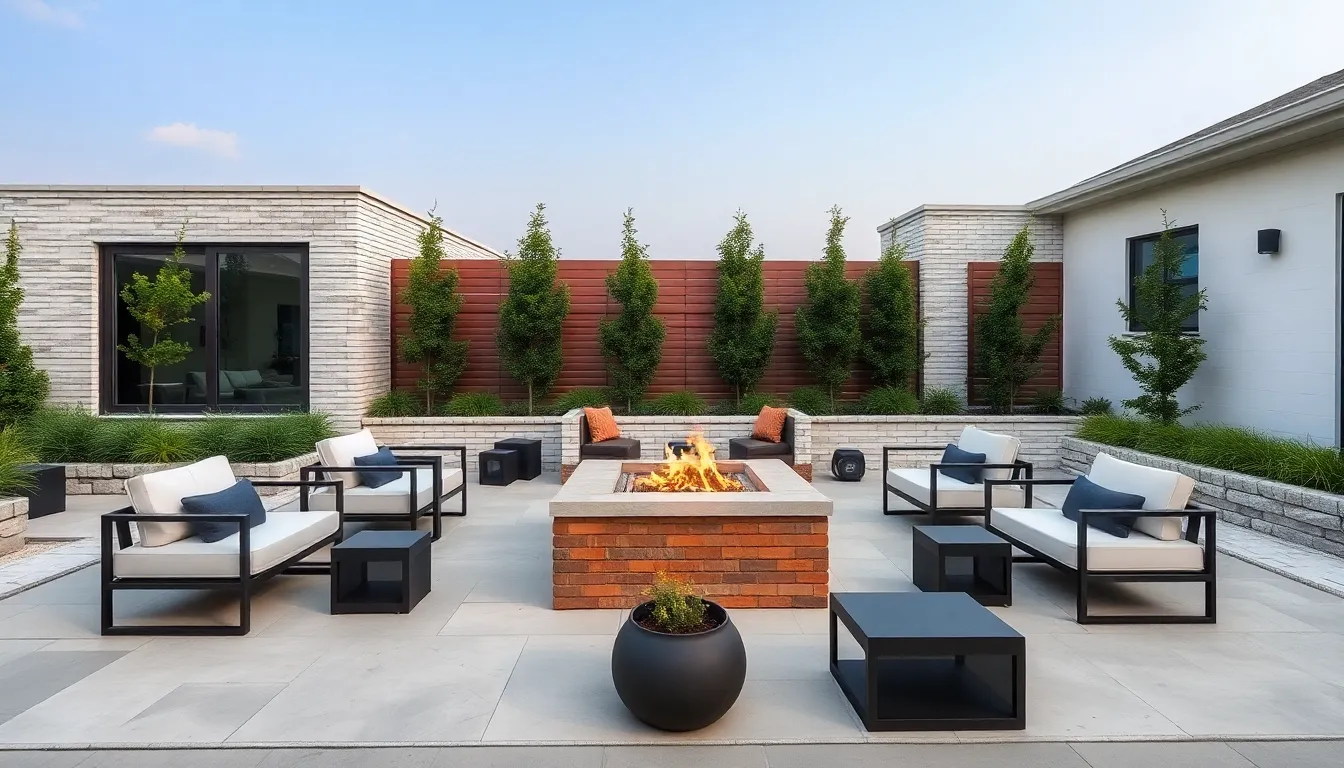
Square brick fire pits bring structured elegance to outdoor spaces, offering clean lines that complement contemporary industry designs. These geometric configurations create distinct focal points while maximizing seating efficiency around the perimeter.
Geometric Appeal for Modern Backyards
Modern backyards benefit from the crisp, angular form of square fire pit designs that establish visual harmony with contemporary architecture. We recommend pairing square brick configurations with matching geometric furniture arrangements to create cohesive outdoor living spaces.
Clean lines achieved through square designs work exceptionally well with L-shaped or straight seating arrangements, maximizing the social aspect of outdoor gatherings. White-painted or whitewashed brick options deliver a sleek modern farmhouse aesthetic when combined with white wicker furniture or upholstered outdoor seating.
Stacked pavers in muted tones create modern rustic appeal by balancing sharp geometric edges with natural brick textures. These configurations suit both ground-level installations and elevated platforms, depending on your backyard’s existing industry features.
Color customization options include rustic red bricks, whitewashed finishes, or paver-style materials that align with exact design themes. Square configurations also accommodate both above-ground installations on gravel or cement bases and inset designs that integrate seamlessly with ground-level landscaping.
Corner Detail and Edge Finishing Techniques
Corner detailing transforms basic square fire pits into sophisticated architectural features through precise construction techniques. We emphasize creating sharp, clean corners using carefully stacked bricks with consistent mortar joints for professional-looking results.
Edge finishing options include rounded or beveled brick edges that soften the geometric appearance while maintaining the square structure’s integrity. Metal caps or stone coping along the top edges provide both weather protection and refined visual appeal.
Weatherproofing treatments applied to finished edges enhance durability while preserving the fire pit’s appearance through seasonal weather changes. These protective measures prevent moisture damage and extend the structure’s lifespan significantly.
Safety considerations include smoothing any sharp edges and ensuring proper corner alignment to prevent structural weakness. Built-in seating integration becomes more straightforward with square configurations, as the straight edges align naturally with bench-style seating arrangements.
Raised Brick Fire Pit with Seating Wall
Raising your brick fire pit above ground level creates a commanding focal point that transforms your backyard into an elegant gathering space. This elevated design enhances accessibility while establishing a defined perimeter that naturally encourages social interaction around the flames.
Built-in Bench Integration Around Perimeter
Creating a permanent seating arrangement around your raised fire pit eliminates the need for separate outdoor furniture while delivering a cohesive, harmonious look. Built-in brick or stone benches can be designed to match your fire pit’s brickwork perfectly, establishing visual continuity throughout your outdoor space.
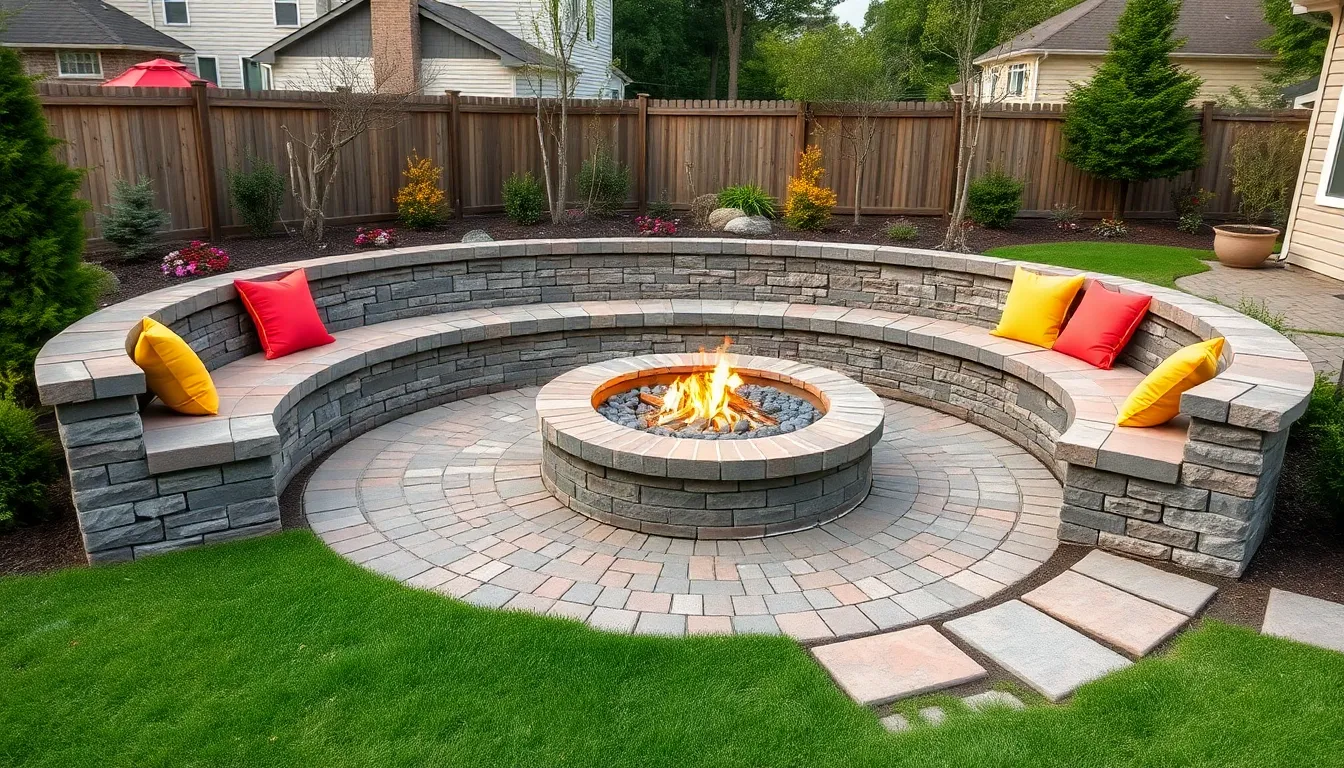
Designing seating walls that serve dual purposes as both comfort zones and safety barriers helps define your fire pit area effectively. These multifunctional walls can curve gracefully around round fire pits or extend in straight lines for rectangular and square layouts, accommodating more guests comfortably.
Customizing your built-in benches with wooden seat tops or outdoor cushions dramatically improves comfort while adding personal style. This approach allows you to incorporate seasonal colors or weather-resistant fabrics that complement your backyard’s overall aesthetic theme.
Planning your seating wall configuration based on your fire pit’s shape maximizes both functionality and visual appeal. Round fire pits pair beautifully with curved benches that follow the perimeter naturally, while angular designs benefit from straight seating walls that emphasize clean geometric lines.
Height Considerations for Comfort and Safety
Building your raised fire pit between 18 to 24 inches above ground provides optimal fire containment while maintaining convenient access for roasting and warming. This height range ensures safe operation while keeping the flames at an ideal level for social interaction and cooking activities.
Constructing seating walls at approximately 18 inches tall creates comfortable sitting positions while maintaining appropriate distance from the fire’s heat. This standardized height works well for most adults and provides a natural barrier that enhances safety around the fire pit area.
Maintaining proper spacing between your fire pit edge and seating areas prevents accidents and ensures guest comfort during gatherings. We recommend keeping at least 18 to 24 inches between the fire’s edge and your seating wall to avoid excessive heat exposure while allowing easy movement around the space.
Selecting heat-resistant and durable materials for both your fire pit and seating walls ensures long-term safety and performance. Fire bricks for the inner ring and standard masonry bricks for outer walls and benches provide the thermal resistance needed to withstand high temperatures and outdoor weather conditions safely.
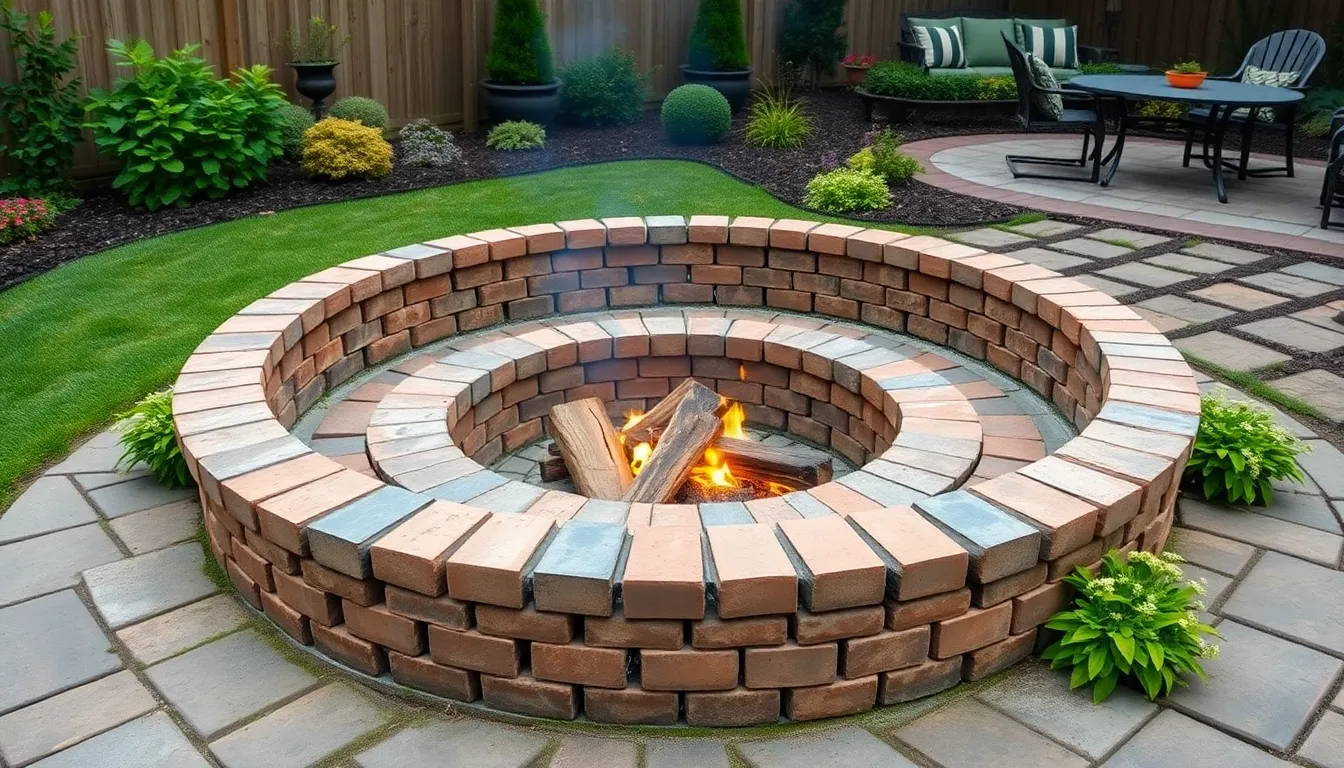
Sunken Brick Fire Pit Installation
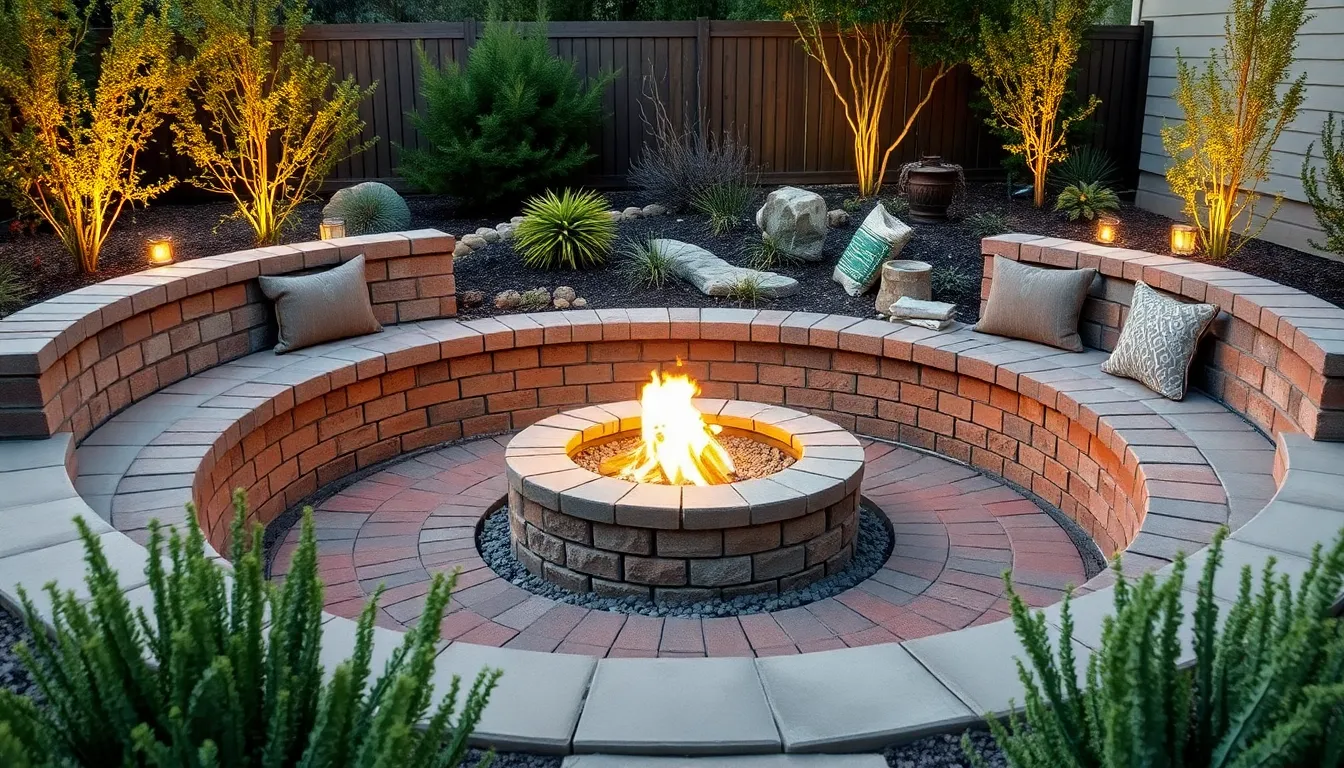
Creating a sunken brick fire pit transforms your backyard into an intimate gathering space that feels naturally integrated with your industry. This below-ground design offers a cozy, enclosed atmosphere that draws people together while maintaining the timeless appeal of brick construction.
Excavation Requirements and Drainage Answers
Planning the excavation requires careful consideration of depth and dimensions to create the perfect sunken fire pit foundation. We recommend digging approximately 18 inches deep to establish an optimal depth that provides the intimate feel of a sunken design while maintaining safety standards. Excavation should extend beyond the fire pit dimensions to accommodate seating areas and proper drainage systems.
Soil conditions often present challenges during the digging process, particularly when encountering wet ground or clay-heavy earth. Machinery becomes essential for larger excavations, though we can manage smaller projects with hand tools and proper planning. Wet conditions require additional time and patience, but proper preparation ensures a solid foundation for your sunken fire pit.
Drainage answers prevent water accumulation that could damage your fire pit structure over time. We start by placing a non-woven geotextile membrane inside the excavated area to provide soil stability and effective water management. This foundation layer creates a barrier that prevents soil mixing while allowing proper water flow.
Recommended Drainage System:
| Layer | Depth | Material | Purpose |
|---|---|---|---|
| Base Layer | 200-300mm | Clean soakaway gravel (30-80mm) | Free-draining foundation |
| Perimeter Cavity | Up to 150mm below ground | Same gravel size | Water diversion |
| Protection Layer | Surface | Geotextile membrane | Soil separation |
Compacting the gravel base ensures stability and prevents settling that could compromise your fire pit structure. We level this base carefully to create an even foundation for the brick installation that follows.
Ground-Level Integration with Surrounding Industry
Seamless integration with your existing industry creates a natural transition from your yard to the sunken fire pit area. We design the surrounding space to complement your backyard’s style while improving the functionality of your new gathering spot.
Built-in seating walls constructed from matching bricks create a cohesive design that eliminates the need for separate outdoor furniture. These seating areas typically extend around the perimeter of the sunken space, providing comfortable spots for guests while maintaining the enclosed feeling that makes sunken fire pits so appealing. Stone or paver caps on these walls add comfort and visual interest while protecting the brick structure beneath.
Finishing touches around the fire pit area complete the integration process and tie the design together. We fill remaining gaps around the drainage system with topsoil, decorative bark, or ornamental stones that match your industry style. These materials create clean transitions between the fire pit area and your existing yard features.
Step-down access enhances both safety and aesthetics by providing clear entry points into the sunken area. We typically incorporate 2-3 steps depending on the excavation depth, using matching brick or stone materials to maintain design consistency. These steps can include integrated lighting fixtures that illuminate the path during evening gatherings.
Lighting integration extends the usability of your sunken fire pit into the evening hours while creating beautiful ambiance. We install fixtures within the seating walls or along the step edges to provide functional illumination without overwhelming the intimate atmosphere. Low-voltage LED options offer energy efficiency and long-lasting performance that complements the permanent nature of brick construction.
Perimeter landscaping softens the edges where your sunken fire pit meets the surrounding yard. We often recommend drought-resistant plants or decorative grasses that can handle the heat generated by the fire pit while adding natural beauty to the space. These plantings should be positioned far enough from the fire area to ensure safety while close enough to create visual continuity with your backyard design.
Multi-Level Brick Fire Pit Design
Multi-level designs transform simple fire pits into architectural masterpieces that command attention while maximizing functionality.
Tiered Construction for Added Visual Interest
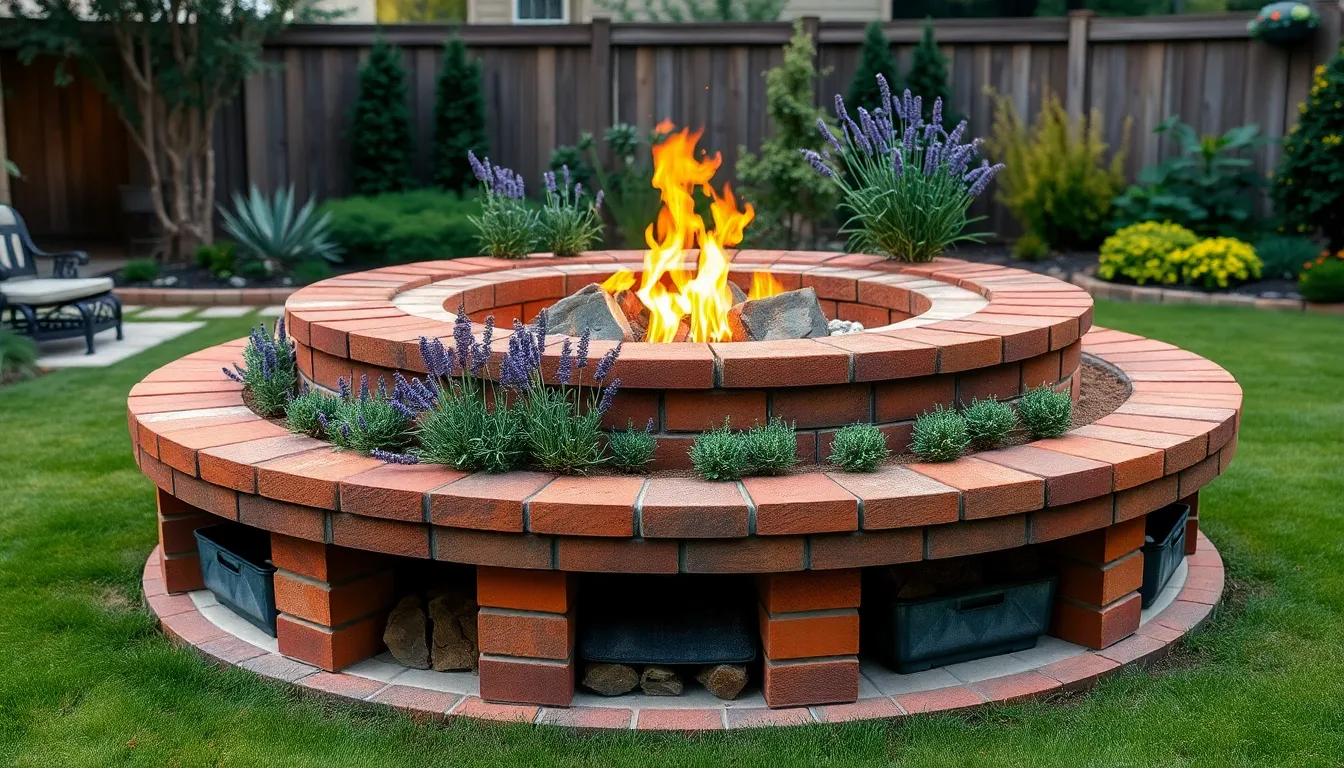
Tiered construction creates stunning visual depth by building your fire pit in distinct layers of varying heights. We recommend using smaller face bricks laid in precise courses with mortar to achieve clean lines and exact height variations. This layered approach allows you to create functional zones within your fire pit structure.
Lower tier serves as the primary fire bowl where flames dance and warmth radiates outward. Upper tiers provide elevated seating ledges or decorative platforms that frame the fire beautifully. Middle sections can incorporate tool storage or display areas for outdoor accessories.
Curved tiers work exceptionally well for organic garden settings, while angular layers complement modern architectural styles. Each level should rise 6 to 8 inches above the previous one to create optimal visual separation. Fire bricks form the interior surfaces for heat resistance, while standard face bricks create the attractive outer tiers that guests admire.
Incorporating Planters and Storage Compartments
Planters integrated into upper tiers soften the hardscape and create a garden oasis around your fire pit. We suggest dedicating the highest tier to planting beds filled with heat tolerant plants like lavender, rosemary, or ornamental grasses. These green elements provide refreshing contrast to warm brick tones while releasing pleasant aromas when heated.
Built-in flower boxes can span entire sections of your upper tiers, creating living walls that change with seasons. Corner planters work well in square tiered designs, adding organic curves to geometric structures.
Storage compartments hidden within lower tiers keep your fire pit area organized and functional. We design hollow spaces or built-in niches that accommodate firewood, kindling, fire tools, and outdoor cushions. Side compartments provide easy access during gatherings, while rear storage areas keep supplies hidden from view.
Access doors made from matching bricks maintain the design aesthetic while protecting stored items from weather. Ventilation gaps prevent moisture buildup in storage areas, extending the life of your stored materials. Divided compartments allow you to separate different types of supplies for easy organization.
This multi-functional approach transforms your fire pit from a simple heating element into a complete outdoor living system that serves your entertainment needs year round.
Brick Fire Pit with Cooking Features
Transform your brick fire pit into a complete outdoor cooking station by adding specialized features that elevate both functionality and entertainment value. These cooking enhancements turn your gathering space into a versatile culinary hub perfect for year-round outdoor dining.
Pizza Oven Attachment Options
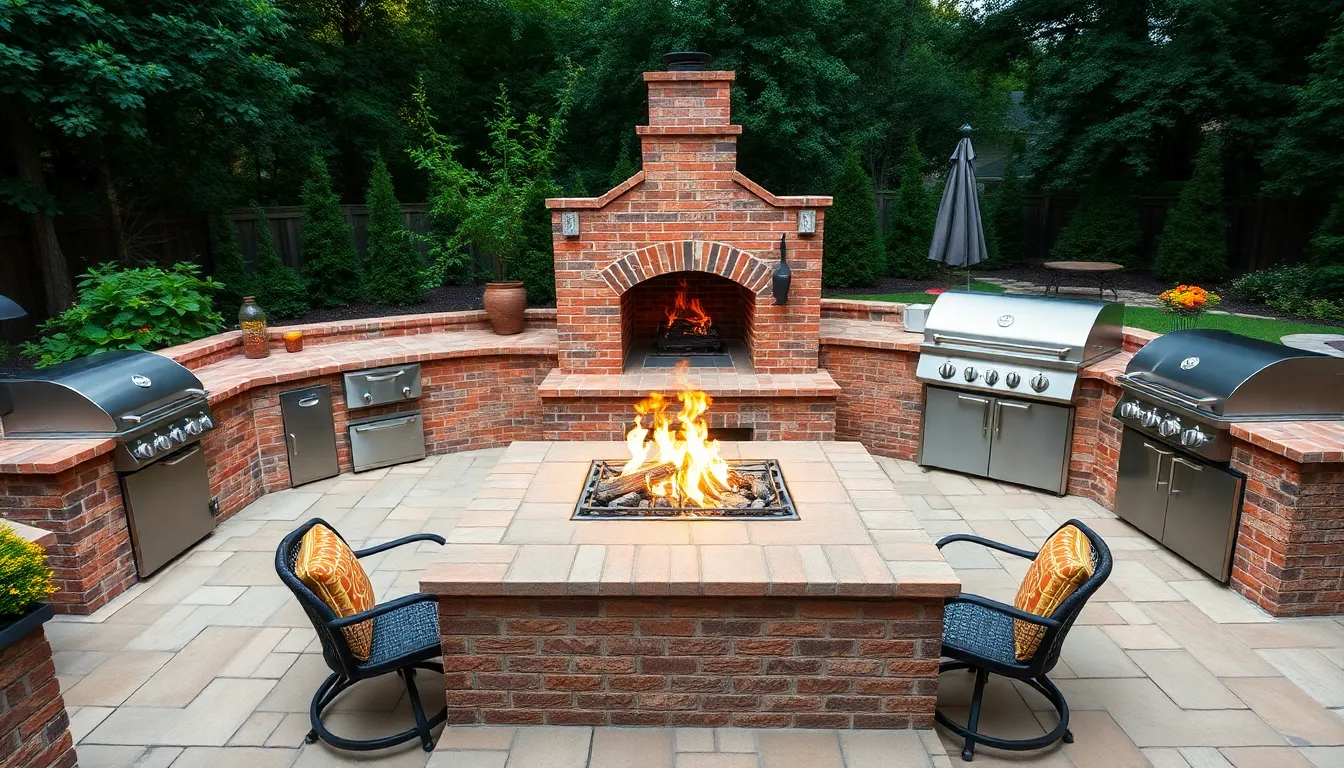
Wood-fired pizza ovens represent the most popular cooking attachment for brick fire pits, creating an authentic outdoor kitchen experience. We recommend integrating these ovens as dome-shaped chambers that connect directly to your existing fire pit structure, allowing you to share the same heat source for maximum efficiency.
Dome attachments feature insulated chambers with wide openings that distribute heat evenly for perfect pizza cooking results. The design typically includes a separate firing chamber that maintains consistent temperatures between 700-900°F, ideal for creating restaurant-quality pizzas in your backyard.
Modular pizza oven kits offer a simpler installation option that sits atop or beside your brick fire pit. These compact units provide excellent baking capabilities while requiring minimal structural modifications to your existing fire pit design.
Adjacent structure designs create separate but connected cooking zones, giving you the flexibility to operate the pizza oven independently from the main fire pit. This configuration works particularly well for larger entertaining spaces where multiple cooking activities happen simultaneously.
Grilling Surface and Food Preparation Areas
Built-in grilling grates positioned above the fire chamber provide direct cooking surfaces that use the natural heat from your fire pit. We suggest installing adjustable grate systems that allow you to control cooking temperatures by raising or lowering the cooking surface relative to the flames.
Surrounding brick countertops create dedicated food preparation areas that integrate seamlessly with your fire pit design. These heat-resistant surfaces withstand high temperatures while providing ample workspace for meal prep, serving, and dining activities.
Storage niches built beneath the countertops offer convenient spaces for cooking utensils, seasonings, and grilling supplies. The brick construction keeps these storage areas cool and dry while maintaining easy access during cooking sessions.
Side tables constructed from matching bricks extend your workspace and create serving stations that complement the overall design aesthetic. These additions prove especially valuable during large gatherings when multiple dishes require preparation and presentation space.
Heat-resistant brick materials ensure all cooking surfaces and prep areas maintain structural integrity under extreme temperatures. Fire bricks rated for high-heat applications provide the durability needed for regular cooking use while maintaining the attractive appearance of your outdoor kitchen setup.
Decorative Brick Pattern Fire Pits
Transform your brick fire pit from functional to fabulous with decorative patterns that add visual depth and artistic flair to your backyard centerpiece.
Herringbone and Basket Weave Designs
Herringbone patterns create ever-changing visual interest through their distinctive zigzag arrangement that catches the eye from every angle. This intricate design works exceptionally well on fire pit walls where the alternating brick placement forms a sophisticated texture that elevates the entire structure. We recommend implementing herringbone patterns on surrounding patio areas to extend the decorative theme beyond the fire pit itself.
Basket weave designs offer a handcrafted aesthetic that brings warmth and character to your outdoor space through their woven appearance. Pairs of bricks laid horizontally and vertically in alternating squares produce this classic pattern that works beautifully on fire pit bases or seating areas. The technique creates visual squares that mimic traditional basketry while maintaining the durability that brick construction provides.
Both patterns require precise measurement and careful planning during construction to achieve their full decorative impact. We suggest practicing these layouts on a flat surface before beginning actual installation to ensure consistent spacing and alignment throughout your fire pit project.
Color Mixing with Different Brick Types
Strategic color combinations transform ordinary brick fire pits into stunning focal points that complement your backyard’s overall design scheme. Mixing rustic red bricks with whitewashed or painted varieties creates compelling contrast that suits both farmhouse and modern aesthetic preferences. Natural earthy tones provide the dual benefit of heat resistance and appealing rugged texture that enhances the fire pit’s visual appeal.
Contrasting brick colors amplify the decorative effect of intricate patterns like herringbone and basket weave designs. Alternating red and cream bricks within these patterns highlights each individual element while creating cohesive visual flow throughout the structure. Fire bricks in natural tones offer superior heat resistance while maintaining the aesthetic variety that makes each fire pit unique.
Coordinated color schemes work best when they complement surrounding outdoor features such as stone seating areas and landscaping elements. We recommend selecting brick colors that harmonize with existing hardscaping materials to create a cohesive backyard oasis that feels intentionally designed rather than randomly assembled.
DIY Brick Fire Pit Construction Tips
Building your own brick fire pit requires careful planning and the right approach to ensure safety and longevity. We’ll guide you through the essential materials and construction process to create a stunning backyard centerpiece.
Essential Tools and Materials List
Fire resistant bricks form the foundation of any quality fire pit construction. We recommend purchasing approximately 25 fire rated bricks for the inner lining, as these withstand high temperatures without cracking or deteriorating. Regular face bricks work perfectly for the exterior walls and decorative caps, requiring around 120 pieces for a standard sized pit.
Mortar mix designed specifically for high heat applications ensures your fire pit maintains structural integrity through countless fires. Standard masonry mortar won’t withstand the extreme temperatures, making fire resistant mortar essential for long term durability.
Base materials including gravel or crushed stone create the stable foundation your fire pit needs. We suggest using approximately 2 to 3 cubic feet of gravel for proper drainage and leveling beneath the structure.
Construction tools streamline the building process significantly. Essential items include a trowel for mortar application, a level to keep bricks aligned, and a rubber mallet for gentle positioning. You’ll also need a circular saw with a concrete blade for cutting bricks to size, jointers for smoothing mortar joints, and measuring tape with string for accurate layout marking.
Marking supplies help establish perfect dimensions from the start. Spray paint or marking chalk works well for outlining your fire pit’s footprint, while rope assists in creating consistent circular shapes.
Step-by-Step Building Process Guidelines
Mark your construction area using rope or marking chalk to outline the desired shape on the ground. We recommend marking a circle with a diameter between 36 and 44 inches for optimal heat distribution and seating arrangements around the perimeter.
Prepare the foundation by digging to the required depth and filling with gravel or crushed stone. Level this base thoroughly using your tools, as an uneven foundation leads to structural problems later in the construction process.
Install the first course by placing fire bricks in the marked circle on your leveled base. Tap each brick gently with the rubber mallet while using your level to ensure even placement across the entire first layer.
Build up the walls by mixing and spreading mortar on top of the first brick layer. Apply a 2 to 3 inch thick bed of mortar, allowing it to set slightly before placing the next course. Stagger bricks on subsequent layers for maximum stability, leaving approximately 1/4 inch gaps between joints.
Continue layering until reaching your desired height of 12 to 18 inches. Work in manageable sections, smoothing mortar joints with your jointer before the material begins drying and becoming difficult to shape.
Allow proper curing time for the mortar to dry completely over 24 to 48 hours. Rushing this step compromises the structural integrity of your entire fire pit construction.
Install the finishing cap by setting brick caps on edge with mortar to form a neat top lip. This row lock cap protects the fire pit structure while providing a safety ledge and enhanced aesthetic appeal.
Add interior drainage by optionally placing an extra layer of gravel inside the completed pit. This final step improves drainage performance and adds an additional safety measure for fire management.
Safety Considerations for Brick Fire Pits
Building a stunning brick fire pit requires careful attention to safety protocols that protect both your property and loved ones. We’ll explore the essential safety measures that ensure your outdoor centerpiece remains both beautiful and secure.
Proper Distance from Structures and Plants
Minimum clearance requirements protect your home and landscaping from fire hazards. We recommend positioning your brick fire pit at least 10 feet away from any buildings, decks, fences, and combustible plants to prevent dangerous flame spread. This distance provides adequate buffer space for sparks and radiant heat that naturally occur during fire pit operation.
Overhead clearance demands equal attention to horizontal spacing. Never install your fire pit under low hanging branches, pergolas without proper clearance, or string lights that could ignite from rising heat and sparks. We suggest checking your local fire codes as some municipalities require even greater distances than the standard 10 foot minimum.
Strategic placement away from neighboring properties shows consideration and reduces liability. Position your fire pit where prevailing winds won’t carry smoke and sparks toward adjacent homes or dry vegetation. This thoughtful approach prevents conflicts with neighbors while minimizing fire risks during windy conditions.
Fire-Resistant Materials and Ventilation Requirements
Heat resistant bricks form the foundation of safe fire pit construction. We recommend using fire bricks specifically designed for high temperature applications rather than standard construction bricks that can crack or explode under extreme heat. These specialized bricks withstand temperatures exceeding 2000°F while maintaining structural integrity season after season.
Proper mortar selection ensures long term durability and safety. Choose refractory mortar specifically formulated for high heat applications rather than standard masonry mortar that deteriorates quickly under fire pit conditions. This investment protects your construction investment while preventing dangerous structural failures.
Ventilation gaps promote efficient combustion and prevent dangerous smoke buildup. Build your fire pit with strategic air gaps between bricks that allow oxygen flow while maintaining structural stability. These openings enhance fire performance and reduce smoke production that can create hazardous conditions for nearby guests.
Deck installations require additional protective measures for fire safety. Place fire resistant pads made of metal, brick, or specialized materials beneath fire pits installed on wooden decks. These protective barriers should extend at least two feet beyond the fire pit perimeter to shield deck materials from falling embers and radiant heat damage.
Maintenance and Longevity of Brick Fire Pits
Proper maintenance transforms your brick fire pit from a seasonal feature into a lasting backyard centerpiece that withstands years of use. We’ll explore essential care practices that protect your investment and keep your outdoor gathering space in prime condition.
Seasonal Care and Weather Protection
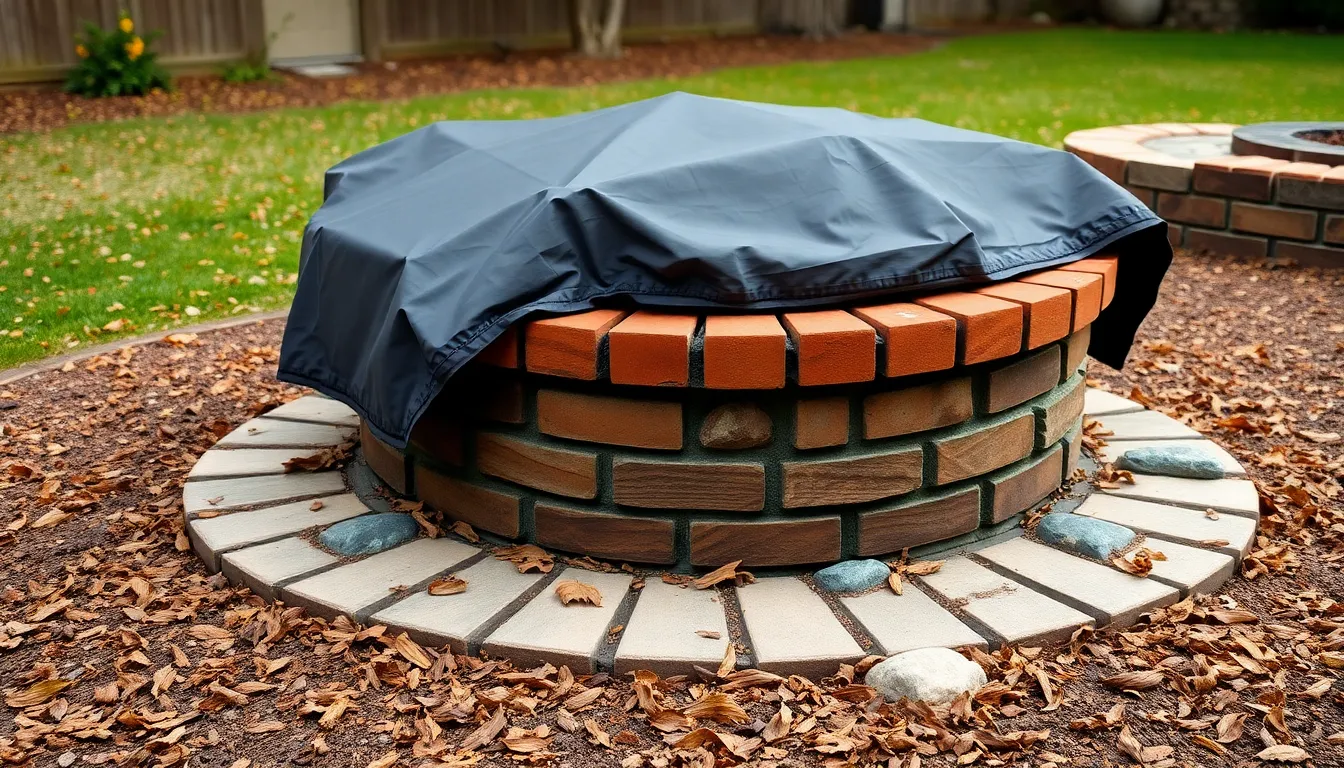
Weather resistant covers serve as the first line of defense when your fire pit isn’t actively warming your gatherings. We recommend covering your brick structure immediately after each use to prevent moisture infiltration that can weaken mortar joints over time.
Avoiding wet weather usage protects both bricks and mortar from accelerated deterioration that occurs when materials expand and contract rapidly during temperature changes. Rain exposure during active fires creates thermal shock that can crack even the most durable fire bricks.
Preventing water accumulation becomes critical in colder climates where freeze thaw cycles pose the greatest threat to structural integrity. We suggest installing proper drainage systems around your fire pit area to redirect standing water away from the brick foundation.
Regular ash and soot removal prevents corrosive buildup that stains brick surfaces and deteriorates mortar joints between firing sessions. Clean removal after every few uses maintains both the appearance and structural soundness of your outdoor feature.
Repair Techniques for Cracked or Loose Bricks
Damaged brick removal requires careful attention to preserve surrounding structure while accessing compromised areas. We start by gently chiseling away old mortar around loose bricks, taking care not to damage adjacent sound masonry.
High temperature mortar application ensures repairs withstand the intense heat cycles your fire pit experiences during regular use. Fire resistant refractory cement provides the durability needed for areas exposed to direct flame contact and extreme temperature variations.
Minor crack sealing using heat resistant epoxy prevents small issues from developing into major structural problems. We apply these specialized sealants during cooler weather when materials can cure properly without thermal stress.
Mortar joint repointing maintains the structural stability that keeps your entire fire pit assembly secure and functional. Fresh mortar application in deteriorated joints restores both the weatherproofing and load bearing capacity essential for safe operation.
| Repair Type | Materials Needed | Timeframe | Difficulty Level |
|---|---|---|---|
| Loose brick replacement | Fire resistant mortar, trowel | 2-4 hours | Moderate |
| Minor crack sealing | Heat resistant epoxy | 30 minutes | Easy |
| Mortar joint repointing | Refractory cement, pointing tool | 1-3 hours | Moderate |
| Weather damage restoration | Multiple materials, cover | 4-8 hours | Advanced |
Prompt attention to structural issues prevents minor maintenance from escalating into costly reconstruction projects that require professional intervention. Regular inspection after severe weather events helps identify problems before they compromise your fire pit’s safety or functionality.
Conclusion
Building a brick fire pit transforms your backyard into a year-round entertainment destination that brings family and friends together. Whether you choose a classic round design or explore modern square configurations, the durability and timeless appeal of brick ensures your investment will last for decades.
We’ve covered everything from simple dry-stack methods to complex multi-level designs with cooking features. The key is selecting the right style for your space and skill level while prioritizing safety and proper construction techniques.
Remember that regular maintenance and attention to local building codes will keep your fire pit functioning safely and looking beautiful. With proper planning and execution, your brick fire pit will become the centerpiece of countless memorable gatherings in your outdoor living space.
Frequently Asked Questions
What is the ideal diameter for a round brick fire pit?
The recommended diameter for a round brick fire pit is 36 to 48 inches. This size range provides optimal heat distribution and comfortable seating arrangements around the fire pit, ensuring everyone can enjoy the warmth while maintaining a safe distance from the flames.
What’s the difference between dry stack and mortared brick fire pit construction?
Dry stacking is a beginner-friendly method where bricks are stacked without mortar, allowing for easy disassembly and lower cost. Mortared construction uses cement to bind bricks together, offering superior durability and weather resistance but requiring more complex building skills and higher investment.
How deep should I dig for a sunken brick fire pit?
Excavate approximately 18 inches deep for a sunken brick fire pit. This depth ensures safety and comfort while creating an intimate gathering space. Include proper drainage with gravel layers and geotextile membranes to prevent water accumulation and maintain structural stability.
What safety clearances are required for brick fire pits?
Maintain a minimum clearance of 10 feet from structures, plants, and neighboring properties. Ensure adequate overhead clearance and avoid placing fire pits under low-hanging branches or covered areas. Use fire-resistant materials and include ventilation gaps for safe combustion and smoke management.
What materials do I need for DIY brick fire pit construction?
Essential materials include fire-resistant bricks, high-heat mortar mix, gravel for the base, and sand for leveling. You’ll also need basic tools like a shovel, level, rubber mallet, and measuring tape. Choose specialized fire bricks for the inner ring to withstand extreme temperatures.
How do I maintain my brick fire pit for longevity?
Use weather-resistant covers when not in use and avoid using the fire pit in wet conditions. Remove ash and soot regularly to maintain appearance and prevent structural damage. Address cracked or loose bricks promptly to prevent costly reconstruction and ensure continued safety.
Can I add cooking features to my brick fire pit?
Yes, you can enhance brick fire pits with cooking attachments like wood-fired pizza ovens, built-in grilling surfaces, and food preparation areas. These additions transform your fire pit into a versatile outdoor culinary hub while maintaining heat resistance and structural integrity.
What are the best brick patterns for decorative fire pits?
Popular decorative patterns include herringbone and basket weave designs that add visual depth and artistic flair. These intricate patterns require precise measurement and planning but create stunning focal points. Consider color mixing with different brick types for enhanced aesthetic appeal.

