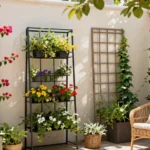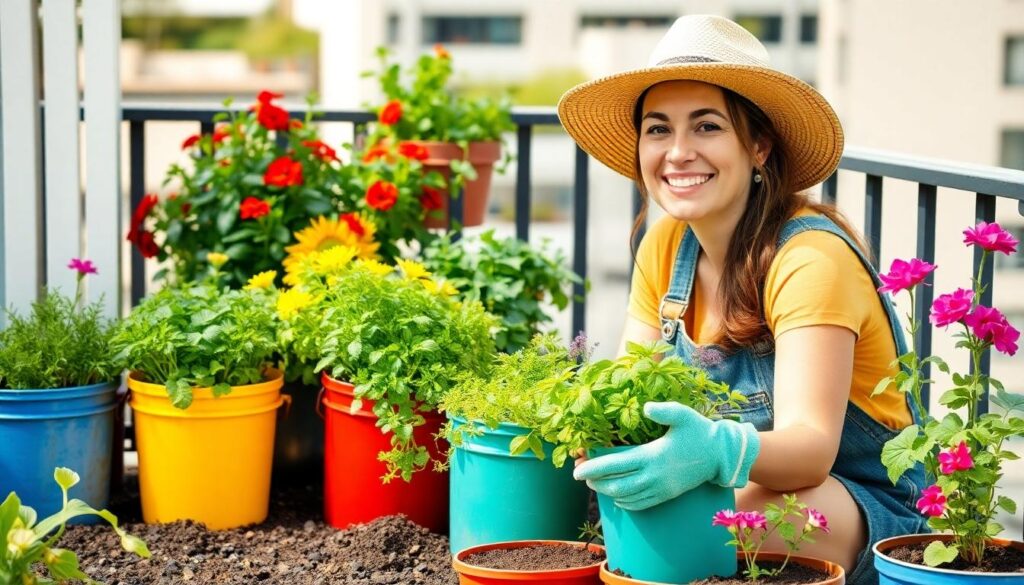
Bucket gardening offers a perfect solution for anyone with limited space who still dreams of growing their own plants. Whether you’re in an apartment with just a balcony or have a small yard, these versatile containers can transform even the tiniest areas into thriving green spaces. We’ll show you how simple it is to get started with this accessible gardening method.
In our experience, bucket gardening isn’t just practical—it’s incredibly rewarding. With the right techniques, you’ll enjoy fresh herbs, vibrant flowers, and even vegetables right outside your door. The best part? It’s budget-friendly and requires minimal investment to begin. Throughout this guide, we’ll share our top tips for successful bucket gardening that will have you harvesting your own produce in no time.
10 Essential Tips for Bucket Gardening Success
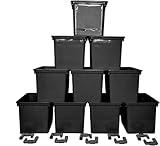
- Choose the right buckets for your gardening needs. Select containers that are at least 5 gallons in capacity to provide adequate room for root development. Food-grade plastic buckets work exceptionally well, but you can also repurpose old trash cans, storage tubs, or even wooden barrels for a more rustic look.
- Ensure proper drainage by drilling 4-6 holes in the bottom of each bucket. Proper drainage prevents root rot and fungal diseases that can destroy your plants. Adding a layer of pebbles or broken pottery pieces at the bottom can further improve water flow.
- Use quality potting soil specifically formulated for container gardening. Regular garden soil is too dense and can become compacted in buckets, restricting root growth. Quality potting mixes contain perlite, vermiculite, or coco coir that provide aeration and moisture retention.
- Consider plant requirements when planning your bucket garden. Some plants like tomatoes and peppers need deeper containers, while herbs and lettuce can thrive in shallower ones. Vegetables such as carrots require at least 12 inches of soil depth for proper development.
- Position buckets strategically to maximize sunlight exposure. Most vegetables and flowering plants require 6-8 hours of direct sunlight daily. Moving your buckets throughout the day or season might be necessary to follow the sun’s path.
- Carry out a consistent watering schedule based on weather conditions and plant needs. Container plants typically require more frequent watering than in-ground gardens because they dry out faster. Testing soil moisture with your finger is a reliable way to determine when to water.
- Feed plants regularly with appropriate fertilizers. Nutrients in container gardens deplete quickly due to frequent watering. Apply water-soluble fertilizer every 2-3 weeks during the growing season or incorporate slow-release fertilizers when planting.
- Mulch the soil surface with straw, wood chips, or compost to reduce water evaporation and moderate soil temperature. A 1-2 inch layer of mulch can significantly reduce your watering frequency and protect delicate roots from temperature fluctuations.
- Monitor for pests and diseases more frequently than you would with traditional gardens. Bucket gardens can be more susceptible to certain issues due to their confined space. Inspecting your plants weekly allows for early intervention before problems spread.
- Rotate crops seasonally to prevent soil depletion and pest buildup. Planning which plants will occupy your buckets each season helps maintain soil health and productivity. Keeping records of what grows well in exact containers can guide future planting decisions.
| # | Preview | Product | Price | |
|---|---|---|---|---|
| 1 |

|
Gardening with Chickens: Plans and Plants for You and Your Hens | $27.98 | Buy on Amazon |
Last update on 2026-02-28 / Affiliate links / Images from Amazon Product Advertising API
Choosing the Right Buckets for Your Garden

Selecting appropriate containers is a crucial first step for successful bucket gardening. Your choice of buckets will directly impact plant health, growth potential, and the safety of any edibles you harvest.
Food-Grade vs. Non-Food-Grade Containers
Food-grade containers are essential when growing edible plants like vegetables and herbs. These buckets are made from materials that won’t leach harmful chemicals into your soil and plants. We recommend always checking for food-grade certification on plastic buckets before purchasing them for your garden. Non-food-grade containers often contain chemicals that can contaminate your soil and potentially transfer to your plants, making them unsafe for consumption. Materials matter significantly – opt for durable, non-toxic options like food-grade plastic or metal buckets. Light-colored containers offer an additional benefit as they reflect heat, making them ideal for placement in sunny garden areas where temperature management is important.
Size Considerations for Different Plants
Bucket size directly corresponds to the type of plants you intend to grow. Large vegetables such as tomatoes, peppers, and eggplants require at least 5-gallon buckets to accommodate their extensive root systems and support healthy growth. Smaller plants including lettuce varieties and many culinary herbs can thrive in more compact 3-4 gallon containers. We always match plant size to container capacity to ensure optimal development. Root space requirements vary significantly between species, so researching your exact plants before selecting containers will save you transplanting headaches later. Remember that proper drainage is crucial regardless of bucket size – drill 6 to 8 evenly spaced holes in the bottom of each container to prevent waterlogging and root rot.


Last update on 2026-02-28 / Affiliate links / Images from Amazon Product Advertising API
Preparing Buckets for Optimal Plant Growth

Proper preparation of your buckets is a crucial step that can make or break your gardening success. Setting up your containers correctly creates the foundation for healthy plants and abundant harvests.
Drilling Proper Drainage Holes
Adequate drainage is essential for preventing root rot and maintaining plant health in bucket gardens. We recommend drilling several holes in the bottom and sides of your bucket, positioning them about 1-2 inches from the bottom to enhance water flow. This strategic placement ensures excess water can escape while still allowing your plants to access the moisture they need. Creating multiple drainage points rather than just one or two large holes distributes the drainage more evenly and prevents soil from washing out during watering sessions.
Adding a Layer of Gravel or Stones
Incorporating a drainage layer significantly improves your bucket garden’s performance and plant health. Place 2-3 inches of gravel or small stones at the bottom of your bucket before adding soil to create an effective drainage system. This layer serves multiple purposes by preventing soil from clogging the drainage holes and creating space for excess water to collect away from plant roots. Pebbles, broken pottery pieces, or even recycled plastic bottle caps can work effectively for this purpose if you don’t have gravel handy. The improved drainage this layer provides helps prevent the waterlogged conditions that lead to root diseases and plant failure.
Choosing the Right Soil
Soil selection can dramatically impact your bucket gardening success. Use a well-draining potting soil that contains ingredients like peat moss, vermiculite, or perlite rather than garden soil from your yard. These components create an ideal structure that retains enough moisture while allowing excess water to drain freely. Commercial potting mixes specifically formulated for container gardening provide balanced nutrition and appropriate texture for plants grown in confined spaces. The lightweight nature of quality potting soil also makes your buckets easier to move if you need to adjust their position throughout the growing season.
Planting and Watering
Proper planting depth and consistent watering routines establish the foundation for thriving bucket gardens. Plant seeds or seedlings according to their exact depth requirements as indicated on seed packets or plant labels. Container plants typically require more frequent watering than those in ground beds, often needing water once or twice daily during hot weather. Morning watering proves most beneficial as it allows foliage to dry before evening, reducing disease risk. The confined space of buckets means soil can dry out quickly, so regular monitoring of moisture levels becomes particularly important during your plants’ establishment phase.
Mulching and Fertilization
Mulching and regular fertilization keep bucket gardens productive throughout the growing season. Apply a 1-2 inch layer of mulch on top of your soil to minimize evaporation and moderate soil temperature fluctuations. Monthly fertilizer applications provide essential nutrients that can quickly deplete in the limited soil volume of containers. Organic options like compost tea or slow-release granular fertilizers work particularly well for bucket gardens. Soil reuse between plantings requires extra attention to nutrient replenishment, making compost additions especially valuable for maintaining soil fertility and structure over time.
Plant Depth and Spacing
Careful consideration of plant placement within buckets prevents common container gardening problems. Position vegetables deep enough and maintain adequate distance from the bucket sides to protect roots from overheating. Following seed packet instructions for spacing remains important even in container settings, though you can often plant slightly closer than in traditional gardens. Tall plants benefit from being placed near the bucket center for stability, while trailing varieties work well positioned near edges where they can cascade over the sides. This thoughtful arrangement maximizes your growing space while ensuring each plant has adequate room to develop properly.


Last update on 2026-02-28 / Affiliate links / Images from Amazon Product Advertising API
Selecting the Best Soil Mix for Bucket Gardens

The foundation of any successful bucket garden begins with the right soil mix. Using potting soil specifically formulated for containers is essential, as it provides proper aeration and moisture retention that plants need to thrive. Standard garden soil should be avoided completely since it compacts easily in containers, restricting root growth and proper drainage.
Blending Potting Soil with Compost
Creating the optimal soil blend for bucket gardens requires combining 2 parts potting soil with 1 part compost. This ratio enhances nutrient availability while introducing beneficial microbial activity that supports plant health. Compost adds valuable organic matter that improves both soil structure and water-holding capacity, creating an environment where roots can easily spread. For best results, we recommend using fully decomposed compost to prevent nitrogen depletion that occurs during the decomposition process. Monthly nutrient replenishment is necessary when reusing soil from previous plantings – simply add a fresh layer of compost or apply a balanced fertilizer to maintain soil fertility.
Incorporating Perlite for Better Drainage
Adding 10-20% perlite to your soil-compost mixture dramatically improves drainage and prevents the soil compaction that commonly occurs in bucket gardens. This lightweight volcanic material creates essential air pockets that promote oxygen flow to plant roots, which is critical for preventing root rot in confined growing spaces. Proper drainage also requires structural modifications to your buckets – drill ½-inch drainage holes at the base and additional side holes 1-2 inches above the bottom to improve air circulation. These strategically placed openings allow excess water to escape while maintaining adequate moisture levels for healthy plant growth.
| Component | Purpose | Recommended Proportion |
|---|---|---|
| Potting Soil | Provides structure and base nutrients | 60-70% |
| Compost | Adds organic matter and nutrients | 20-30% |
| Perlite | Enhances drainage and aeration | 10-20% |


Last update on 2026-02-28 / Affiliate links / Images from Amazon Product Advertising API
Picking the Perfect Plants for Bucket Gardening

Selecting the right plants for your bucket garden is crucial for success in this space-saving growing method. Not all plants are suited for container growing, so knowing which varieties thrive in buckets will save you time and frustration.
Vegetables That Thrive in Containers
Tomatoes perform exceptionally well in bucket gardens, particularly dwarf or patio varieties that don’t require extensive root space. Cherry tomatoes and determinate varieties adapt beautifully to container life while producing abundant harvests. Peppers and eggplants, especially in their dwarf forms, flourish in 5-gallon buckets and provide impressive yields throughout the growing season. Leafy greens like lettuce, spinach, and kale grow perfectly in shallow buckets, allowing for multiple harvests when you practice cut-and-come-again techniques. Root vegetables such as carrots require proper spacing to develop properly—remember not to overcrowd them as this can lead to stunted growth. When planting vegetables in buckets, we recommend avoiding heavy-fruited standard varieties unless they’re specifically bred for container growing, as they can become too weighty and unstable for bucket gardening.
Herbs and Flowers for Bucket Gardens
Most herbs adapt wonderfully to bucket gardens, making them perfect candidates for small-space cultivation. Basil, mint, cilantro, and parsley thrive in containers and provide fresh flavors for your kitchen throughout the growing season. Rosemary, thyme, and oregano also perform well in buckets, requiring less water and excellent drainage for optimal growth. Flowering plants add vibrant color and beneficial insect attraction to your bucket garden. Petunias create cascading blooms that brighten any space while helping to deter certain pests naturally. Marigolds serve dual purposes in bucket gardens—they provide cheerful blooms while repelling harmful insects with their distinctive scent. Annual flowers generally work better in bucket gardens than perennials, as they complete their life cycle in one season and don’t require winter protection. When selecting plants for your bucket garden, consider combining herbs, vegetables, and flowers for both practical harvests and aesthetic appeal.


Last update on 2026-02-28 / Affiliate links / Images from Amazon Product Advertising API
Implementing Strategic Watering Techniques

Proper watering is essential for successful bucket gardening, as container plants typically require more frequent attention than those planted in the ground. Strategic watering techniques ensure your plants receive adequate moisture without risking root damage.
Self-Watering Bucket Systems
Self-watering bucket systems offer an efficient solution for busy gardeners who can’t water their plants daily. These systems work by elevating the plant above a water reservoir, typically using a nested bucket arrangement with a wick to draw moisture upward as needed. Creating your own self-watering system is straightforward yet effective for maintaining consistent soil moisture. Always retain the original drainage holes in your bucket to prevent oversaturation, which can lead to root diseases. The beauty of self-watering buckets lies in their ability to provide a steady supply of water directly to the root zone while minimizing waste through evaporation.
Establishing a Consistent Watering Schedule
Monitoring soil moisture daily is crucial for bucket gardens since container soils dry out much faster than ground soil. Water your bucket plants when the top 1-2 inches of soil feel dry to the touch, which might mean daily watering during hot summer months. Bucket gardens require more frequent hydration compared to traditional gardens, especially during periods of high temperatures. Check moisture levels twice daily during peak heat to prevent wilting and plant stress. Fertilize your plants monthly with a balanced liquid fertilizer to replenish nutrients that are frequently washed away through regular watering. Limit root competition by planting only 1-2 plants per bucket, giving each plant sufficient room to develop a healthy root system. Maintain a 1-inch buffer between seedlings and bucket edges to protect roots from heat stress that can occur when container walls heat up in direct sunlight.
Providing Adequate Sunlight for Bucket Plants

Proper sunlight exposure is crucial for the success of your bucket garden. Different plants have exact light requirements that directly impact their growth and productivity.
Positioning Tips for Maximum Sun Exposure
Strategic placement of your bucket garden can dramatically improve plant health and yield. Position buckets that contain full-sun plants like tomatoes, peppers, and most flowering plants in locations receiving at least 6-8 hours of direct sunlight daily. South or west-facing areas typically offer the best sun exposure for most garden plants. Remember to keep buckets away from trees, buildings, or other structures that might cast shadows during peak sunlight hours.
Seasonal adjustments are necessary to maintain optimal growing conditions throughout the year. We recommend rotating your buckets as the sun’s position changes with the seasons to ensure consistent light exposure. Take advantage of vertical space by stacking buckets or incorporating trellises for vining plants like cucumbers or beans, which maximizes your growing area while ensuring adequate sunlight reaches all plants.
Managing Heat Absorption in Different Colored Buckets
Bucket color significantly impacts soil temperature and can affect plant growth. Dark-colored buckets absorb more heat, potentially raising soil temperatures to levels that stress plant roots during hot weather. Light-colored buckets reflect more sunlight and maintain cooler soil temperatures, making them ideal for heat-sensitive plants or gardens in warm climates.
Applying a 2-3 inch layer of mulch on top of your bucket soil serves multiple purposes beyond moisture conservation. Mulch acts as an insulator that moderates soil temperature fluctuations, protecting roots from extreme heat or cold. For gardens in particularly hot regions, consider adding a reflective outer layer to dark buckets or simply opt for lighter-colored containers to minimize heat absorption. These simple adjustments help create a more stable growing environment for your plants and reduce the frequency of watering needed during hot weather.
Fertilizing Effectively in Bucket Gardens

Bucket gardens require regular nutrient replenishment due to their limited soil volume. Monthly fertilization is essential when reusing soil since nutrients deplete much faster than in traditional garden beds.
Slow-Release vs. Liquid Fertilizers
Slow-release fertilizers provide consistent nutrient delivery over several weeks, making them ideal for bucket gardens. They significantly reduce the risk of over-fertilization, which can damage delicate root systems in confined spaces. Beginners or gardeners with low-maintenance setups will find these particularly beneficial as they require less frequent application and monitoring.
Liquid fertilizers offer immediate nutrient availability, making them perfect during rapid growth phases of your bucket garden plants. Apply these nutrients every 2-3 weeks to maintain optimal plant health throughout the growing season. Always follow the manufacturer’s dilution guidelines carefully to prevent root burn, which is more common in container gardens due to concentrated soil conditions.
Creating Your Own Compost Tea
Compost tea serves as an excellent organic fertilizer option that delivers both nutrients and beneficial microorganisms to your bucket garden. Start with quality ingredients including mature compost, non-chlorinated water, and basic aeration equipment such as an aquarium pump to create this nutrient-rich solution.
The process involves steeping compost in water using a 1:5 ratio (one part compost to five parts water) for 24-48 hours. Continuous aeration during this steeping period promotes the growth of beneficial microbes that enhance soil health and plant resistance to diseases.
Application requires straining the mixture and diluting it until it resembles a light tea color before use. Weekly application as either a soil drench or foliar spray will enhance nutrient uptake and strengthen your plants’ natural defense systems. This natural fertilizer works particularly well in bucket gardens where soil biology can quickly deplete without regular replenishment.

Last update on 2026-02-28 / Affiliate links / Images from Amazon Product Advertising API
Preventing Common Bucket Gardening Problems

Even the most dedicated bucket gardeners encounter challenges, but with proper preparation and maintenance, most issues can be easily resolved. Let’s explore answers to the most common problems you might face in your bucket garden.
Addressing Drainage Issues
Proper drainage forms the foundation of successful bucket gardening and prevents potentially fatal root rot. We recommend drilling four ½-inch holes in the bucket base and four additional holes 1-2 inches above the bottom to create optimal air circulation and water flow. Elevating your buckets slightly with bricks or stands enhances drainage efficiency and prevents water from pooling beneath containers. A layer of gravel or small rocks at the base works wonders for improving drainage while preventing soil from clogging the holes.
Food-grade, BPA-free buckets should always be your priority for growing edible plants. When preparing these containers, use a ½-inch drill bit to create evenly spaced holes that effectively prevent waterlogging. Your watering practices significantly impact drainage success—water deeply until you see liquid flowing from the drainage holes, especially during hot weather, to ensure even the lower soil layers receive adequate moisture. Daily finger tests to check soil dryness will help you adjust your watering frequency based on current conditions rather than a rigid schedule.
Combating Pests in Container Gardens
Pest prevention starts with your choice of growing medium—always use sterile potting soil rather than garden soil, which may harbor unwanted insects and pathogens. Mulching the soil surface serves dual purposes by deterring pests while helping retain crucial soil moisture. Strategic companion planting with flowers like marigolds naturally repels many common garden pests and attracts beneficial insects that prey on harmful ones.
Regular plant inspection forms your first line of defense against aphids, spider mites, and other common bucket garden invaders. Early intervention dramatically increases your chances of success—promptly remove affected leaves and consider organic answers like insecticidal soap or diluted neem oil for treating visible pests. Avoid the temptation to over-fertilize your plants, as the resulting tender growth often attracts more pests to your garden.
Environmental factors play a crucial role in pest management, with proper spacing between plants reducing humid conditions that many pests prefer. Ensuring your bucket garden receives adequate sunlight (6-8 hours daily) creates stronger plants that naturally resist pest pressure. Sanitizing your gardening tools and containers between plantings eliminates potential pest eggs and disease pathogens, preventing problems before they begin.


Last update on 2026-02-28 / Affiliate links / Images from Amazon Product Advertising API
Creating Multi-Season Bucket Garden Displays

Bucket gardens offer incredible versatility, allowing you to enjoy fresh harvests throughout the changing seasons with proper planning and maintenance.
Rotating Crops Throughout the Year
Rotating crops in your bucket garden maximizes productivity while preventing soil-borne diseases from taking hold. Replace nitrogen-fixing plants like beans with heavy feeders such as lettuce to maintain soil health and nutrient balance. Cool-season crops including spinach and kale thrive during spring and fall months, while warm-season favorites like basil and tomatoes perform best during summer heat. Companion planting techniques, such as growing carrots alongside radishes, help optimize limited bucket space and improve overall yields. After harvesting one crop, refresh the soil with quality compost before introducing new plants to ensure continued fertility. This systematic rotation not only prevents pest buildup but also extends your growing season significantly.
Winterizing Your Bucket Garden
Cold weather doesn’t mean your bucket garden must go dormant for months. Move containers indoors or to sheltered locations during hard freezes to protect sensitive plants from damage. Insulate root systems by applying a thick layer of mulch made from straw or fallen leaves around the base of perennial plants. Cover frost-sensitive varieties with specialized frost cloth when temperatures drop suddenly. Cold-hardy crops like Swiss chard can continue producing even as temperatures decline. Herbs such as rosemary often survive winter with minimal protection when planted in well-draining soil. Consider adding ornamental kale or cold-tolerant pansies to maintain visual interest in your bucket display during winter months. Proper winterization ensures your bucket garden remains productive or at least survives until spring planting season begins again.
Conclusion: Enjoying the Fruits of Your Bucket Garden
Bucket gardening offers an accessible path to growing your own food and beautiful plants regardless of space limitations. With the right containers drainage setup soil mix and plant selection you’ll be well on your way to a thriving garden.
Remember that successful bucket gardening is all about balance—providing adequate sunlight managing water needs and maintaining proper nutrition. Don’t be afraid to experiment with different plants and techniques as you develop your personal system.
The beauty of bucket gardening lies in its flexibility and scalability. Whether you’re growing a few herbs on a windowsill or creating a lush balcony garden you’re participating in a rewarding hobby that connects you to nature and provides tangible benefits.
Happy gardening and enjoy the harvest!
Frequently Asked Questions
What is bucket gardening and why should I try it?
Bucket gardening is a space-efficient method of growing plants in buckets instead of traditional garden beds. It’s perfect for people with limited space like apartments, small yards, or balconies. This approach allows you to grow herbs, vegetables, and flowers with minimal investment while maximizing your available space. Bucket gardens are also portable, making them ideal for renters or those who want to adjust plant positioning throughout the growing season.
What size bucket do I need for container gardening?
For most vegetables, use buckets that are at least 5 gallons in capacity. Larger plants like tomatoes and peppers thrive in 5-7 gallon containers, while smaller herbs and leafy greens can grow successfully in 3-4 gallon buckets. The depth should accommodate the plant’s root system. Always ensure your bucket has adequate drainage holes (6-8 holes) to prevent waterlogging and root rot.
Are all buckets safe for growing edible plants?
No, not all buckets are safe for growing food. Always use food-grade containers for edible plants to prevent harmful chemical leaching. Look for buckets with recycling codes #1, #2, #4, or #5, or ones specifically labeled as food-grade. Avoid containers that previously held toxic materials. Food-grade plastic, ceramic, or metal buckets are generally safe options for growing vegetables and herbs.
What type of soil should I use in my bucket garden?
Use a high-quality potting mix specifically formulated for containers, not regular garden soil which compacts easily. The ideal mix combines potting soil and compost in a 2:1 ratio, with perlite added to improve drainage. This ensures proper aeration, moisture retention, and nutrient availability. Container soil should be lightweight yet able to retain moisture while allowing excess water to drain freely.
How often should I water my bucket garden plants?
Container plants typically need more frequent watering than ground plants because they have limited soil volume. Check moisture levels daily by touching the top 1-2 inches of soil—water thoroughly when it feels dry. Water needs increase during hot weather and as plants mature. Morning watering is ideal. Consider self-watering systems for consistent moisture or mulching to reduce evaporation and watering frequency.
What vegetables grow best in bucket gardens?
The best vegetables for bucket gardens include determinate (bush) tomatoes, peppers, eggplants, leafy greens (lettuce, spinach, kale), radishes, carrots, and herbs. Compact or dwarf varieties bred specifically for containers perform exceptionally well. Plants with shallow root systems like lettuce and herbs can be grown in smaller buckets, while root vegetables and fruiting plants need deeper containers with at least 12 inches of soil depth.
How do I ensure proper drainage in my buckets?
Drill 6-8 evenly spaced holes (1/4 to 1/2 inch in diameter) in the bottom of each bucket. Add a 1-2 inch layer of gravel or broken pottery pieces before adding soil to prevent drainage holes from clogging. Consider elevating buckets slightly using bricks or pot feet to allow water to flow freely from the drainage holes and improve airflow under the container.
How often should I fertilize bucket garden plants?
Fertilize container plants more frequently than in-ground gardens, as nutrients leach out with regular watering. Apply a balanced slow-release fertilizer monthly during the growing season, or use a half-strength liquid fertilizer every 2-3 weeks. Organic options like compost tea work well too. Always follow package instructions to avoid over-fertilization, which can damage plants.
How can I protect my bucket garden from extreme temperatures?
For hot weather, use light-colored buckets to reflect heat, apply mulch to moderate soil temperature, and position containers where they receive morning sun but afternoon shade. During cold periods, move buckets to sheltered locations, insulate containers with bubble wrap or burlap, group plants together for warmth, or bring cold-sensitive plants indoors. Consider using frost cloths for light freezes.
Can I grow multiple plants in one bucket?
While possible, it’s best to limit planting to 1-2 plants per 5-gallon bucket to prevent root competition and nutrient depletion. Exceptions include shallow-rooted plants like lettuce or herbs, which can be planted more densely. Ensure each plant has adequate space for root development and top growth. Companion planting can work in larger buckets if you choose plants with similar water and light requirements.