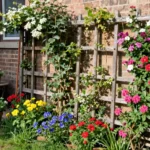
Creating an outdoor kitchen doesn’t have to drain your savings account. We’ve discovered that with smart planning and creative answers you can build a stunning outdoor cooking space that rivals expensive installations – all while staying within your budget.
The secret lies in knowing which elements to prioritize and where to find affordable alternatives. From repurposing existing materials to choosing cost-effective appliances we’ll show you how to maximize every dollar without sacrificing functionality or style. Many homeowners spend thousands on outdoor kitchens but we’ve found ways to achieve the same results for a fraction of the cost.
Whether you’re working with a few hundred dollars or a modest budget of a couple thousand we’ll guide you through practical answers that deliver impressive results. Get ready to transform your backyard into an entertaining paradise without the hefty price tag.
Plan Your Budget-Friendly Outdoor Kitchen Layout
Strategic planning transforms your outdoor kitchen dreams into affordable reality. We’ll break down the essential steps to create a functional layout that maximizes both space and savings.
Assess Your Available Space
Measure your outdoor area carefully to determine the maximum footprint for your kitchen. Most budget-friendly outdoor kitchens work well in spaces ranging from 8×10 feet to 12×16 feet, with smaller patios accommodating compact designs around 6×8 feet.
Document existing features like electrical outlets, water lines, gas connections, and permanent structures. We can save hundreds of dollars by building around current utilities rather than running new lines across your yard.
Consider traffic flow patterns when sketching your initial layout. Position cooking areas away from main walkways and ensure at least 3 feet of clearance around work zones for safe movement during food preparation.
Evaluate sun exposure and wind patterns throughout different times of day. Southern exposures provide natural lighting but may require shade answers, while northern areas might need additional heating elements during cooler months.
Determine Your Essential Cooking Needs
List your primary cooking methods to avoid purchasing unnecessary equipment. Basic outdoor kitchens typically include a grill, prep surface, and storage, while expanded versions might add a side burner or small refrigerator.
Prioritize appliances based on your entertaining style rather than copying elaborate designs. Casual grillers need different setups than those hosting large dinner parties or families who cook outdoors multiple times per week.
Calculate your typical cooking capacity by considering how many people you’ll serve regularly. A 3-burner gas grill handles up to 8 people comfortably, while larger gatherings might require a 4-6 burner model or supplemental cooking surfaces.
Factor in prep and cleanup requirements when planning your workspace. We recommend allocating 30-36 inches of counter space per cooking station and including at least one sink or wash station for food safety.
Set a Realistic Budget Range
Establish your total spending limit before selecting any materials or appliances. Budget outdoor kitchens typically range from $500-$2,000 for DIY projects, $2,000-$5,000 for mid-range installations, and $5,000-$10,000 for premium budget builds.
| Budget Range | Typical Features | Expected Savings |
|---|---|---|
| $500-$2,000 | Basic grill, DIY counters, minimal storage | 60-80% vs. professional |
| $2,000-$5,000 | Mid-range appliances, concrete counters, built-in storage | 40-60% vs. professional |
| $5,000-$10,000 | Quality appliances, stone surfaces, electrical additions | 30-50% vs. professional |
Allocate your budget using the 40-30-30 rule for optimal results. Spend 40% on appliances and core equipment, 30% on countertops and structural elements, and 30% on finishing touches like lighting and accessories.
Build in a 15-20% contingency fund for unexpected expenses like utility line modifications or permit fees. We’ve found that most DIY outdoor kitchen projects encounter at least one surprise cost during installation.
Research financing options if your ideal design exceeds your immediate budget. Many home improvement stores offer seasonal promotions with 0% interest for 12-24 months on outdoor kitchen purchases over $1,000.
| # | Preview | Product | Price | |
|---|---|---|---|---|
| 1 |

|
The Wild & Free Garden: Transform Your Outdoor Space with Found Materials, Community Sharing, and... |
$23.55 |
Buy on Amazon |
| 2 |
|
Straw Bale Gardens Complete | $14.42 | Buy on Amazon |
Last update on 2026-02-27 / Affiliate links / Images from Amazon Product Advertising API
Choose Affordable Countertop Materials
 1")
We’ve found that selecting the right countertop material can make or break your outdoor kitchen budget. Smart material choices let you achieve stunning results while keeping costs manageable.
Concrete Countertops for DIY Enthusiasts
Concrete stands out as our top recommendation for budget-conscious DIY builders who want customizable outdoor countertops. We can pour and shape concrete on-site to fit any space and design preference, making it incredibly versatile for unique layouts. Weather-resistant properties make concrete an excellent choice for outdoor environments, while its durability ensures years of reliable service.
Customization options with concrete include adding stains or aggregates to mimic expensive surfaces like granite or marble. Many DIY enthusiasts successfully build concrete countertops around grills and sinks using simple tools, saving important costs compared to purchasing pre-made stone surfaces. We’ve seen homeowners achieve professional-looking results with basic concrete mixing and finishing techniques.
Tile Options That Mimic Expensive Stone
Ceramic and porcelain tiles offer the perfect solution for achieving luxury stone aesthetics at a fraction of the cost. We can choose from countless colors and patterns that convincingly replicate marble, granite, slate, and other premium materials. Proper sealing and grout selection ensure these tiles withstand outdoor weather conditions while maintaining their appearance.
Tiling projects remain manageable for most DIY skill levels, making them budget-wise choices for outdoor kitchen countertops. Installation costs stay low when we handle the work ourselves, and replacement becomes simple if individual tiles ever need attention. We recommend selecting tiles with slip-resistant surfaces for safety around outdoor cooking areas.
Butcher Block for a Rustic Appeal
Butcher block countertops provide an inexpensive alternative that adds warmth and rustic charm to outdoor cooking spaces. We can install these wood surfaces relatively easily, making them attractive options for budget-conscious homeowners. Proper sealing protects butcher block against moisture and outdoor elements, extending its lifespan significantly.
Covered or semi-covered outdoor kitchen areas work best for butcher block installations where weather exposure stays limited. We’ve found that regular maintenance keeps these surfaces looking beautiful while preserving their functionality. Cost savings with butcher block often exceed 50% compared to natural stone alternatives, making them excellent choices for tight budgets.
Select Budget-Conscious Cooking Appliances
 2")
Once you’ve established your layout and chosen your countertops, the next crucial step involves selecting appliances that deliver exceptional performance without draining your budget. We’ll explore three standout options that maximize your cooking capabilities while keeping costs manageable.
Portable Gas Grills as Your Main Cooking Station
Portable gas grills represent the smartest investment for budget-conscious outdoor kitchen builders. These versatile units offer professional-level heat control and ample cooking space even though their compact design. We recommend models that provide at least 400 square inches of cooking surface to accommodate typical family meals and small gatherings.
Flexibility becomes your biggest advantage with portable gas grills since you can easily relocate them based on weather conditions or entertaining needs. Storage proves effortless during off-seasons, protecting your investment from harsh weather elements. Many homeowners discover that these units deliver restaurant-quality results at a fraction of built-in grill costs.
Cost effectiveness shines when you consider that quality portable gas grills start around $200 to $500, compared to $2,000+ for permanent installations. Setup requires no professional installation or utility connections, eliminating contractor fees entirely.
Electric Griddles for Versatile Meal Prep
Electric griddles transform your outdoor cooking capabilities by expanding meal options beyond traditional grilling. These budget-friendly appliances excel at preparing breakfast items like pancakes and eggs, grilled sandwiches, vegetables, and even stir-fry dishes. We find them particularly valuable for feeding larger groups efficiently.
Versatility stands out as the primary benefit since electric griddles handle multiple cooking techniques on one surface. Temperature control remains consistent across the entire cooking area, ensuring even results every time. Cleanup becomes remarkably simple with non-stick surfaces and removable drip trays.
Affordability makes them accessible to virtually any outdoor kitchen budget, with quality models available for $100 to $300. Power requirements are minimal, needing only a standard electrical outlet rather than dedicated gas lines or special installations.
DIY Pizza Oven Using Brick or Stone
Building a DIY pizza oven using brick or stone materials creates an impressive focal point while maintaining budget-friendly costs. This project requires basic masonry skills and inexpensive materials like fire bricks, sand, and mortar. We estimate total material costs between $300 to $600 for a functional pizza oven.
Construction involves layering fire bricks in a dome shape over a sand base, creating an insulated cooking chamber that reaches temperatures exceeding 800°F. The thermal mass retains heat for hours, allowing you to cook multiple items sequentially. Results include authentic wood-fired pizza, artisan bread, and roasted vegetables with unmatched flavor.
Long-term value emerges through years of entertaining capabilities and the unique character it adds to your outdoor space. Unlike expensive built-in ovens costing thousands, this DIY approach delivers similar functionality through weekend project investment rather than major financial commitment.
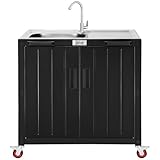
Create Functional Storage Solutions
 3")
We’ll maximize your outdoor kitchen’s usability by incorporating efficient storage options that deliver both practicality and affordability.
Repurpose Indoor Cabinets for Outdoor Use
Repurposing old indoor kitchen cabinets offers one of the most cost-effective methods for outdoor storage. We recommend refinishing or sealing these cabinets to resist moisture and weather damage, transforming them into stylish functional storage without the expense of purchasing new outdoor-exact cabinetry. These repurposed units add character to your design while blending seamlessly into your outdoor kitchen aesthetic. Sealing wooden cabinets with marine-grade polyurethane creates a protective barrier that withstands outdoor conditions. We’ve found that adding new hardware like stainless steel handles completes the transformation while maintaining your budget constraints.
Build Open Shelving with Reclaimed Wood
Open shelving provides a budget-friendly alternative to full cabinetry while making frequently used items easily accessible. We suggest constructing shelving from reclaimed wood or pallets, which you can often source for free or at minimal cost. This approach brings rustic charm to your kitchen while supporting eco-friendly practices that reduce waste. Floating shelf designs attach directly to outdoor walls, creating perfect storage for dishes, utensils, or decorative items. Reclaimed wood naturally weathers beautifully, developing a unique patina over time that enhances your outdoor space’s visual appeal.
Use Weather-Resistant Storage Containers
Weather-resistant storage containers protect your utensils, gadgets, and supplies from harsh outdoor elements. We recommend investing in metal bins, sealed plastic tubs, or vintage trunks that provide flexible storage answers you can move and rearrange easily. Selecting containers with tight sealing mechanisms keeps your items dry and organized while contributing to your outdoor kitchen’s overall aesthetic. Stackable options maximize vertical space utilization, especially important in smaller outdoor areas. We’ve discovered that choosing containers in neutral colors allows them to complement various design styles while maintaining functionality throughout different seasons.


Last update on 2026-02-27 / Affiliate links / Images from Amazon Product Advertising API
Design Your Outdoor Kitchen Island
 4")
An outdoor kitchen island transforms your backyard cooking space into a central hub for food preparation and socializing. We’ll show you three budget-friendly approaches that deliver maximum functionality without very costly.
Construct a Simple Frame with Cinder Blocks
Cinder blocks offer the most economical foundation for building your outdoor kitchen island base. These sturdy concrete blocks cost significantly less than custom cabinetry or stonework while providing excellent durability in outdoor conditions. Stack them easily to create your desired height and width, then secure with construction adhesive for stability.
Finish your cinder block frame with affordable materials like stucco, tile, or leave it exposed for a modern industrial look. We recommend applying a concrete sealer to protect against moisture and staining. This construction method typically costs 60-70% less than hiring contractors for custom built-in islands.
Top your frame with budget-friendly countertop options such as concrete, tile, or reclaimed wood. Concrete countertops work particularly well since you can pour and finish them yourself for under $200 in materials.
Add Rolling Carts for Mobile Prep Space
Rolling carts provide flexible preparation surfaces that adapt to your cooking needs without permanent installation costs. Look for weather-resistant carts with stainless steel or powder-coated finishes that withstand outdoor elements. Many indoor kitchen carts work outdoors when treated with appropriate sealers.
Position multiple carts around your main island to create dedicated zones for different tasks like food prep, serving, and storage. We suggest choosing carts with multiple shelves to maximize vertical storage space for utensils, spices, and cooking supplies.
Move carts easily when entertaining large groups or store them during winter months to extend their lifespan. This mobility makes them perfect for small patios or multi-use outdoor spaces where permanent fixtures aren’t practical.
Incorporate a Bar Height Eating Area
Bar height eating areas attached to your kitchen island encourage social interaction while keeping construction costs minimal. Design your island at 42 inches high to accommodate standard bar stools, which creates a natural gathering spot during food preparation.
Use affordable seating options like repurposed wooden crates with cushions, thrift store bar stools, or DIY pallet furniture. We’ve found that mixing different seating styles creates visual interest while keeping costs under $100 for four seats.
Extend your countertop 12-15 inches beyond the island base to provide comfortable knee room for diners. This overhang also creates additional workspace for plating and serving without requiring extra materials or construction.


Last update on 2026-02-27 / Affiliate links / Images from Amazon Product Advertising API
Install Cost-Effective Lighting Options
 5")
Smart outdoor kitchen lighting transforms your cooking space from daytime functional to evening magical. We’ll explore three affordable lighting answers that deliver maximum impact without straining your budget.
String Lights for Ambient Evening Atmosphere
String lights create the perfect warm ambiance for evening gatherings while staying incredibly budget friendly. These versatile fixtures instantly transform any outdoor kitchen into a cozy entertainment hub that welcomes friends and family. We recommend installing them along pergola beams, fence lines, or between posts to establish defined cooking and dining zones.
Edison bulb string lights offer vintage charm at modern prices, typically costing $15 to $30 for a 25 foot strand. LED versions consume 80% less energy than traditional incandescent bulbs while lasting up to 25,000 hours longer. Weather resistant options withstand rain, wind, and temperature fluctuations without compromising performance or safety.
Installation requires minimal tools and zero electrical expertise. Simply secure mounting hooks every 8 to 10 feet along your desired path, then drape the lights with gentle curves for visual appeal. Multiple strands can be connected together to cover larger areas, creating layers of illumination that enhance both functionality and atmosphere.
Solar-Powered LED Fixtures
Solar powered LED fixtures eliminate electricity costs while providing reliable illumination for your outdoor kitchen workspace. These eco friendly options charge during daylight hours and automatically activate at dusk, delivering 6 to 8 hours of continuous lighting. We’ve found that modern solar LEDs produce brightness levels comparable to traditional wired fixtures.
Pathway solar lights guide traffic flow around your outdoor kitchen for $5 to $15 per fixture. Solar spotlights illuminate exact work areas like grills or prep stations, ranging from $20 to $40 each. String style solar LEDs combine the ambiance benefits of traditional string lights with zero operating costs.
Quality solar fixtures feature weather resistant construction and replaceable batteries for extended lifespan. Position them in locations that receive 6 to 8 hours of direct sunlight daily for optimal performance. Motion sensor solar lights add security while conserving battery power, activating only when movement is detected.
Battery-Operated Under-Cabinet Lighting
Battery operated under cabinet lights improve task lighting for countertops and prep zones without requiring electrical work. These convenient fixtures install in minutes using adhesive strips or magnetic mounts, making them perfect for renters or DIY beginners. We recommend LED puck lights for focused illumination or LED strip lights for broader coverage.
Wireless puck lights cost $10 to $25 each and provide concentrated light for exact tasks like food preparation or grilling. Battery powered LED strips range from $15 to $40 per section, offering continuous illumination along countertop edges. Motion activated versions extend battery life by operating only when needed.
Modern battery operated fixtures use energy efficient LEDs that operate for 50 to 100 hours on a single set of batteries. Rechargeable options eliminate ongoing battery costs while maintaining consistent brightness levels. Remote control features allow you to adjust brightness or turn lights on and off from across your outdoor kitchen space.


Last update on 2026-02-27 / Affiliate links / Images from Amazon Product Advertising API
Add Weather Protection Elements
 6")
Weather protection transforms your outdoor kitchen from a fair-weather cooking space into a year-round entertaining area. We’ll explore three affordable approaches that shield your investment from the elements while maintaining style and functionality.
Build a Simple Pergola or Roof Structure
Pergolas deliver the perfect balance of openness and protection with their slatted roof design that filters sunlight while maintaining an airy atmosphere. We can enhance these structures with transparent waterproof covers to create rain protection without sacrificing the natural light that makes outdoor cooking so appealing.
Alternative roof structures like pavilions or gazebos provide complete shade coverage through their pitched or octagonal designs. These wooden structures combine rustic charm with comprehensive weather protection, making them ideal for homeowners who prioritize full coverage over partial shade.
Metal roofs with strategic overhangs offer superior durability against wind and rain while deflecting water away from your cooking surfaces. This approach works particularly well for those seeking long-term protection that requires minimal maintenance once installed.
Install Outdoor Curtains or Screens
Outdoor curtains create versatile barriers that block wind, sun, and insects while adding a decorative element to your kitchen space. We recommend choosing weather-resistant fabrics that can withstand outdoor conditions while providing the flexibility to open or close sections based on current weather.
Privacy screens serve dual purposes by offering weather protection and creating intimate cooking zones within larger outdoor spaces. These installations can be permanent or removable, allowing you to adapt your kitchen layout for different entertaining needs throughout the seasons.
Use Portable Umbrellas for Flexible Coverage
Large adjustable umbrellas provide on-demand shade that can be repositioned or stored as weather conditions change. We find this solution particularly cost-effective for homeowners who want protection flexibility without permanent structural commitments.
Market-style umbrellas with tilting mechanisms offer superior coverage angles that follow the sun’s path throughout the day. These portable answers protect against both direct sunlight and light rain while requiring minimal investment compared to permanent structures.


Last update on 2026-02-27 / Affiliate links / Images from Amazon Product Advertising API
Incorporate Smart Water and Utility Solutions
 7")
We’ve covered the foundation elements of our budget outdoor kitchen, and now it’s time to tackle the utilities that’ll make our space truly functional. Smart water and electrical answers don’t have to expensive when we focus on simple, effective approaches.
Install a Basic Outdoor Sink Setup
Adding a sink transforms our outdoor kitchen from a simple grilling station into a complete cooking workspace. We can create a mini modular unit comprising sink, faucet, countertop, and shelves using repurposed materials or affordable pre-made components. Connection typically involves attaching to our garden hose or existing water line, making installation straightforward for most DIY enthusiasts.
Building our sink setup doesn’t require professional plumbing skills when we use hose connections. We’ll need a basic outdoor sink that can handle food prep and cleanup tasks efficiently. Repurposed workbenches or simple countertops provide the perfect base for mounting our sink while keeping costs minimal.
Create Drainage with Gravel and PVC Pipes
Proper drainage prevents standing water and protects our outdoor kitchen investment from damage. We can install an inexpensive drainage solution using gravel beds beneath the sink area coupled with PVC piping. This system directs wastewater safely away from both our kitchen and yard areas.
Laying PVC pipes in gravel beds creates effective drainage without expensive professional installation. We’ll dig a shallow trench leading away from our sink area and fill it with gravel before running our drainage pipe. This approach prevents water accumulation while maintaining proper flow away from our cooking space.
Add Electrical Outlets with GFCI Protection
Outdoor electrical outlets fitted with GFCI protection are essential for safely powering our appliances and equipment. GFCI outlets protect against electric shocks due to moisture exposure, making them crucial for outdoor kitchen safety. We can hire an affordable electrician for this installation or tackle it ourselves if we’re comfortable with basic electrical work.
Installing GFCI outlets ensures we can power griddles, blenders, and other electric appliances safely. We’ll need outlets positioned conveniently near our prep areas while maintaining safe distances from water sources. This electrical foundation supports our cooking needs while meeting safety requirements for outdoor use.
Enhance Your Space with Affordable Decor
 8")
Once you’ve established your outdoor kitchen’s functional elements, decorative touches transform the space into an inviting entertainment area. Smart decor choices create atmosphere and personality without straining your budget.
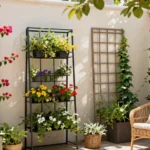
Use Potted Plants for Natural Ambiance
Potted plants offer the most cost-effective way to soften hardscape elements and bring life to your outdoor cooking space. We recommend clustering various sized containers around your kitchen’s perimeter to create natural boundaries and visual interest. Herbs like basil, rosemary, and thyme serve dual purposes by providing fresh ingredients while adding fragrant greenery to your setup.
Large planters work well as corner anchors near seating areas, while smaller pots can line countertops or shelving units. Succulents and drought-resistant plants require minimal maintenance and thrive in most outdoor conditions. You’ll find that grouping plants at different heights creates depth and makes your kitchen feel more integrated with the surrounding industry.
Add Colorful Outdoor Rugs and Cushions
Vibrant textiles instantly make outdoor cooking areas feel more comfortable and inviting for guests. We suggest choosing weather-resistant rugs in bold patterns that can withstand foot traffic and occasional spills. Outdoor cushions in coordinating colors provide seating comfort while protecting furniture from wear.
These fabric elements allow you to change your kitchen’s look seasonally without major expense. Bright colors create energy during summer gatherings, while warmer tones work perfectly for fall entertaining. You can easily swap these accessories as trends change or when you want to refresh your space’s appearance.
Display Cooking Utensils as Functional Art
Transforming cooking tools into decorative displays creates both visual appeal and practical convenience in your outdoor kitchen. We recommend mounting spatulas, tongs, and serving spoons on attractive racks or hooks near your cooking area. This approach keeps essential tools within easy reach while adding personality to blank wall spaces.
Copper or stainless steel utensils create particularly striking displays when arranged thoughtfully on wooden boards or metal grids. You’ll appreciate having frequently used items visible and accessible during meal preparation. This functional art concept eliminates the need for additional storage while showcasing your outdoor cooking passion to guests.


Last update on 2026-02-27 / Affiliate links / Images from Amazon Product Advertising API
Maintain Your Budget Outdoor Kitchen
 9")
We’ve built our dream outdoor kitchen without very costly, and now it’s time to protect that investment through smart maintenance practices.
Protect Surfaces with Weatherproof Covers
Weatherproof covers extend the lifespan of outdoor kitchen appliances and counters by shielding them from weather damage. We recommend investing in high-quality covers specifically designed for outdoor kitchen equipment like grills, pizza ovens, and prep surfaces. Custom-fitted covers provide the best protection since they prevent water from pooling and reduce exposure to UV rays that can fade surfaces over time.
Covering countertops during harsh weather prevents costly repairs and preserves their appearance. Materials like concrete, ceramic tiles, and butcher block surfaces all benefit from protective covers during storms or extended periods of non-use. We suggest using waterproof tarps or specialized countertop covers that secure tightly to prevent wind damage.
Appliance covers reduce repair needs and maintain equipment functionality throughout the seasons. Portable gas grills, electric griddles, and other cooking equipment stay in optimal condition when properly covered between uses. Quality covers cost a fraction of replacement appliances and help us avoid unexpected maintenance expenses.
Clean and Store Equipment Properly
Routine cleaning after each use prevents buildup that can damage equipment and surfaces. We clean our grills, utensils, and prep areas immediately after cooking to remove grease, food particles, and moisture that attract pests or cause corrosion. Simple dish soap and warm water work effectively for most outdoor kitchen surfaces and tools.
Proper storage protects equipment from weather exposure and extends its useful life. We store portable appliances like electric griddles and smaller cooking tools in weather-resistant containers or covered storage areas during off-seasons. Metal bins and sealed plastic tubs keep utensils dry and organized while protecting them from temperature fluctuations.
Seasoning and oiling surfaces maintains their protective barriers and prevents deterioration. Butcher block countertops need regular oil treatments to resist moisture damage, while cast iron cooking surfaces require seasoning to prevent rust. We schedule these maintenance tasks monthly during peak outdoor cooking season and quarterly during slower periods.
Schedule Regular Maintenance Tasks
Periodic inspections help us identify potential problems before they become costly repairs. We examine our outdoor kitchen monthly for loose fixtures, cracked surfaces, or signs of wear that need attention. Early detection of issues like loose cabinet hardware or small concrete cracks saves money compared to major repairs later.
Tightening fixtures and hardware prevents structural problems that can compromise safety. We check and tighten bolts on our DIY pizza oven, cabinet hinges, and island construction every few months using basic tools. This simple maintenance keeps our modular outdoor kitchen components secure and functioning properly.
Resealing countertops and surfaces maintains their weather resistance and appearance. Concrete countertops benefit from annual sealing to prevent water absorption and staining, while tile grout needs periodic touch-ups to maintain waterproof barriers. We schedule these tasks during spring preparation or fall winterization to keep our outdoor kitchen looking fresh and protected year-round.


Last update on 2026-02-27 / Affiliate links / Images from Amazon Product Advertising API
Conclusion
Creating your dream outdoor kitchen doesn’t require very costly when you apply these strategic approaches. We’ve shown you how thoughtful planning smart material choices and creative answers can deliver impressive results within any budget range.
The key lies in prioritizing what matters most to your cooking style and gradually building your space over time. Whether you’re starting with a simple portable grill setup or investing in a complete island configuration these budget-friendly strategies ensure you’ll get maximum value from every dollar spent.
Your outdoor kitchen journey begins with taking that first step. Start small focus on functionality and let your space evolve naturally as your needs and budget allow. With proper maintenance and care your affordable outdoor kitchen will provide years of memorable meals and entertaining experiences.
Frequently Asked Questions
Can I build an outdoor kitchen on a small budget?
Yes, you can create an impressive outdoor kitchen on any budget, from a few hundred to a couple thousand dollars. The key is smart planning, prioritizing essential elements, and finding affordable alternatives like repurposing materials and selecting cost-effective appliances without compromising style or functionality.
What’s the best way to plan my outdoor kitchen layout?
Start by assessing your available space and documenting existing utilities. Consider traffic flow and environmental factors when sketching your layout. Determine your essential cooking needs, prioritize appliances based on your entertaining style, and calculate your typical cooking capacity to create an efficient design.
How should I allocate my outdoor kitchen budget?
Follow the 40-30-30 budgeting rule: 40% for appliances and major equipment, 30% for construction and materials, and 30% for accessories and finishing touches. Always build a 10-15% contingency fund for unexpected expenses and explore financing options if your ideal design exceeds your immediate budget.
What are the most affordable countertop materials for outdoor kitchens?
Concrete countertops are excellent for DIY enthusiasts, offering versatility and durability. Ceramic and porcelain tiles mimic expensive stone at lower costs. Butcher block countertops provide rustic appeal and cost-effectiveness, especially in covered areas. All these options deliver stunning results while keeping costs manageable.
Which budget-friendly cooking appliances should I prioritize?
Start with portable gas grills for professional-level heat control at affordable prices. Electric griddles offer versatility for various dishes. Consider building a DIY pizza oven using brick or stone for an impressive focal point. These options provide excellent cooking capabilities without breaking your budget.
How can I add storage without spending too much?
Repurpose old indoor kitchen cabinets by refinishing and weatherproofing them. Create open shelving using reclaimed wood or pallets for rustic charm. Use weather-resistant storage containers like metal bins or sealed plastic tubs to protect utensils and supplies while maintaining functionality and style.
What are some affordable ways to create an outdoor kitchen island?
Build a simple frame with cinder blocks and finish with stucco or tile for an economical base. Use rolling carts for mobile prep space without permanent installation costs. Incorporate a bar-height eating area to encourage social interaction while keeping construction minimal and budget-friendly.
How can I add lighting to my outdoor kitchen affordably?
Install string lights for warm ambiance, use solar-powered LED fixtures for eco-friendly illumination, and add battery-operated under-cabinet lighting for improved task lighting. These budget-friendly options provide maximum impact, ensuring you can enjoy your outdoor kitchen both day and night.
What weather protection options work on a budget?
Build simple pergolas or roof structures for partial shade using affordable materials. Install outdoor curtains or screens for versatile barriers against wind and sun. Use portable umbrellas for flexible coverage. These solutions protect your space while maintaining style and functionality year-round.
How do I add water and electrical utilities affordably?
Install a basic outdoor sink using repurposed materials connected to a garden hose or existing water line. Create proper drainage with a gravel and PVC pipe system. Add GFCI-protected electrical outlets for safe appliance operation. These solutions enhance functionality while maintaining safety and budget consciousness.
What maintenance is required for a budget outdoor kitchen?
Use weatherproof covers for appliances and surfaces to extend their lifespan. Perform routine cleaning and proper equipment storage to prevent buildup and weather damage. Schedule regular maintenance tasks like inspections and resealing surfaces to identify issues early and keep your kitchen in optimal condition.