Growing mint at home isn’t just easy—it’s incredibly rewarding. This versatile herb thrives in most conditions and rewards gardeners with fragrant leaves perfect for cooking, teas, and cocktails. Whether you’re a seasoned gardener or just starting out, mint can quickly become your garden’s star performer.
We’ve discovered that with the right growing techniques, you’ll never need to buy mint from the store again. From container planting to prevent spreading, to proper watering schedules that maximize flavor, our tried-and-tested tips will help you cultivate lush, healthy mint plants. Even apartment dwellers with limited space can enjoy fresh mint year-round with our indoor growing strategies.
Selecting the Right Mint Variety for Your Garden
With dozens of mint varieties available, choosing the right one for your garden can significantly impact your growing success and culinary satisfaction.
Understanding Different Mint Types
Peppermint offers a strong, cooling flavor that’s perfect for teas and desserts. Spearmint provides a milder, sweeter taste ideal for cooking and mojitos. Chocolate mint delivers a surprising cocoa undertone that works wonderfully in desserts and hot drinks. Apple mint features fuzzy leaves with a fruity aroma making it excellent for fruit salads and garnishes. Ginger mint combines spicy notes with traditional mint flavors, creating complexity in both sweet and savory dishes. Orange mint brings citrus notes that complement seafood dishes and summery beverages. Water mint thrives in damp conditions and offers a mild flavor profile suitable for subtle applications. Corsican mint grows as a low-growing groundcover with tiny leaves that release intense fragrance when stepped on. Each variety has unique growing habits and space requirements, so consider your available garden space when making your selection.
Choosing Based on Your Climate
Hot, dry climates favor drought-resistant varieties like spearmint and apple mint that can withstand higher temperatures. Cold regions benefit from hardy types such as peppermint and chocolate mint that survive frost and return vigorously each spring. Humid environments create ideal conditions for water mint and orange mint which thrive with consistent moisture. Coastal gardens often succeed with spearmint and ginger mint that tolerate salt spray and variable temperatures. Indoor growing environments work well with compact varieties like Corsican mint or variegated peppermint that don’t require extensive space. Container gardening suits virtually all mint types but particularly benefits from smaller varieties like mountain mint or pennyroyal. Zone consideration should guide your selection, with USDA zones 4-9 supporting most mint varieties while extreme zones may require specialized care. Regional growing calendars affect planting times, with northern areas typically planting mint after the last frost date while southern regions can often grow mint year-round.
Preparing the Perfect Soil for Mint Plants

Creating the right soil environment is crucial for growing vibrant, flavorful mint plants. Mint thrives in exact soil conditions that provide the perfect balance of moisture, nutrients, and drainage.
Ideal Soil Composition
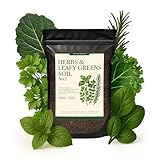
Fertile, moist soil enriched with organic matter forms the foundation for successful mint cultivation. Adding several inches of aged compost significantly improves both the structure and nutrient content of your growing medium. For container gardening, premium potting mixes work exceptionally well, giving your mint plants the moisture retention they need while preventing waterlogging issues. Loamy soil textures offer the best environment for mint roots to expand and access nutrients efficiently. Many gardeners find success using products like Miracle-Gro® Performance Organics® All Purpose In-Ground Soil to enhance native soil conditions. Utah State University Extension specifically recommends amending native soils with compost to improve both fertility and drainage capabilities. Container growers should select soil-based or multi-purpose compost mixes that will help limit mint’s naturally invasive spreading tendencies.
pH Levels That Promote Healthy Mint Growth
Mint plants prefer slightly acidic to neutral soil conditions with an optimal pH range between 6.0 and 7.0. Testing your soil before planting helps identify whether amendments are needed for ideal growth. Soils testing below 6.0 benefit from lime or gypsum additions, particularly if calcium deficiency is present. Alkaline soil conditions should be avoided as they typically reduce nutrient availability and uptake. Variegated mint varieties, such as the attractive pineapple mint, require special attention to pH levels, performing best when soil pH stays within the 6.0-6.5 range. Maintaining proper pH prevents leaf scorch issues, especially when these decorative varieties are grown in full sun locations. We recommend regular soil testing throughout the growing season to ensure continued optimal conditions for your mint plants.


Last update on 2026-02-28 / Affiliate links / Images from Amazon Product Advertising API
Planting Mint: Containers vs. Garden Beds

When it comes to growing mint, choosing the right planting location is crucial for success. We’ve found that this decision significantly impacts how well your mint thrives and whether it becomes a garden asset or a nuisance.
Why Containers Prevent Invasive Spreading
Containers offer excellent control over mint’s aggressive growth habits. The physical barrier of a pot restricts mint’s root system, preventing it from spreading beyond its designated space. Most experienced gardeners recommend containers as the first choice for mint cultivation due to this containment benefit.
Potted mint plants are much easier to manage and maintain, allowing you to relocate them as needed throughout the growing season. Your other garden plants will thank you for keeping mint separate, as they won’t have to compete with its rapidly expanding root system. Container growing also makes harvesting more convenient since you can position the pots near your kitchen or outdoor living spaces for easy access.
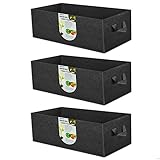
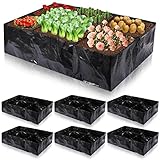
Best Container Types for Mint
Selecting the right container makes a important difference in mint’s growth potential. A pot that’s at least 12 inches in diameter provides adequate space for mint’s root system to develop properly. Good drainage is essential for mint containers, so choose pots with sufficient drainage holes to prevent waterlogging that can lead to root rot.
Quality potting mix forms the foundation for successful container-grown mint. We recommend using a premium potting soil that retains moisture while still allowing excess water to drain away. Terracotta pots work particularly well for mint as they allow soil to breathe, though plastic containers are perfectly suitable if they have proper drainage.
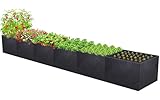
For gardeners who still want to incorporate mint directly into garden beds, using a bottomless bucket or container sunk into the ground offers a smart compromise. This method allows you to enjoy mint among your other plants while still keeping its spreading tendencies under control.
Mint thrives in both full sun and partial shade conditions, making it versatile for various garden locations. Consistent moisture is key—water your mint when the top inch of soil feels dry to the touch. Regular fertilization with water-soluble plant food encourages lush leaf production, while frequent harvesting by pinching off stems stimulates new growth and keeps your plants bushy and productive.


Last update on 2026-02-28 / Affiliate links / Images from Amazon Product Advertising API
Watering Techniques for Thriving Mint Plants

Mint plants require consistent moisture to produce flavorful leaves and maintain vigorous growth. Proper watering is essential for cultivating thriving mint plants that provide abundant harvests throughout the growing season.
Establishing a Proper Watering Schedule
Maintaining the right watering schedule depends on several environmental factors including pot size, climate, and temperature. Young mint plants need more frequent watering as their root systems develop, requiring special attention during the establishment phase. We recommend adjusting your watering frequency based on your exact growing conditions—outdoor plants typically need water once or twice weekly, while indoor plants may require daily watering during hot weather or weekly watering in cooler temperatures.
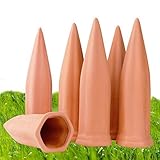
Water mint plants at the base rather than from overhead to prevent fungal diseases that can develop when foliage remains wet. The finger test works perfectly for determining when to water—simply insert your finger about an inch into the soil and water when it feels dry at that depth. Drip irrigation systems provide an excellent way to deliver water directly to the roots, significantly reducing waste and disease risk while ensuring consistent moisture. Adding a layer of mulch around your mint plants helps conserve moisture and suppresses weeds, reducing the frequency of necessary watering.
Signs of Overwatering and Underwatering
Recognizing water-related stress in mint plants allows you to adjust your care routine before permanent damage occurs. Overwatered mint typically displays yellowing leaves and shows signs of root rot as the waterlogged conditions prevent proper oxygen absorption. The plant may paradoxically appear wilted even though the soil is wet, indicating that the roots are suffocating and unable to function properly.
Underwatered mint exhibits clear distress signals through wilting leaves that appear dry and sometimes crispy around the edges. The soil will feel completely dry beyond the surface level, and growth becomes noticeably stunted. Plants suffering from insufficient moisture often develop smaller, less flavorful leaves and become more susceptible to pest infestations. Adjusting your watering routine at the first sign of these symptoms helps ensure your mint remains healthy and productive throughout its growing season.


Last update on 2026-02-28 / Affiliate links / Images from Amazon Product Advertising API
Sunlight Requirements for Optimal Mint Growth

Mint plants require the right balance of sunlight for optimal growth and flavor development. These versatile herbs can adapt to various light conditions, but knowing their exact needs will help you cultivate thriving mint plants.
Finding the Right Balance of Sun and Shade
Mint thrives best with 4-6 hours of direct sunlight daily, though it adapts well to partial shade environments receiving just 2-5 hours of sun. Full sun exposure (6-8 hours) promotes vigorous growth and intense flavor, provided you maintain consistent soil moisture. Growing mint outdoors in hot climates works best when you position plants to receive morning sun with afternoon shade, protecting them from intense heat. We recommend using well-draining, compost-rich soil to help retain essential moisture while preventing root rot. Indoor mint plants flourish near south-facing windows or under full-spectrum grow lights running for 14-16 hours daily. Different mint varieties have exact light preferences—spearmint and peppermint tolerate full sun conditions well, while specialty varieties like pineapple, orange, and chocolate mints generally perform better with some afternoon shade.
Seasonal Light Adjustments
Spring and summer bring peak growing conditions for mint, requiring extra attention to moisture levels during these high-light periods. Apply a layer of mulch around your mint plants to reduce water evaporation and maintain consistent soil dampness. During periods of extreme heat, relocate potted mint to shadier locations or install shade cloth to prevent leaf scorch and excessive drying. Winter growing requires different strategies, especially for indoor plants that need bright, indirect light. Supplement insufficient natural winter light with grow lights to keep your mint productive year-round. Soil quality significantly impacts how mint responds to various light conditions—maintain moist, fertile soil with a slightly acidic pH between 6.0 and 7.0 for optimal results. Space outdoor mint plants 18-24 inches apart, and consider using containers or garden edging to control their spreading habit. Watering practices should complement your light management, keeping soil consistently damp but never waterlogged regardless of sun exposure.
Pruning Strategies to Encourage Bushy Mint Plants

Regular pruning is the key to transforming leggy mint plants into lush, bushy herbs perfect for continuous harvesting. Strategic trimming encourages lateral growth and creates denser foliage for better yields.
Start pruning when your mint reaches 4-6 inches tall by pinching off the stem tips just above leaf nodes. This simple technique stimulates the plant to produce side shoots instead of just growing taller. For overgrown plants, don’t hesitate to trim back by one-third of their height to maintain a compact, productive shape.
Develop a weekly pruning routine during active growth periods to prioritize leafy expansion over vertical stems. Focus your trimming efforts on the top growth to encourage the plant to fill out horizontally rather than reaching upward. Your mint will respond to each trim with new branching growth, creating a fuller plant with more harvestable leaves.
When and How to Harvest Mint Leaves
Harvest mint leaves before flowering occurs in mid-growing season to capture their peak flavor. Morning harvesting yields the best results as this is when the leaves contain their highest concentration of essential oils. Use sharp, clean shears to cut stems approximately 1-2 inches above the soil line for optimal regrowth.
Avoid overharvesting by never removing more than one-third of the plant at once, which could stress your mint and slow future production. For a continuous supply throughout the growing season, plan to harvest your mint 3-4 times, allowing 2-3 weeks between cuttings for the plant to recover and produce new growth.
The harvesting process itself acts as a form of productive pruning that helps maintain the plant’s bushy habit. Selective cutting of longer stems encourages the plant to produce more side shoots filled with tender new leaves for future harvests.
Preventing Flowering to Maximize Leaf Production
Regular harvesting naturally delays bolting by redirecting the plant’s energy from flower production back to leaf growth. Monitor your mint plants closely and pinch off flower buds immediately when they appear to maintain leaf production and flavor intensity.
Maintain consistent soil moisture and provide partial shade during intense heat periods to reduce stress-induced flowering. Environmental stress often triggers mint to flower prematurely, so creating optimal growing conditions helps keep plants in their vegetative state longer.
If flowering begins even though your preventative efforts, cut the flowering stems back by half to rejuvenate growth. This decisive pruning redirects the plant’s resources away from seed production and back to developing the flavorful foliage that makes mint so valuable in the garden. Your quick action will ensure continued leaf production throughout the growing season rather than letting the plant complete its flowering cycle.
Managing Common Mint Pests and Diseases

Even the hardiest mint plants can fall victim to certain pests and diseases. Knowing how to identify and address these issues will help maintain a thriving mint garden without resorting to harsh chemicals.
Natural Remedies for Pest Control
Aphids and spider mites often target mint plants, clustering on stems and leaves to suck out plant juices. We recommend spraying affected plants with a strong stream of water to dislodge these pests, or applying insecticidal soap for more persistent infestations. Introducing ladybugs to your garden can provide ongoing protection as they naturally prey on aphids.
Neem oil serves as an excellent deterrent against multiple mint pests when applied in a diluted solution weekly. For a homemade alternative, garlic or chili spray can be equally effective—simply blend garlic or chili peppers with water, strain the mixture, and spray directly onto mint leaves.
Strategic companion planting improves your mint’s natural defenses against invaders. Chives and marigolds planted nearby will help repel common mint pests while adding diversity to your garden. For controlling whiteflies, yellow sticky traps placed near mint plants can capture these flying pests before they establish colonies.
Mint root borers represent a more serious threat that requires immediate attention. We advise removing and destroying any infected plants completely to prevent the pest from spreading throughout your mint patch.
Identifying and Treating Mint Diseases
Mint rust manifests as distinctive orange pustules on the undersides of leaves, eventually causing defoliation if left untreated. Remove infected leaves promptly and avoid overhead watering since moisture on foliage creates favorable conditions for this fungal disease.
Powdery mildew appears as white powdery patches on mint leaves, typically in humid conditions with poor air circulation. A simple baking soda solution (1 teaspoon baking soda mixed with 1 quart of water) sprayed on affected areas can help manage this common fungal problem.
Verticillium wilt causes mint leaves to yellow and eventually die, starting from the bottom of the plant. Unfortunately, plants infected with this soil-borne fungus cannot be saved and must be destroyed to prevent further infection. Crop rotation becomes essential after an outbreak.
Prevention remains the most effective strategy against mint diseases. Ensuring proper spacing between plants promotes good airflow and reduces humidity around foliage. Using only disease-free cuttings when propagating new plants helps maintain a healthy mint garden. Regular trimming of dormant plants in spring and fall removes dead growth where disease organisms might overwinter.
Propagating Mint: Expanding Your Herb Garden

Growing more mint from your existing plants is both economical and rewarding. We can easily multiply our mint collection through simple propagation techniques that require minimal effort and resources.
Propagation Through Cuttings
Mint cuttings offer one of the simplest ways to expand your herb garden with virtually no cost. Take fresh, healthy stems from the top growth of your mint plants, selecting pieces approximately 8 cm (3 inches) long for optimal results. Carefully remove all lower leaves from each stem, making a clean cut just below a leaf node to encourage robust root development.
Place your prepared cuttings in a glass of clean water, ensuring the leaf nodes are submerged while keeping the remaining leaves above the water line. Fresh water every 3 days creates the ideal environment for root formation and prevents bacterial growth. Watch for new roots to emerge within 10 to 14 days, indicating your cuttings are ready for transplanting into soil.
This water propagation method works year-round, though spring and summer generally yield faster results due to warmer temperatures. Your new mint plants will establish quickly once transplanted, giving you additional plants to enjoy or share with friends and family.
Division Techniques for Established Plants
Division provides an excellent propagation method for mature mint plants that have developed extensive root systems. Select healthy sections of your established mint plant, ensuring each division contains at least three to four strong roots for successful transplanting.
Create planting holes in fresh potting soil using a dibber or chopstick, making them deep enough to accommodate the roots without bending. Gently position each division in its new home, taking care to minimize root disturbance that could shock the plant. Water thoroughly after transplanting to help settle the soil around the roots and provide necessary moisture.
Place newly divided plants in indirect light initially, allowing them time to adjust to their new containers before exposing them to direct sunlight. Move your divisions outdoors when frost danger has passed, selecting either a semi-shaded location or a sunny windowsill depending on your climate. Divisions typically establish themselves faster than cuttings and will quickly develop into full, productive mint plants that mirror the characteristics of the parent plant.


Last update on 2026-02-28 / Affiliate links / Images from Amazon Product Advertising API
Harvesting and Preserving Your Mint Bounty

Turning your thriving mint plants into a usable culinary treasure requires proper harvesting and storage techniques. With the right approach, you can enjoy your mint’s vibrant flavor year-round.
Best Practices for Harvesting Mint
Timing plays a crucial role when harvesting mint for maximum flavor. We recommend picking mint leaves just before the plant blooms, as this is when oils are most concentrated and flavors are at their peak. Morning harvests yield the best results since essential oils are most abundant before the day’s heat sets in. Regular snipping of flower buds encourages more leaf growth, ensuring your plants remain productive throughout the growing season. You can harvest up to one-third of the plant at once without causing stress – simply cut stems about 2-3 inches from the soil using clean, sharp scissors. Fresh mint leaves should be bright green without any discoloration, indicating they’re ready for culinary use or preservation.
Drying and Freezing Methods for Long-Term Storage
Preserving mint extends its usefulness well beyond the growing season. For drying mint, gather small bunches of stems and tie them together at the base with twine. Hang these bundles upside down in a warm, dry, dark location until the leaves become completely brittle. Once dried, remove leaves from stems and store them in airtight containers away from direct light to maintain flavor for up to a year. Freezing offers another excellent preservation method – chop fresh mint leaves and pack them into ice cube trays, then fill with water. These frozen mint cubes work perfectly for dropping into teas, soups, and sauces throughout winter months. Alternatively, mint leaves can be frozen flat in freezer bags for easy portioning later. Both methods lock in the fresh flavor of your mint bounty, ensuring you can enjoy your garden’s productivity year-round.
Troubleshooting Common Mint Growing Problems
Growing mint at home is a rewarding experience that brings fresh flavor to your kitchen year-round. By containing mint’s enthusiasm in pots selecting the right variety for your climate and maintaining proper moisture levels you’ll enjoy abundant harvests without the headaches.
Remember that regular pruning encourages bushier growth while prompt harvesting before flowering ensures the most flavorful leaves. Don’t worry about mistakes along the way – mint is incredibly forgiving and responds well to course corrections.
Whether you’re growing mint for culinary uses herbal teas or simply for its refreshing aroma we hope these tips empower you to cultivate this versatile herb successfully. Start your mint garden today and discover the joy of snipping fresh leaves whenever inspiration strikes!
Frequently Asked Questions
Is mint easy to grow for beginners?
Yes, mint is one of the easiest herbs for beginners to grow. It’s resilient, adaptable, and grows vigorously in various conditions. Mint thrives in containers, which helps control its spreading habit. With basic care including regular watering and occasional pruning, beginners can successfully grow mint both indoors and outdoors with minimal gardening experience.
What type of mint is best for cooking?
Spearmint is generally considered the best all-purpose culinary mint. It offers a balanced, sweet flavor that complements both savory dishes and desserts. Peppermint, with its stronger menthol content, works well in desserts and teas. Chocolate mint adds a subtle cocoa hint to desserts, while apple and orange mint varieties provide unique fruity notes that pair well with specific dishes.
Can mint be grown indoors year-round?
Absolutely! Mint grows well indoors year-round with proper conditions. Place your mint near a south-facing window that receives 4-6 hours of sunlight daily, or supplement with grow lights. Use well-draining potting soil, water consistently to keep soil moist but not soggy, and occasionally feed with diluted organic fertilizer. Regular pruning encourages bushy growth and continuous leaf production.
How often should I water my mint plants?
Water mint when the top inch of soil feels dry. Typically, this means watering every 3-4 days for container plants and weekly for garden plants, adjusting for weather conditions. Mint prefers consistently moist soil but not waterlogged conditions. During hot weather, increase watering frequency. Reduce watering in winter for dormant outdoor plants. Always water at the base to prevent leaf diseases.
How do I stop mint from taking over my garden?
Plant mint in containers rather than directly in garden beds. If you prefer ground planting, sink a bottomless container at least 12 inches deep into the soil to act as a barrier against spreading roots. Regularly trim back runners and remove flower heads before they seed. Harvest frequently to control growth. Consider planting mint in isolated areas where spreading won’t affect other plants.
What are the best containers for growing mint?
The best containers for mint are at least 12 inches in diameter with good drainage holes. Terracotta pots work well as they allow excess moisture to evaporate, helping prevent root rot. Plastic containers that retain moisture are also suitable, especially in hot climates. Choose containers with depth to accommodate mint’s spreading root system. Self-watering containers can be beneficial for maintaining consistent moisture levels.
How do I harvest mint without killing the plant?
Harvest mint by cutting stems 1-2 inches above the soil using clean scissors or pruning shears. Never remove more than one-third of the plant at once. Begin harvesting when plants reach 4-6 inches tall. Regular harvesting actually encourages bushier growth and more leaves. Morning harvesting yields the highest essential oil content. Avoid harvesting stressed or wilted plants.
How can I preserve mint for later use?
Preserve mint by drying or freezing. To dry, hang small bundles upside down in a warm, dark place until leaves become brittle, then store in airtight containers. For freezing, chop fresh leaves and pack into ice cube trays with water or olive oil, or place whole leaves in freezer bags. You can also make mint-infused simple syrup or mint extract for long-term preservation of flavor.
What are common pests that affect mint plants?
Common mint pests include aphids, spider mites, flea beetles, and mint root borers. Aphids and spider mites cause yellowing, curling leaves and can be treated with insecticidal soap or neem oil. Flea beetles create small holes in leaves and can be deterred with diatomaceous earth. Mint root borers are the most serious pest, causing wilting and plant death, requiring immediate removal of infected plants.
Can you grow different varieties of mint together?
It’s not recommended to grow different mint varieties close together in garden beds as they can cross-pollinate, potentially altering flavors. If you want multiple varieties, grow each in separate containers at least several feet apart. This method also helps control mint’s aggressive spreading habit and makes it easier to identify different varieties for specific culinary uses.