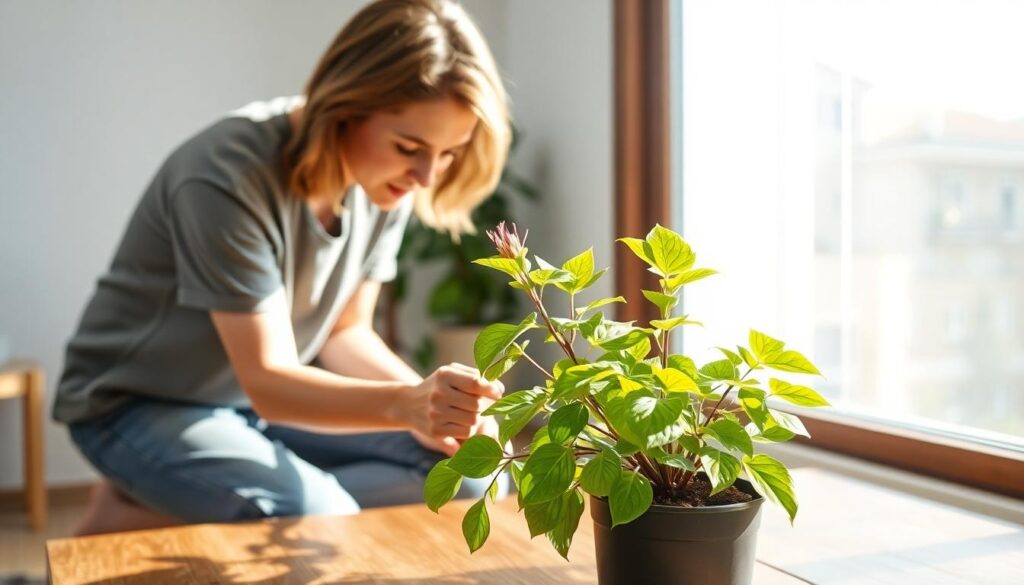
Are your beloved plants looking less vibrant than usual? Brown leaves and wilting stems can be alarming signs that something’s wrong with your green friends. Don’t worry—we’ve got answers to bring those plants back to life!
We’ll help you diagnose and fix plant browning issues that commonly plague indoor and outdoor plants. From overwatering to nutrient deficiencies, pest infestations to improper lighting, there are several culprits behind those crispy edges and spotty leaves. With our expert tips and simple remedies, you’ll learn how to identify the exact problem affecting your plants and take effective action.
Understanding Why Plant Leaves Turn Brown
When your plant’s leaves start turning brown, it’s a sign that something isn’t right in your plant’s environment. Brown leaves are essentially your plant’s way of communicating distress, and understanding the underlying causes is the first step toward recovery.
Common Causes of Plant Browning
Water-related issues are frequently the culprit behind browning plants. Overwatering creates soggy soil that suffocates roots, preventing them from absorbing oxygen and nutrients effectively. Underwatering, on the other hand, causes plants to become dehydrated, resulting in crispy, brown leaf tips and edges.
Environmental stress significantly impacts plant health. Too much direct sunlight scorches delicate leaves, especially on shade-loving plants like peace lilies and ferns. Inadequate humidity levels cause browning in tropical plants that require moisture-rich air to thrive.
Nutrient deficiencies manifest as yellowing leaves that eventually turn brown. Potassium deficiency often appears as brown leaf margins, while nitrogen deficiency typically shows as overall yellowing before browning occurs. Improper pH levels in soil can block nutrient absorption, causing similar symptoms even when nutrients are present.
Pest infestations damage plant tissue, leading to brown spots and eventual leaf death. Spider mites, scale insects, and aphids suck plant juices, while larger pests physically damage leaves. Fungal and bacterial diseases, such as leaf spot or blight, create distinctive brown patches with exact patterns that help identify the exact problem.
How to Diagnose Exact Browning Issues
Examining leaf patterns offers crucial diagnostic clues. Crispy brown tips usually indicate underwatering or low humidity, while soft, brown patches suggest overwatering or fungal issues. Uniform browning across entire leaves often points to environmental stress or natural aging.
Location patterns matter significantly in diagnosis. When browning appears only on lower leaves, it might indicate natural aging or nitrogen deficiency. Upper leaves showing symptoms could signal pest problems or recent environmental changes. Browning that starts at leaf edges typically relates to watering issues or fertilizer burn.
Timing provides valuable context for diagnosis. Sudden browning after relocating your plant suggests shock from environmental changes. Seasonal browning might be natural for some plants or related to changing light conditions and humidity levels. Gradual browning that worsens over weeks often indicates progressive problems like nutrient deficiencies or pest infestations.
Soil condition assessment helps pinpoint root causes. Checking soil moisture with your finger reveals whether overwatering is the issue. Examining soil drainage by observing how quickly water passes through the pot offers insights into potential root problems. Salt buildup appearing as white crust on soil surfaces might indicate excessive fertilization leading to root burn and browning leaves.
Adjusting Your Watering Routine to Fix Plant Browning

Water management is often the key to resolving plant browning issues. Establishing the right watering routine can dramatically improve your plant’s health and appearance.
Signs of Overwatering vs. Underwatering
Overwatering manifests through soggy soil conditions and yellowing leaves that eventually turn brown. You’ll notice plants developing root rot when consistently overwatered, which compromises their ability to absorb nutrients properly. A simple test involves inserting your finger 1-2 inches into the soil—if it feels wet, you should delay watering to prevent further damage.
Underwatering presents quite differently with crispy, brown leaf tips and edges that often curl inward. The soil typically feels completely dry when checked at root level, indicating your plant is desperately seeking moisture. These symptoms develop because plants prioritize sustaining vital functions when water is scarce, sacrificing leaf edges first.
Creating the Perfect Watering Schedule
Soil moisture assessment forms the foundation of proper watering. Water your plants only when the top 1-2 inches of soil has dried out completely. Using well-draining pots prevents waterlogging and helps maintain optimal moisture levels around the roots.
Water quality significantly impacts plant health, especially for sensitive species. Filtered water, rainwater, or tap water that has been left out for 24 hours to reduce chlorine content works best for most plants. Fluoride-sensitive plants like spider plants and peace lilies may require distilled water sources to prevent browning.
Seasonal adjustments to your watering routine are essential for plant health. Reduce watering frequency during winter months when plant growth naturally slows down. Increase watering during active growth periods in spring and summer when plants require more moisture to support new development.
Low humidity environments can worsen leaf browning, particularly for tropical plant varieties. Place pebble trays filled with water beneath your plants or use humidifiers to increase moisture in the surrounding air.
Fertilizer buildup often causes leaf burn that resembles drought damage. Flush your plant’s soil every few months with clean water to remove accumulated salts, or switch to more diluted fertilizer answers applied less frequently.
Light exposure plays a crucial role in plant hydration needs. Protect your plants from harsh direct sunlight that can scorch leaves and create brown spots, which further stresses the plant’s water management system.
Optimizing Light Conditions to Restore Plant Health

Incorrect light exposure is a common culprit behind those frustrating brown spots on your beloved plants. By understanding the symptoms and making strategic adjustments to your plants’ placement, you can help them recover their lush, vibrant appearance.
Symptoms of Light-Related Browning
Light-related browning manifests in distinct ways depending on whether your plant is getting too much or too little illumination. Shade-loving plants placed in excessive light often develop browning on their upper leaves, which are most directly exposed to intense rays. Plants suffering from insufficient light typically show brown tips and may physically lean toward light sources in an attempt to capture more energy. You’ll notice stretched or elongated stems as plants desperately reach for adequate light, creating an unbalanced appearance. Leaf color might also appear washed-out or pale before browning begins, signaling that photosynthesis isn’t occurring at optimal levels.
How to Find the Ideal Light Position
Finding the perfect light balance requires observation and strategic placement adjustments. For plants receiving excessive light, relocate them to areas with filtered brightness, using sheer curtains to diffuse harsh direct sunlight. Reflective materials like mirrors and matte finishes can redirect light to create more balanced exposure throughout your space. When dealing with light-starved plants, move them closer to windows that receive direct sunlight, prioritizing south-facing windows for maximum exposure (in the Northern Hemisphere). Supplemental grow lights offer an excellent solution for dark corners or during winter months when natural light is limited. Temperature considerations play a crucial role too—keep plants away from heating vents, air conditioners, and drafty windows, as these temperature fluctuations can worsen browning issues. Rotating your plants quarterly ensures even light distribution and prevents one-sided growth or browning. Monitor your plants’ response to light changes for at least two weeks before making additional adjustments, allowing them time to adapt to their new environment.
Addressing Humidity and Temperature Problems

Low humidity and temperature fluctuations are common culprits behind those frustrating brown leaf tips and edges. Let’s explore how to create a more hospitable environment for your plants.
Increasing Humidity for Tropical Plants
Tropical plants often struggle in our typically dry indoor environments, leading to brown leaf tips and edges. Many houseplants come from jungle environments where humidity levels range from 60-80%, making them especially vulnerable to dry air. You can effectively boost humidity using several proven methods:
- Set up a humidity tray by placing a shallow tray filled with pebbles and water beneath your plant pot, ensuring the pot sits on the pebbles above the water level. The water will gradually evaporate, creating a pocket of moisture around your plant.
- Invest in a humidifier to maintain consistent moisture levels, particularly beneficial for moisture-loving plants like ferns, calatheas, and peace lilies.
- Create a microclimate by grouping plants together, allowing them to generate a naturally humid environment through their collective transpiration process.
- Mist sensitive plants occasionally, although this provides only temporary relief and works best as a supplement to other humidity-boosting strategies.
Managing Temperature Fluctuations
Plants can develop brown spots and edges when exposed to dramatic temperature changes that stress their systems. Most houseplants thrive in temperatures between 65°F and 75°F, mirroring their natural tropical habitats. Here’s how to protect your plants from harmful temperature swings:
- Keep plants away from drafty windows and doors where cold air can cause stress and trigger browning, especially during winter months.
- Avoid placing plants near heating vents or radiators as the hot, dry air can quickly dehydrate leaves and cause crispy brown edges.
- Move sensitive plants away from cold windowsills during winter nights when temperatures drop significantly.
- Use thermal curtains to protect window plants from temperature extremes while still allowing adequate light exposure during the day.
- Monitor room temperatures with a simple thermometer to ensure your plant environment remains within the optimal range, adjusting placement seasonally as needed.
Fixing Nutrient Deficiencies That Cause Browning

Many cases of plant browning stem from exact nutrient deficiencies that disrupt essential plant functions. Identifying and correcting these imbalances can restore your plant’s health and prevent further browning.
Identifying Common Nutrient Issues
Potassium deficiency manifests as browning leaf edges and distinctive brown spots, typically beginning on older leaves before progressing to complete tissue death in severe cases. Magnesium shortage creates yellow or white interveinal streaking patterns on lower leaves that eventually develop reddish-purple tips and necrotic spots when left untreated. Manganese-deficient plants display white streaks that turn brown, along with overall leaf deterioration and noticeably stunted growth, occurring more frequently in acidic soil conditions.
Calcium problems appear primarily in new growth, causing distorted leaves and necrosis, particularly in very acidic soils with pH below 5.0. Copper deficiency turns younger leaves chlorotic (pale) with brown discoloration while significantly slowing plant development. Iron shortages produce a distinctive yellowing between the veins (chlorosis) on young leaves first, which progressively browns in non-native plants growing in high-pH soils.
How to Fertilize Properly
Correcting potassium deficiency requires applications of sulfate of potash (SOP) or potassium nitrate, while avoiding excessive calcium or magnesium which can block potassium uptake. Magnesium shortages respond well to Epsom salt (magnesium sulfate) applied either as a foliar spray directly on leaves or mixed into the soil, but we recommend limiting high-potassium fertilizers when addressing this issue. Manganese deficiencies need chelated manganese foliar spray for quick correction, with best results achieved when soil pH remains below 6.5.
For calcium issues, adding gypsum (calcium sulfate) or lime (calcium carbonate) helps adjust soil pH, though care must be taken to avoid overliming which creates additional problems. Copper deficiencies require careful application of copper sulfate in very small amounts, as excess copper quickly becomes toxic to plants. Iron deficiencies respond best to chelated iron applications directly to leaves or soil, and lowering soil pH with sulfur proves beneficial when consistently measuring above 7.0.
Always begin with a comprehensive soil test to check pH and nutrient levels before applying any corrective fertilizers. Use balanced fertilizer formulations that include secondary nutrients, such as 15-5-15 with added calcium and magnesium, for overall plant health. Avoid excessive fertilization which can create nutrient lockout effects and flush the soil if electrical conductivity (EC) levels indicate salt buildup. Remember to address deficiencies early, as damage to older leaves typically remains permanent even after correcting the underlying nutritional issue.
Treating Pest and Disease Problems

When your plants develop brown leaves, pests and diseases are often the culprits behind this distressing symptom. Identifying these issues early can save your plants from extensive damage and potential death.
Common Pests That Cause Brown Leaves
Spider mites are tiny arachnids that create speckled brown or yellow foliage, often leaving fine webbing as evidence of their presence. Aphids attack plants by sucking sap from tender growth, resulting in curled leaves with brown tips that can severely weaken your plants over time. Scale insects, with their hard protective shells, attach themselves to stems and leaves, causing brown patches as they drain nutrients from your plant. Fungal pathogens like leaf spot and anthracnose create distinctive brown lesions on leaves, frequently surrounded by yellow halos that indicate spreading infection. Bacterial infections manifest as water-soaked spots that turn brown and sometimes ooze fluid, signaling serious plant tissue damage.
Effective Treatment Options
Insecticidal soap or neem oil provides an excellent first line of defense against soft-bodied pests like aphids and spider mites when applied weekly to suffocate and eliminate these invaders. Manual removal works well for larger or stationary pests, particularly scale insects, which can be wiped away using cotton swabs dipped in rubbing alcohol. Fungicides containing copper compounds or chlorothalonil should be applied according to product guidelines to effectively combat fungal leaf spots before they spread throughout the plant. Pruning heavily infested or diseased foliage prevents problems from spreading to healthy parts of the plant and improves air circulation. Soil management is crucial since excess fertilizer salts can mimic pest damage symptoms; flushing your soil thoroughly with clean water removes potentially harmful buildup.
Preventive measures greatly reduce future problems, so we recommend improving airflow around your plants to discourage fungal growth. Avoiding overwatering creates less favorable conditions for root rot and bacterial issues that lead to brown leaves. Regular plant inspections allow you to catch pest infestations before they become severe, while quarantining new plants for several weeks protects your existing collection from potential contamination.
Pruning and Maintenance Techniques to Revive Browning Plants

Proper maintenance is essential for helping your plants recover from browning issues. Strategic pruning and care routines can revitalize struggling plants and prevent further damage.
How to Properly Remove Brown Foliage
Removing brown foliage requires precision and the right approach to promote healing. Always use clean, sharp pruning tools to prevent the spread of disease when cutting away brown parts of your plants. Cut just above a node (where a leaf meets the stem) to encourage new growth from that point. Make decisive, angled cuts rather than tearing or ripping damaged foliage to minimize stress on the plant.
Assess the extent of browning before pruning extensively—sometimes only the tips need trimming while other cases may require removing entire leaves. After pruning, adjust your plant’s watering schedule to address potential moisture issues that may have caused the browning initially. Check for proper drainage in pots, as standing water often leads to root rot and subsequent leaf browning.
Evaluate your soil quality after pruning and consider refreshing potting mix if the current soil has become compacted or hydrophobic. Soaking dry, hydrophobic soil in lukewarm water can restore its moisture balance and ability to properly hydrate your plant. Monitor your plant closely after pruning, as its recovery will indicate whether additional care adjustments are needed.
Preventative Maintenance Practices
Maintaining optimal humidity around your plants is crucial for preventing brown tips, especially for tropical varieties. Mist humidity-loving plants regularly but avoid misting when the soil is already dry, as this creates conflicting moisture signals. Balance water application based on your exact plant’s needs—different species require vastly different watering frequencies and amounts.
Apply fertilizer carefully to avoid chemical burns that manifest as brown patches on leaves. Monitoring how your plant responds to fertilization helps determine if you’re providing appropriate nutrient levels. Use water with minimal chlorine or harmful chemicals for your plants; letting tap water sit for 24 hours before using it allows chemicals to dissipate naturally.
Adjust your plant care routine seasonally as temperature changes affect watering needs significantly. Reduce watering frequency during cold months when evaporation slows and plants enter dormancy. Increase watering thoughtfully during hot summer months when plants actively grow and moisture evaporates quickly. Regularly inspect plant leaves for early signs of browning to catch problems before they become severe.
Implementing these maintenance practices consistently creates an environment where your plants can thrive without developing brown foliage. Regular monitoring combined with appropriate adjustments to care routines will keep your plants looking vibrant and healthy throughout the year.
When to Repot Plants with Browning Issues

Repotting can be a crucial solution when your plants show persistent browning issues. The right time to repot is when roots circle the pot, drainage is poor, or when soil dries too quickly—all common contributors to browning caused by improper watering. Remember to avoid repotting during dormancy or flowering periods unless the plant is severely root-bound.
Signs Your Plant Needs a New Home
Visible roots are the most obvious indicator that your plant requires repotting. Roots emerging from drainage holes or appearing on the soil surface signal that your plant has outgrown its current container.
Stunted growth accompanied by persistent browning even though proper watering suggests that your plant needs more space to thrive. Plants that stop growing or produce smaller leaves than usual are often crying out for a larger home.
Salt buildup appears as white crust on soil surfaces or pot edges and contributes significantly to leaf browning. This mineral accumulation is frequently linked to fluoride and chlorine toxicity from tap water, making repotting with fresh soil essential for plant recovery.
Step-by-Step Repotting Guide
Unpot carefully to minimize stress on your struggling plant. Gently tap the sides of the container, support the plant’s stem with your fingers, and slowly slide the entire plant out of its pot. Careful removal helps preserve delicate root systems.
Trim roots that appear dead or circling using sterilized scissors. Cutting these problematic roots encourages healthy new growth and prevents continued strangulation that leads to nutrient deficiencies and browning.
Soil choice makes a important difference in plant recovery. Use fresh, well-draining potting mix specifically suited to your plant type to provide optimal growing conditions and prevent future browning issues.
Pot selection should focus on proper sizing. Choose a container only 1-2 inches larger than the current root ball, ensuring it has adequate drainage holes to prevent water accumulation that leads to root rot and browning.
Water thoroughly after repotting, preferably using filtered or rainwater to minimize exposure to harmful minerals. Proper initial watering helps settle the soil around roots and begins the recovery process for browning plants.
After repotting, place your plant in indirect light and avoid fertilizing for 4-6 weeks to prevent additional stress. For tap water users, letting water sit for 24 hours helps evaporate chlorine, though fluoride requires proper filtration to be removed completely.
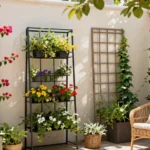
Specialized Solutions for Different Plant Types

Different plants require customized approaches to combat browning issues based on their environment and exact needs. We’ve compiled specialized answers for both indoor and outdoor plants to help you restore their health and vibrancy.
Fixing Browning in Houseplants
- Watering Balance: Proper hydration is crucial for preventing brown tips on houseplants. Underwatering often causes crispy brown edges on leaves, while overwatering leads to yellowing followed by browning as root rot develops. We recommend checking soil moisture before watering and establishing a consistent schedule based on your plant’s exact needs.
- Humidity Levels: Low humidity frequently causes browning, especially in tropical houseplants. You can increase moisture levels by using a humidifier, placing plants on pebble trays with water, or grouping plants together to create a microclimate with higher humidity.
- Mineral Impact: Tap water containing chlorine, fluoride, or chloramines often contributes to leaf browning in sensitive houseplants. Consider using filtered water, rainwater, or allowing tap water to sit for 24 hours before using it to water your plants.
- Temperature and Sunlight: Extreme temperature fluctuations and direct sunlight can scorch leaves and cause browning. Position your houseplants away from heating vents, air conditioners, and direct afternoon sun to maintain consistent growing conditions.
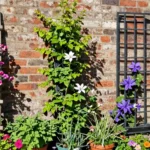
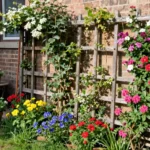
Addressing Browning in Outdoor Plants
- Water and Nutrient Balance: Outdoor plants require adequate water and nutrients to prevent browning. Soil quality plays a major role in nutrient availability, so we recommend testing your soil and amending it with appropriate fertilizers based on your plants’ exact requirements.
- Pest Control: Insects and other pests frequently cause stress that manifests as browning leaves. Regular inspection of your outdoor plants can help identify infestations early. Look under leaves and along stems for signs of pests, then treat with appropriate organic or chemical answers depending on the severity.
- Climate Factors: Outdoor plants face environmental challenges like drought, frost, or excessive heat that can trigger browning. Protect sensitive plants during extreme weather conditions by using shade cloth during heat waves, frost covers during cold snaps, or mulching to retain soil moisture during dry periods.
- Seasonal Adjustments: Many outdoor plants require different care throughout the year. Adjust your watering frequency, fertilization schedule, and pruning routine as seasons change to prevent stress-induced browning and maintain plant health year-round.
Long-Term Strategies to Prevent Future Browning
Saving your browning plants isn’t just about quick fixes—it’s about developing sustainable care habits. By implementing the strategies we’ve shared, you’ll not only revive your struggling plants but also prevent future issues. Remember that each plant has unique needs that may change with seasons and growth stages.
The key to thriving plants lies in observation and consistency. Take time to understand your exact plant varieties, their natural habitats, and how to recreate those conditions in your home or garden. Regular monitoring will help you catch problems early before they progress to severe browning.
With proper watering techniques, optimal light conditions, appropriate humidity levels, and regular maintenance, your plants can flourish year-round. Trust the process—plant recovery takes time, but your dedication will eventually reward you with vibrant, healthy greenery.
Frequently Asked Questions
Why are my plant leaves turning brown?
Brown leaves indicate plant distress, commonly caused by improper watering (over or under), environmental stress, nutrient deficiencies, or pest damage. Examine the pattern of browning, timing, and soil conditions to accurately diagnose the issue. Most browning problems can be corrected with proper care adjustments.
How can I tell if I’m overwatering my plants?
Signs of overwatering include yellowing leaves, soft stems, root rot, soil that remains constantly wet, and a moldy smell. Plants will appear wilted even though the soil is moist. Reduce watering frequency, ensure proper drainage, and consider repotting in fresh, well-draining soil if the problem persists.
What’s the right way to water my houseplants?
Water thoroughly until it drains from the bottom, but allow the top 1-2 inches of soil to dry between waterings for most plants. Use room temperature water, preferably filtered or rainwater. Adjust frequency based on season, humidity, and plant type rather than following a strict schedule.
How do I know if my plant isn’t getting enough light?
Plants receiving insufficient light typically develop pale leaves, leggy growth, smaller new leaves, and reduced flowering. They may also lean or stretch toward light sources. Gradually move your plant to a brighter location, considering supplemental grow lights during darker months.
Can tap water harm my plants?
Yes, tap water can harm plants due to chlorine, fluoride, and mineral buildup. These chemicals can cause brown leaf tips and edges. Use filtered water, rainwater, or leave tap water out overnight to allow chlorine to dissipate. Some sensitive plants may require distilled water.
How often should I fertilize my plants?
Most houseplants benefit from fertilizer every 4-6 weeks during growing season (spring and summer) and rarely or never during dormancy (fall and winter). Use half-strength fertilizer to avoid nutrient burn. Signs of over-fertilization include brown leaf edges and salt buildup on soil.
What are the signs of pest infestation on plants?
Look for tiny insects, webs, sticky residue, unexplained leaf spots, holes in leaves, and stunted growth. Common pests include spider mites, aphids, mealybugs, and scale insects. Inspect new plants before bringing them home and regularly check existing plants, especially under leaves.
When should I repot my plant?
Repot when you notice roots growing out of drainage holes, circling the root ball, water running straight through without absorption, stunted growth, or if the plant becomes top-heavy. Most plants benefit from repotting every 1-2 years, ideally in spring at the beginning of the growing season.
How do I increase humidity for my indoor plants?
Increase humidity by grouping plants together, using pebble trays with water, running a humidifier nearby, or placing plants in naturally humid rooms like bathrooms. Misting provides only temporary relief. Avoid placing plants near heating vents or air conditioners that dry the air.
Should I prune brown leaves from my plants?
Yes, remove brown or damaged leaves with clean, sharp scissors or pruning shears. Cut at the base of the leaf stem (petiole) without damaging the main stem. Pruning improves plant appearance, prevents disease spread, and redirects energy to healthy growth. Always sterilize tools between plants.