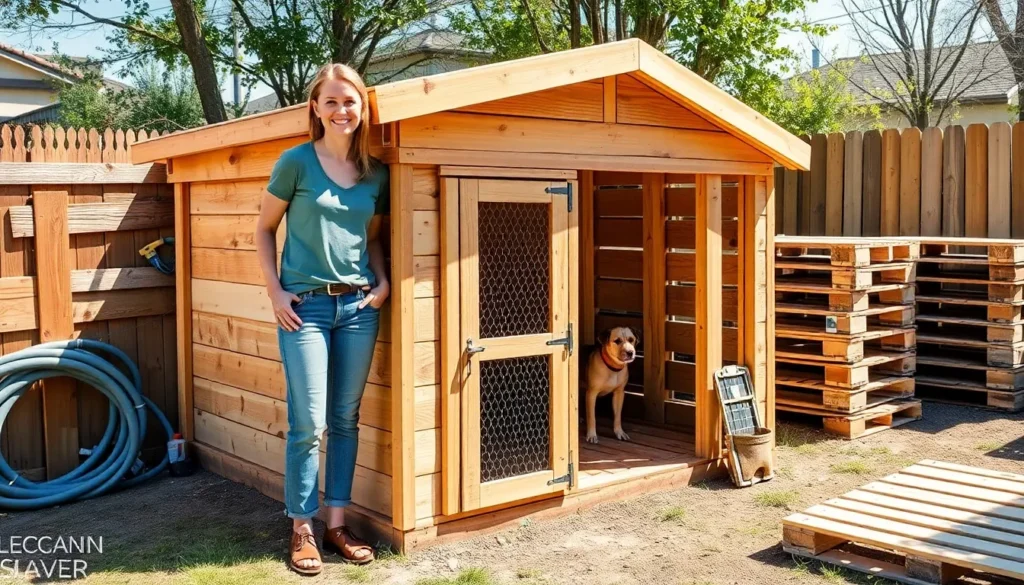
Building an outdoor dog kennel doesn’t have to drain your wallet or require professional construction skills. We’ve discovered that creating a safe and comfortable space for your furry friend can be both budget-friendly and rewarding when you take the DIY approach.
Many pet owners think they need to spend hundreds or even thousands of dollars on pre-built kennels, but we’re here to prove that’s simply not true. With some creativity, basic materials, and a weekend of work, you can construct a sturdy outdoor kennel that rivals expensive commercial options.
Whether you’re working with pallets, chain link fencing, or repurposed materials, we’ll show you how to maximize your budget while ensuring your dog’s safety and comfort. These practical answers will help you create the perfect outdoor haven for your pet without very costly.
Budget-Friendly Materials for Your DIY Dog Kennel
Building an outdoor dog kennel doesn’t require expensive materials when you know which budget-friendly options deliver both durability and safety. We’ve identified several cost-effective materials that can help you create a sturdy kennel without very costly.
Recycled Pallets and Reclaimed Wood
Recycled pallets offer one of the most economical answers for constructing kennel walls and flooring. We can source these materials from local businesses, shipping companies, or online marketplaces for as little as $5-15 per pallet. Heat-treated (HT) pallets provide the safest option since they haven’t been chemically treated and won’t harm your dog.
Reclaimed wood from old fences, barns, or construction sites gives us another affordable alternative. This material typically costs 50-70% less than new lumber while offering the same structural integrity. We should sand down any rough edges and check for protruding nails before installation.
Processing these materials requires basic tools like a circular saw, drill, and sandpaper. Most hardware stores will cut pallets to size for a small fee if you don’t own cutting equipment.
PVC Pipes and Fittings
PVC pipes create lightweight yet durable kennel frames that resist weather damage and corrosion. We can purchase standard 10-foot sections of 2-inch PVC pipe for approximately $8-12 each at most home improvement stores. These pipes connect easily using T-joints, elbow fittings, and straight couplers that cost $1-3 per piece.
This material works particularly well for temporary or semi-permanent kennel structures since it assembles and disassembles quickly. We don’t need special tools beyond a PVC pipe cutter or hacksaw to customize lengths. The total material cost for a basic 6×8 foot PVC frame typically ranges from $75-100.
White PVC reflects sunlight better than dark materials, helping keep the kennel cooler during hot weather. We can also paint PVC with specialized paint if we want to match our home’s exterior colors.
Chain Link Fencing and Hardware Cloth
Chain link fencing provides excellent security while maintaining visibility and airflow throughout the kennel. We can find residential-grade chain link fencing for $3-6 per linear foot, depending on height and gauge thickness. Galvanized options last longer and resist rust better than standard steel versions.
Hardware cloth offers a more affordable alternative for smaller kennels or areas requiring additional security. This material costs approximately $1-2 per square foot and comes in various mesh sizes. Quarter-inch mesh prevents small animals from entering while half-inch mesh works well for larger dog breeds.
Installation requires fence posts, tension bands, and gate hardware that add roughly $20-40 to the total project cost. We can rent post-hole diggers from tool rental shops for about $30 per day, making professional installation unnecessary for most DIY projects.
Simple A-Frame Dog Kennel Design
 1")
Building an A-frame dog kennel offers one of the most straightforward approaches to outdoor pet housing. This triangular design provides excellent weather resistance while remaining simple enough for weekend DIY enthusiasts.
Basic Construction Steps
Foundation preparation starts with laying treated lumber rails like 4×6 boards on level ground for stability. Concrete blocks create an even more durable base that prevents dogs from digging underneath the structure.
Frame assembly requires constructing two identical triangular frames using 2×4 lumber to form the characteristic A-shape. We connect these frames with horizontal support beams at both the base and top to ensure structural rigidity.
Flooring installation works best with sturdy wood or composite decking materials elevated slightly above ground level. This elevation prevents moisture damage and creates a dry environment for your pet.
Wall construction involves attaching plywood or economical sheet siding like T1-11 to the completed frame. These materials offer solid weather protection without breaking your budget.
Roofing completion calls for covering the slanted surfaces with asphalt shingles or metal panels for long-lasting protection. Metal roofing often proves easier to install and maintain than traditional shingle systems.
Door installation finishes the basic structure with either hinged or sliding options framed with 2×4 lumber. We recommend covering the door frame with matching siding material for consistency.
Weatherproofing Tips
Treated lumber selection for foundation and frame components resists rot and extends the kennel’s lifespan significantly. This investment pays dividends in reduced maintenance over time.
Joint sealing with exterior grade wood sealant or waterproof paint prevents moisture infiltration at critical connection points. Every gap represents a potential entry point for water damage.
Roofing barriers include felt underlayment beneath shingles or metal panels for additional moisture protection. This extra layer catches any water that penetrates the primary roofing material.
Floor elevation above ground level prevents water ingress and eliminates dampness problems inside the kennel. Even a few inches of clearance makes a substantial difference.
Ventilation planning avoids condensation buildup that can create unhealthy conditions for your pet. Strategic air circulation keeps the interior environment comfortable year round.
Door protection benefits from adding overhangs or flaps that deflect rain away from the entrance. These simple additions dramatically improve weather resistance.
Cost Breakdown
| Material Category | Cost Range |
|---|---|
| Treated lumber (foundation and framing) | $40-$70 |
| Sheet siding (T1-11 or plywood) | $30-$50 |
| Roofing materials (shingles or metal) | $25-$50 |
| Flooring (wood or composite) | $20-$40 |
| Hardware (fasteners and door components) | $15-$30 |
| Sealants and paint | $15-$25 |
| Total estimated cost | $145-$265 |
Material costs vary based on kennel size and regional pricing differences, but this A-frame design consistently delivers value. Quality materials in the upper price range typically provide better longevity and weather resistance.
Size considerations directly impact total expenses, with larger kennels requiring proportionally more materials. We recommend calculating your exact dog’s space needs before finalizing dimensions to avoid overbuilding.
Tool requirements remain minimal for this design, with most homeowners already owning necessary equipment. Rental options make specialized tools accessible for occasional DIY projects without major investment.
Pallet Dog House and Run Combination
 2")
Building a pallet dog kennel offers the perfect balance between cost savings and durability for our outdoor pet housing needs. We’ll transform discarded pallets into a functional shelter that keeps our dogs comfortable while staying within budget.
Selecting the Right Pallets
Choose sturdy wooden pallets without chemical treatments to ensure our dogs’ safety and health. Hardwood pallets with solid construction provide the best durability for long-term outdoor use. We need to inspect each pallet thoroughly for damage, loose nails, or splinters before starting our project.
Avoid pallets marked with chemical treatment stamps like MB (methyl bromide) or other hazardous material indicators. Clean pallets free from dirt, debris, and protruding hardware work best for our kennel construction. We should prioritize pallets that show minimal wear and maintain their structural integrity.
Assembly Instructions
Disassemble pallets carefully using a crowbar, hammer, or saw to salvage usable planks and stringers for our kennel components. We’ll need to separate each pallet into individual boards while preserving the wood’s condition. Planning our kennel dimensions based on our dog’s size helps determine how much pallet wood we’ll need.
Cut pallet wood to create the base, walls, and roof sections according to our predetermined measurements. Vertical pallet palings work well for wall construction, typically requiring six panels in height for adequate shelter. We secure these pieces with screws or nails while reinforcing corners with additional stringers pulled from our dismantled pallets.
Mark and cut a door opening offset to one side to protect our dogs from weather exposure and provide comfortable interior space. Creating a slanted roof from pallet stringers with overlapping wood helps water runoff effectively. We recommend designing a removable roof system to make cleaning and dog access easier.
Raise the kennel floor by placing a pallet underneath to keep our dogs off wet ground and improve insulation. This elevation method prevents moisture damage while providing better comfort for our pets.
Adding Ventilation
Leave small gaps between pallet planks or install vents near the top of walls to ensure proper airflow without creating uncomfortable drafts. Double layering pallet planks with overlapping slats minimizes wind penetration while maintaining necessary air circulation. We position these ventilation points strategically to balance fresh air entry with weather protection.
Ensure the door opening provides adequate fresh air entry while maintaining the kennel’s structural integrity. Adding partial open sections on the back or sides works well for warmer months, though we should plan for removable covers like tarps or plastic sheets during cold or wet seasons.
Consider seasonal ventilation adjustments to accommodate changing weather conditions throughout the year. Proper airflow prevents moisture buildup and maintains a healthy environment for our dogs year round.
PVC Pipe Kennel Frame Construction
 3")
We’ve discovered that PVC pipes offer one of the most budget-friendly approaches to building an outdoor dog kennel. This lightweight material provides excellent durability while remaining easy to work with for DIY enthusiasts.
Measuring and Cutting Materials
Start by measuring your desired kennel dimensions carefully using a tape measure and pencil. Mark cutting points directly on the 1/2″ PVC pipes to ensure accuracy throughout your project. We recommend common pipe cuts ranging from 4″ for connectors and supports to 34.5″ for longer frame sides, with typical frame pieces measuring 24″, 25.5″, and 34.5″ depending on your exact design.
Cut your pipes using a standard pipe cutter for clean, precise edges. Many local home improvement stores offer free cutting services, which can save you time and ensure professional results. This service proves especially valuable when you need multiple pieces cut to exact specifications.
Double check all measurements before cutting to avoid costly mistakes. We suggest laying out your planned design on paper first, then transferring those measurements to your PVC materials for the most accurate results.
Joint Connections and Stability
Use 1/2″ three-way elbows and end caps to create strong corner connections throughout your frame. These fittings form the backbone of your kennel’s structural integrity, ensuring opposite sides maintain equal lengths for proper stability. Connect each joint by firmly pounding pieces together with a rubber mallet until they lock securely in place.
Reinforce any loose connections with duct tape wrapped around pipe ends. This prevents pieces from turning or separating during use, maintaining your kennel’s shape over time. We’ve found that this simple reinforcement technique significantly improves long term durability.
Assemble your main frame carefully, checking that all corners form proper right angles. The rectangular or box shape depends on precise alignment of your pipe segments and fittings for maximum stability.
Cover Options for Weather Protection
Cover your completed frame with fabric, tarps, or sheer voiles to provide essential weather protection. Sheer voile fabric offers an excellent lightweight and inexpensive option that provides shade while maintaining proper airflow for your dog’s comfort. Waterproof tarps increase rain protection significantly, making them ideal for areas with frequent precipitation.
Customize your kennel’s appearance using spray paint on fabric covers before installation. This allows you to match your kennel to your home’s exterior or create a visually appealing design that complements your yard.
Consider upgrading to greenhouse style tops or chain link kennel roofs for robust all weather coverage. These options provide superior protection from harsh weather conditions while maintaining the modular, easy to assemble design that makes PVC pipe kennels so appealing for budget conscious dog owners.
Chain Link Fence Kennel Build
 4")
Building a chain link fence kennel represents one of the most durable and secure options for creating an outdoor dog enclosure. We’ll guide you through the essential steps to construct a sturdy kennel using chain link panels and basic materials.
Foundation Preparation
Clear and level the ground where your kennel will be built to ensure proper drainage and stability. Proper site preparation prevents water pooling and keeps your dog’s space dry throughout various weather conditions.
Create a well-drained base using one of these budget-friendly options:
- Compacted soil with weed barrier cloth and gravel for basic builds
- Gravel base for improved drainage and cleanliness
- Concrete foundation for maximum durability (optional upgrade)
Level the area using basic tools to ensure your kennel panels will fit together properly and remain stable over time.
Panel Installation Techniques
Construct rectangular frames using scrap wood like four bar twos or metal materials sized according to your kennel dimensions. We recommend building three to four panels depending on your desired kennel size, with one panel serving as the gate.
Attach welded wire mesh or chain link fencing (1.5 to 2 mm thick) securely to these frames using staples or nails. This thickness provides adequate security while remaining cost-effective for most dog sizes.
Ensure corners are square and panels remain sturdy to prevent bending or sagging over time. Connect panels together using hinges or metal brackets to form the kennel walls, creating a secure enclosure.
Gate Hardware and Security
Install a sturdy gate frame using wood or metal construction with securely fastened wire mesh that matches your kennel panels. Strong gate hinges on one side allow smooth opening and closing while maintaining structural integrity.
Use reliable latching mechanisms such as:
- Standard gate latches for basic security
- Padlocks for enhanced protection
- Carabiner clip latch systems for easy operation
Ensure the gate fits flush with the kennel frame to prevent gaps or weak points that could allow escape. Proper gate alignment maintains both security and ease of access for daily use.
Repurposed Shed Conversion Project
 5")
Converting an existing shed into a dog kennel offers a cost-effective foundation that eliminates the need to build from scratch. This approach leverages an existing structure while requiring minimal modifications to create a comfortable outdoor space for your pet.
Structural Modifications Needed
Door modifications represent the first essential step in transforming your shed into a functional dog kennel. Replace or modify the existing shed door to accommodate easy dog entry and cleaning access, with side or top hinged doors providing optimal maintenance convenience.
Window installations improve both airflow and natural light while maintaining security for your pet. Cut out strategic openings in the shed walls and install mesh panels or clear windows to create a bright, well-ventilated environment.
Fencing attachments extend your dog’s living space beyond the shed walls using welded wire mesh and wooden frames. Attach a secure outdoor run directly to the shed structure, giving your dog room to move safely while staying contained.
Height adjustments accommodate different dog sizes through simple modifications to the existing structure. Add raised flooring or extra framing to create appropriate ceiling height, ensuring your pet has adequate headroom and comfort.
Insulation and Flooring Options
Wall insulation keeps your dog comfortable year-round using affordable materials like foam board or reflective bubble wrap. Line the interior shed walls to maintain cooler temperatures in summer and provide warmth during winter months.
Flooring answers prioritize easy cleaning and weather resistance through materials like sealed plywood covered with rubber mats or outdoor tiles. Elevated flooring prevents moisture buildup and improves overall comfort for your pet.
Thermal bedding adds extra warmth using simple materials like straw or blankets placed inside the kennel. These additions provide comfort during colder months while remaining easy to replace and maintain.
Ventilation and Lighting Answers
Ventilation systems prevent humidity and odor buildup through strategically placed screened windows or vents near the roofline. Install mesh-covered openings to ensure consistent airflow while keeping insects and debris out of the kennel space.
Natural lighting enters through clear or frosted windows and skylights installed in the shed roof or walls. These modifications provide daylight without creating direct sun exposure that might overheat the interior space.
Artificial lighting extends usability during darker hours using battery-operated or solar-powered lights mounted inside the kennel. These answers provide visibility for evening care and maintenance without requiring electrical connections to your home.
Portable Dog Kennel for Renters
 6")
Renters face unique challenges when creating outdoor spaces for their dogs since they can’t make permanent modifications to their property. We’ve found that portable dog kennels offer the perfect solution by providing flexibility and mobility without compromising on your pet’s comfort and safety.
Lightweight Frame Materials
Metal panels stand out as our top choice for portable kennel construction due to their exceptional strength to weight ratio. Galvanized steel panels resist rust and weather damage while remaining light enough for one person to handle during assembly. We recommend welded wire mesh panels framed with lightweight metal or reclaimed wood since these materials can be sourced affordably from building sites or scrap yards.
PVC pipes continue to excel in portable applications because they’re incredibly lightweight and won’t corrode over time. These plastic components snap together easily and can support fabric or mesh coverings without adding important weight to your kennel design.
Recycled plastic materials provide sustainable alternatives that offer excellent weatherproofing and insulation properties. We’ve noticed these materials maintain their structural integrity across temperature changes while being lighter than traditional wood options.
Wood pallets work well for budget conscious builders but require more careful handling due to their increased weight. Safety precautions like masks and goggles become necessary when cutting or sanding pallet wood to avoid sawdust exposure.
Easy Assembly and Disassembly
Panel systems with hinges or clips enable quick setup and breakdown that’s perfect for renters who might need to relocate. We’ve tested designs that allow one person to assemble a complete kennel in under 30 minutes using basic hand tools.
Hinged openings on tops and sides simplify daily maintenance tasks like cleaning and feeding while supporting easy partial disassembly. These access points swing open completely and can detach when you need to fold the kennel for storage or transport.
Simple square frames cut from welded wire mesh and attached to lightweight wooden or metal frames enable rapid construction modifications. We can adjust kennel dimensions quickly by adding or removing panel sections as your dog’s needs change.
Modular connection points allow panels to connect securely without permanent fasteners or tools. Snap together joints and twist lock mechanisms provide stability during use while releasing easily when it’s time to move.
Storage Answers
Flat panel breakdown systems save valuable storage space by allowing kennels to fold into compact packages when not in use. We’ve found that most portable kennels reduce to less than 6 inches thick when properly disassembled.
Stackable panel designs maximize storage efficiency in small spaces like apartment closets or garage corners. Nested components take up minimal floor space while remaining organized and ready for quick deployment.
Hinged roof sections that swing open and completely detach help both daily use and long term storage. We recommend designs where roof panels fold flat against wall sections to create one compact storage unit.
Modular component systems allow individual pieces to stack or nest together compactly. These systems often include dedicated storage bags or containers that keep all hardware and small parts organized between uses.
Roofing Options for Outdoor Dog Kennels
 7")
Choosing the right roofing material is crucial for protecting your dog from weather elements while keeping costs manageable. We’ll explore the most practical and budget-friendly options that deliver excellent protection without very costly.
Corrugated Metal Sheets
Corrugated metal stands out as our top recommendation for DIY outdoor dog kennel roofing due to its unbeatable combination of affordability and durability. This lightweight yet strong material provides excellent protection against rain and sun while remaining easy to install for beginners. Suntuff 12ft corrugated roofing has proven particularly effective for 10×10 kennel spaces according to experienced DIY builders.
Metal roofs can be easily angled for proper drainage and withstand various weather conditions with minimal maintenance requirements. The corrugated design adds structural strength while the material itself resists rust and corrosion when properly coated. Installation typically requires only basic tools like a drill and metal screws, making it accessible for most homeowners.
Tarp and Canvas Covers
Tarps and canvas covers serve as excellent temporary roofing answers when you need immediate shelter on a tight budget. These options work well over chain link fenced kennels and provide quick shade and weather protection while you plan for a more permanent solution. Canvas offers better durability than standard tarps and can withstand moderate weather conditions for extended periods.
Many DIY builders start with tarped roofs as interim answers before upgrading to wooden supports and more permanent coverings. While these materials are less durable than metal or shingles, they offer the advantage of easy replacement and seasonal adjustments. Securing these covers properly with bungee cords or rope prevents wind damage and extends their useful life.
Slanted Roof Design for Drainage
Incorporating a slanted or pitched roof design is essential regardless of your chosen roofing material to ensure proper water drainage and prevent leaks. We recommend framing the roof with 2×4 lumber supports and angling it appropriately to allow rainwater and snow to drain off easily. This design approach significantly extends your roof’s lifespan while keeping the kennel interior dry and comfortable.
Proper drainage prevents water buildup that can lead to structural damage and creates healthier living conditions for your dog. The slanted design works equally well with corrugated metal sheets, shingles, or even temporary tarp covers. Building the frame with basic lumber like 2x4s creates a sturdy yet inexpensive foundation that supports various roofing materials effectively.
Essential Safety Features to Include
 8")
Safety isn’t just about keeping our dogs contained—it’s about creating a secure environment where they can thrive. We’ve identified three critical safety features that every DIY outdoor dog kennel must include.
Secure Latching Systems
Metal latches with safety locks provide the most reliable security for our DIY dog kennels. Dogs are notorious escape artists who can learn to nudge or paw open simple latches, making escape-proof mechanisms essential. We recommend using heavy-duty metal hardware that includes double-action latches or sliding bolt systems.
Spring-loaded latches often fail under persistent dog pressure, so we should avoid these cheaper alternatives. Instead, we’ll focus on latches that require human hand coordination to open, such as thumb-turn locks or twist-action mechanisms. These latching systems prevent accidental openings while still allowing us quick access during emergencies.
Smooth Edges and Safe Materials
Sharp corners and rough edges pose serious injury risks to our dogs, particularly around collars and during play. We need to sand down all wooden surfaces and file any metal edges smooth before assembly. Rounded corners should replace sharp 90-degree angles wherever possible in our kennel design.
Non-toxic materials are crucial since dogs often chew on kennel components. We’ll avoid pressure-treated lumber that contains harmful chemicals and opt for naturally weather-resistant woods like cedar or redwood. Metal components should be powder-coated or galvanized to prevent rust and eliminate sharp edges from forming over time.
Proper Spacing for Ventilation
Adequate airflow keeps our dogs comfortable in summer heat while preventing the buildup of odors and moisture. We need to ensure gaps between kennel panels allow sufficient ventilation without creating escape opportunities. The ideal spacing ranges from 1 to 2 inches for most medium to large dogs.
Ventilation gaps should be positioned high enough to prevent paws from getting stuck but low enough to maintain proper air circulation. We’ll avoid creating openings where our dog’s head could become trapped, particularly around the 4 to 6 inch range which poses the greatest risk. Strategic placement of vents near the roof line maximizes airflow while maintaining security.
Money-Saving Tips for DIY Dog Kennels
 9")
Building an outdoor dog kennel doesn’t have to drain your wallet. We’ve discovered several proven strategies that can reduce your project costs by 50-70% while still creating a secure, comfortable space for your furry friend.
Finding Free or Discounted Materials
Salvaging pallets from construction sites and local businesses provides excellent foundation materials for kennel walls and flooring. We recommend checking with shipping companies, furniture stores, and warehouses that often discard sturdy wooden pallets daily.
Scrap lumber can be sourced from home improvement stores, where damaged or returned wood pieces are often sold at steep discounts. Construction sites frequently have leftover materials like 2×4 lumber and plywood sheets that contractors are willing to give away rather than haul to landfills.
Reclaimed wire fencing offers substantial savings compared to new welded wire mesh. We suggest visiting local farms, businesses, or homeowners who are removing old fencing systems. The 2mm thick wire mesh commonly used in agricultural applications works perfectly for kennel walls.
Community resources like Facebook Marketplace, Craigslist, and neighborhood apps frequently list free building materials. Local community boards at hardware stores or coffee shops often feature residents offering surplus materials from completed projects.
Tool Borrowing and Sharing
Friends and family typically own the basic tools needed for kennel construction like hammers, saws, and drills. We’ve found that most people are happy to lend tools for weekend projects, especially when you offer to help with their future DIY endeavors.
Community tool libraries exist in many areas and provide access to expensive equipment like circular saws, grinders, and power drills for minimal fees. These programs allow you to reserve tools for exact dates without the long term investment.
Neighbor networks create opportunities for tool sharing arrangements where multiple households split the cost of purchasing tools that everyone uses occasionally. We recommend organizing with 3-4 nearby families to share expenses on items like miter saws or nail guns.
Hardware store rentals offer professional grade tools at daily rates that are much cheaper than purchasing. Most home improvement stores rent specialized equipment and include basic instruction on proper usage.
Phased Construction Approach
Basic frame first allows you to create a functional kennel with minimal initial investment using just lumber and wire mesh. We suggest starting with a simple rectangular frame that costs under $50 and provides immediate containment for your dog.
Gradual upgrades spread expenses over several months while improving the kennel’s features and comfort. Add roofing during your second phase, then insulation and flooring improvements as your budget permits.
Seasonal timing helps you take advantage of material sales and weather conditions. We recommend building the frame during spring sales at hardware stores, then completing roofing before winter weather arrives.
Staged tool needs prevent you from buying or borrowing all equipment at once. Start with basic hand tools for frame construction, then progress to power tools for roofing and finishing work during later phases.
Conclusion
Building an outdoor dog kennel doesn’t have to drain your wallet or require professional expertise. We’ve shown you that with basic materials and some creativity you can create a safe comfortable space for your furry friend.
Whether you choose pallets PVC pipes or chain link fencing the key is selecting materials that fit your budget and skill level. Remember to prioritize safety features like secure latches and proper ventilation while keeping costs manageable.
Your dog deserves a quality outdoor space and now you have the knowledge to build one affordably. Start with what you have gather your materials and give your pet the outdoor haven they’ll love.
Frequently Asked Questions
How much does it cost to build a DIY outdoor dog kennel?
Building a DIY outdoor dog kennel typically costs between $145 to $265, depending on size and materials chosen. This represents significant savings compared to pre-built options. Using recycled materials like pallets, reclaimed wood, and PVC pipes can reduce costs by 50-70%. Regional pricing variations may affect the final total, but the project remains budget-friendly for most homeowners.
What are the best budget-friendly materials for building a dog kennel?
The most cost-effective materials include recycled wooden pallets for walls and flooring, PVC pipes for lightweight frames, chain link fencing for security, and reclaimed wood for structural elements. Corrugated metal sheets work well for roofing, while tarps and canvas provide temporary weather protection. These materials offer durability while keeping costs low.
Can I build a dog kennel without professional construction experience?
Yes, building a DIY dog kennel requires only basic construction skills and common tools. The project involves simple steps like measuring, cutting, and assembling materials. Most designs use straightforward techniques like screwing panels together and attaching hardware. Tool rental options make specialized equipment accessible, and the process is designed for beginner-friendly construction.
What tools do I need to build an outdoor dog kennel?
Basic tools required include a drill, saw, measuring tape, level, and screwdriver. For chain link installations, you’ll need wire cutters and pliers. Most homeowners already own these tools, and rental options are available for specialized equipment. The minimal tool requirements make this project accessible without significant additional investment in equipment.
How do I ensure my DIY dog kennel is weatherproof?
Use treated lumber for the frame, seal all joints with weatherproof caulk, and install a slanted roof for proper drainage. Elevate the floor to prevent moisture damage and ensure adequate ventilation. Apply weather-resistant finishes to wood surfaces and choose durable roofing materials like corrugated metal or asphalt shingles for long-term protection.
What safety features should I include in my DIY dog kennel?
Install secure latching systems with heavy-duty metal hardware and safety locks to prevent escapes. Ensure all edges are smooth and use non-toxic materials like powder-coated metal and safe wood finishes. Maintain proper spacing for ventilation while preventing escape opportunities. Regularly inspect the structure for wear and potential hazards.
Can renters build temporary dog kennels?
Yes, portable dog kennels offer an excellent solution for renters. These use lightweight materials like metal panels or PVC pipes that assemble and disassemble easily without permanent modifications. Panel systems with hinges or clips allow quick setup, while modular designs enable customization. Many portable kennels can be stored compactly when not in use.
How can I save money on my dog kennel project?
Source free or discounted materials by salvaging pallets, reclaimed wood, and scrap lumber from construction sites or community resources. Borrow tools from neighbors or use community tool libraries. Consider phased construction to spread costs over time and take advantage of seasonal sales. These strategies can reduce total project costs by 50-70%.
What’s the best roofing option for an outdoor dog kennel?
Corrugated metal sheets provide the best balance of durability, weather protection, and affordability. They’re easy to install and long-lasting. For temporary solutions, tarps and canvas covers work well. Always design the roof with a slant for proper water drainage to keep the kennel dry and comfortable for your dog.
Can I convert an existing shed into a dog kennel?
Yes, converting a shed is often more cost-effective than building from scratch. Modify doors and windows for better access and ventilation, add fencing to extend the living space, and consider insulation for temperature control. Focus on easy-to-clean flooring and ensure proper ventilation and lighting for your dog’s comfort and health.