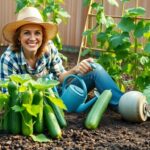
Starting seeds at home can be incredibly rewarding, but it’s also surprisingly easy to make mistakes that sabotage your gardening efforts before they truly begin. We’ve all been there—excitedly planting seeds only to wonder why they never sprout or why seedlings suddenly wither away.
Over our many years of gardening experience, we’ve identified the most common seed starting mistakes that prevent gardeners from achieving those picture-perfect seedlings. From improper soil moisture to inadequate lighting, these seemingly small errors can make the difference between thriving plants and disappointing results. The good news? Once you know what to avoid, success rates skyrocket.
10 Common Seed Starting Mistakes That Will Sabotage Your Garden
1. Using the Wrong Soil
Using regular garden soil for seed starting is a major mistake that can doom your seedlings from the start. Garden soil is too dense and often contains weed seeds, fungi, and other pathogens that can cause disease. Instead, always use a lightweight, sterile seed-starting mix specifically formulated to provide the ideal texture and drainage that tender seedlings need. These specialized mixes allow roots to penetrate easily while maintaining appropriate moisture levels.
2. Planting Seeds Too Deep
We’ve seen countless gardeners bury their seeds too deep, preventing them from ever reaching the surface. Different seeds have different depth requirements, so always check the seed packet for exact planting depths. As a general rule, most seeds should be planted at a depth about twice their diameter. Tiny seeds like lettuce or petunias should barely be covered or even left on the surface, while larger seeds like beans or corn can go deeper.
3. Inconsistent Watering
Inconsistent watering creates stress that can kill delicate seedlings before they have a chance to establish. Allowing soil to completely dry out or keeping it constantly soggy will significantly reduce germination rates and seedling survival. The soil should remain consistently moist but never waterlogged. Bottom watering (placing trays in shallow water until the soil surface becomes moist) promotes even moisture distribution and stronger root development.
4. Insufficient Light
Insufficient light leads to leggy, weak seedlings that stretch desperately toward whatever light source they can find. Most vegetable and flower seedlings require 14-16 hours of bright light daily. Window sills rarely provide enough light, especially during winter months. Invest in quality grow lights and position them just 2-3 inches above your seedlings, adjusting the height as plants grow to maintain this distance.
5. Skipping the Hardening Off Process
Skipping the hardening off process is like sending your seedlings into shock. Indoor-grown plants need time to adjust to outdoor conditions gradually. Start by placing seedlings outside in a sheltered spot for just an hour, then increase exposure time by 1-2 hours daily over 7-10 days. During this period, protect them from strong winds, intense sun, and cold temperatures to prevent transplant shock that can set plants back weeks or kill them entirely.
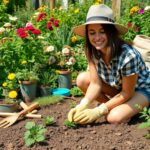
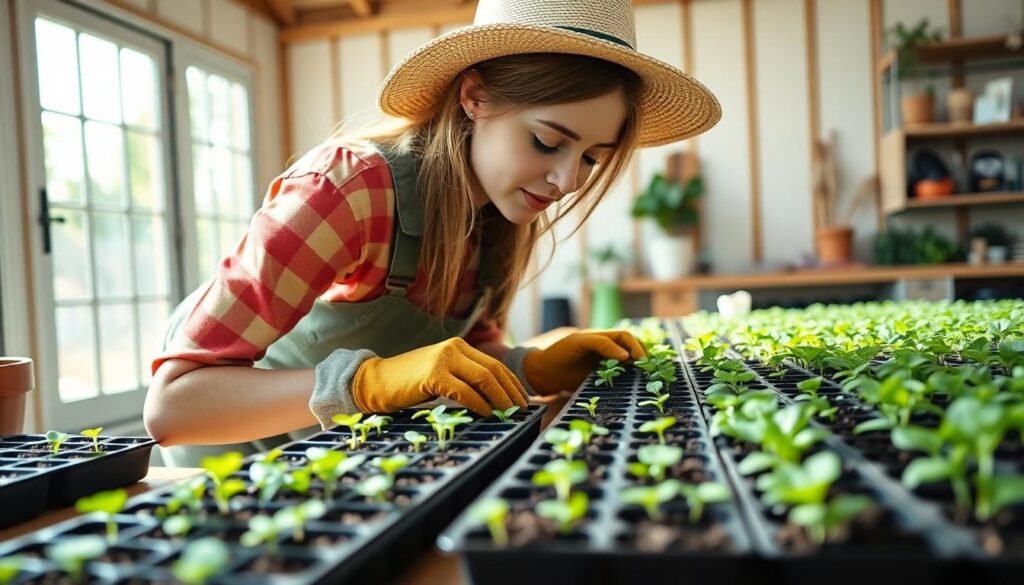
6. Overcrowding Seedlings
Overcrowding seedlings forces them to compete for light, nutrients, and air circulation, resulting in weak plants susceptible to disease. Each seedling needs space to develop properly. Always thin seedlings according to packet recommendations, typically leaving only the strongest plant per cell. Though it feels painful to snip out excess seedlings, this sacrifice ensures the survivors will grow into healthy, productive plants.
7. Starting Seeds at the Wrong Time
Starting seeds too early or too late can significantly impact your growing success. Plants started too early become rootbound and stressed before outdoor planting is possible, while those started too late may not have time to mature before the season ends. Create a planting calendar based on your local last frost date, counting backward according to each variety’s recommended starting time, typically found on seed packets or catalog descriptions.
8. Forgetting to Label
Forgetting to label seed trays leads to unnecessary confusion and potential planting mistakes. Without proper identification, you might give sun-loving plants shade or place tall varieties where they’ll overshadow shorter ones. Use waterproof markers on plastic labels to note the variety name and planting date for each section. This simple step creates a valuable record for planning future gardens and tracking which varieties perform best in your conditions.
9. Inadequate Air Circulation
Inadequate air circulation creates the perfect environment for damping off disease and other fungal problems that can wipe out entire trays of seedlings overnight. Use a small fan set on low to provide gentle air movement around your seedlings for a few hours each day. This strengthens stems while reducing humidity at the soil surface, dramatically decreasing disease problems and preparing plants for outdoor conditions.
10. Using Old Seeds Without Testing
Using old seeds without testing their viability wastes valuable growing space and time. Seed viability decreases with age, though rates vary by plant type. Some seeds remain viable for years while others lose germination potential after just one season. Perform a simple germination test by placing 10 seeds between damp paper towels in a plastic bag. Check after the normal germination period to calculate your viability percentage and adjust your planting quantities accordingly.
Ignoring Seed Packet Instructions and Planting Requirements
 2")
Those tiny seed packets contain valuable information that’s often overlooked by eager gardeners. Seed packets serve as mini instruction manuals specifically designed for each plant’s unique needs and requirements.
Disregarding Plant Hardiness Zones
Plant hardiness zones provide critical guidance about which plants will thrive in your exact climate. Many gardeners make the mistake of purchasing seeds without checking if they’re suitable for their region, leading to wasted time and resources. Understanding your area’s hardiness zone is vital since planting seeds inappropriate for your climate exposes them to potentially fatal frost or heat stress. Climate considerations significantly impact germination rates and overall plant health, with some varieties simply unable to withstand certain temperature extremes regardless of care quality. Before purchasing seeds, we recommend consulting the USDA Plant Hardiness Zone Map to ensure you’re selecting varieties that can flourish in your exact growing conditions.
Missing Optimal Planting Times
Timing is everything when it comes to successful seed starting. Starting seeds too early is one of the most common mistakes we see gardeners make, resulting in leggy, stressed seedlings that outgrow their containers before outdoor conditions are favorable. These prematurely started plants often become rootbound, nutrient-deficient, and more susceptible to disease by the time they can be transplanted. Conversely, transplanting seedlings outdoors too soon exposes them to harsh conditions they’re not ready to withstand, reducing their survival rates dramatically. Each plant has its ideal planting window based on both frost dates and soil temperature requirements. For optimal results, we suggest creating a seed-starting calendar customized to your exact region, working backward from your area’s last expected frost date to determine exactly when each variety should be started indoors.
Using Low-Quality or Outdated Seeds
 4")
One of the most common seed starting mistakes is relying on low-quality or outdated seeds. Fresh, high-quality seeds from reputable suppliers ensure better germination rates and genetic integrity. Seeds typically remain viable for only 1-5 years depending on the plant variety, so using seeds beyond their prime significantly reduces your chances of gardening success.
Storing Seeds Improperly
Seed viability dramatically decreases with improper storage conditions. Seeds last longest when kept in cool, dry, and dark environments, with airtight containers in refrigerators being ideal for long-term storage. Exposure to humidity or temperature fluctuations can trigger mold growth or premature sprouting, essentially ruining your seed collection before you’ve even started. Adding silica gel packs to your seed storage containers helps absorb excess moisture, protecting your investment for future growing seasons.
Overlooking Seed Viability Tests
Many gardeners skip the crucial step of testing seed viability, leading to wasted time and garden space. The water test offers a quick assessment method—simply place seeds in water and observe if they float (likely nonviable) or sink (probably viable). For more reliable results, we recommend conducting a germination test by placing about 10 seeds on a damp paper towel in a plastic bag to check sprouting rates. Seed batches showing less than 50% germination should be discarded or sown more densely to compensate for poor performance. Testing your seeds before the growing season begins saves considerable frustration and ensures you’re not dedicating valuable garden resources to seeds that won’t produce.
Starting Seeds in Inadequate Growing Medium
 6")
One of the most critical factors in successful seed starting is selecting the proper growing medium. Many gardening failures can be traced back to this fundamental choice that affects everything from germination rates to seedling health.
Using Garden Soil Instead of Seed Starting Mix
Garden soil might seem like a convenient option for starting seeds indoors, but it’s actually one of the worst choices you can make. Native garden soil typically contains heavy clay or sandy components that create drainage problems for delicate seedlings. Clay-heavy soils retain excessive moisture that can literally drown young roots, while sandy soils dry out far too quickly for consistent germination. Perhaps most concerning is the fact that garden soil harbors many pathogens and pests that can attack vulnerable seedlings before they’ve developed any natural defenses. Professional seed-starting mixes are specifically formulated to be sterile and pathogen-free, providing the optimal balance of moisture retention and drainage that young plants need.
Choosing Compacted or Water-Repellent Media
Media that compacts easily creates important challenges for emerging seedlings by restricting root growth and oxygen access. When growing medium becomes dense and compacted, it increases the risk of mold development and creates waterlogged conditions that few plants can tolerate. Similarly problematic are water-repellent mixes that fail to hydrate evenly throughout the container. These mixes create dry pockets where seeds can’t access the moisture needed for successful germination. Quality seed-exact mixes incorporate materials like vermiculite or perlite that maintain a loose, porous structure ensuring consistent moisture distribution without compaction. These specialized mixes allow seedling roots to easily penetrate the medium while maintaining the perfect balance of moisture and airflow necessary for healthy development.
Planting Seeds at Incorrect Depths
 8")
Every seed has its preferred planting depth, and getting this wrong can significantly impact your germination success. Proper seed depth is a critical factor many gardeners overlook, yet it dramatically affects whether your seeds will sprout and thrive.
Burying Seeds Too Deep
Seeds planted too deeply often struggle to reach the surface before depleting their energy reserves. When seeds are buried excessively deep, they must use valuable stored energy to push through too much soil, frequently resulting in failed germination. Small seeds like lettuce require only surface sowing with minimal covering, while larger seeds such as beans can handle being planted deeper in the soil. Following the exact instructions on your seed packets is essential, as planting depth varies significantly between species and directly impacts germination success. Garden experts consistently identify improper planting depth as one of the top reasons for seed failure in home gardens.
Leaving Seeds Too Exposed
Seeds that aren’t adequately covered face multiple challenges that can prevent successful growth. Shallow planting leads to rapid drying out of seeds, unstable root anchorage, and increased vulnerability to birds and insects. Even seeds that need light for germination, like petunias, still require good soil contact to maintain the moisture necessary for sprouting. Using a light layer of vermiculite or fine soil can help retain moisture without blocking light for these light-dependent seeds. We recommend using humidity domes or clear plastic covers to maintain moisture levels for exposed seeds. A properly moistened seed-starting mix helps create the ideal environment for germination while providing the right balance of air and water that newly planted seeds need to thrive.
Watering Incorrectly During Germination
 10")
Watering practices can make or break your seed starting success. Many gardeners struggle with finding the right balance, leading to important issues during the crucial germination period.
Overwatering and Causing Dampening Off
Excessive moisture is one of the quickest ways to sabotage your seedlings. Overwatering creates constantly soggy soil conditions that promote “dampening off,” a devastating fungal disease that attacks seedlings at the soil line. This pathogen causes young plants to suddenly wilt, collapse, and die just as they’re emerging. You’ll recognize this problem when seedlings appear to be cut off at the base, falling over even though looking healthy just hours before. To prevent this common issue, we recommend using a well-draining seed starting mix specifically formulated for seedlings. Check soil moisture by inserting your finger into the medium up to the first knuckle—if it feels dry at this depth, it’s time to water. Bottom watering techniques can also help maintain appropriate moisture levels without saturating the soil surface where seedlings are most vulnerable to fungal problems.
Underwatering and Stunting Growth
Insufficient moisture creates equally problematic conditions for emerging seedlings. Underwatering stresses young plants during their most vulnerable stage, resulting in stunted growth, weak stems, and reduced vigor that can permanently affect their development. Seeds require consistent moisture to properly germinate, and newly emerged seedlings need reliable access to water as they establish their first true leaves. Using a clear humidity dome or plastic cover helps maintain environmental moisture without overwatering the soil directly. Consistent moisture levels support optimal cell expansion and nutrient uptake in developing seedlings. We’ve found that monitoring seedlings daily and watering when the top quarter-inch of soil feels dry leads to the best results. Misting systems or self-watering setups can also provide the steady moisture young seedlings need without the dangers of manual overwatering.
Providing Insufficient Light for Seedlings
 12")
Light serves as the primary energy source for seedlings, directly impacting their development and overall health. Inadequate lighting is one of the most common yet overlooked factors that can completely derail your seed starting efforts.
Relying Solely on Window Light
Window light often falls short of providing seedlings with sufficient illumination, even from south-facing windows. Most windowsills deliver less than eight hours of high-intensity sunlight daily, which simply isn’t enough for robust seedling development. Your seedlings require 12-14 hours of consistent light exposure to develop strong stems and healthy leaf structures. Without adequate light, seedlings will stretch toward the available light source, becoming leggy with weak stems that can’t support healthy growth. This phenomenon, called etiolation, results in plants that are more susceptible to disease and less likely to thrive when transplanted outdoors. We recommend supplementing natural window light with grow lights positioned directly above your seedling trays to ensure consistent, adequate illumination throughout their early growth stages.
Setting Up Grow Lights Incorrectly
Proper grow light setup makes a tremendous difference in seedling development. Many gardeners purchase quality grow lights but position them incorrectly, negating their benefits. Lights placed too far from seedlings (beyond 12 inches) significantly reduce the intensity reaching your plants. The ideal distance ranges between 6-12 inches above your seedling trays, allowing for maximum light penetration without heat damage. LED grow lights offer excellent answers for home seed starting, providing high-quality light with minimal heat output that won’t scorch tender seedlings. The duration matters just as much as position – your timer should be set for 12-14 hours daily to simulate optimal growing conditions. Adjusting your lights upward as seedlings grow ensures they receive consistent light intensity throughout their development cycle. Remember to turn off grow lights at night, as seedlings also benefit from a dark period that helps trigger important growth processes.
Skipping the Hardening Off Process
 14")
Many gardeners excitedly rush their precious seedlings outdoors without realizing this critical transition step can make or break their gardening success. Hardening off prepares indoor-grown seedlings for the harsh realities of outdoor life by gradually exposing them to elements like wind, sunlight, and temperature fluctuations.
Rushing Seedlings Outdoors Too Quickly
Transplanting seedlings before they’re truly ready leads to important stress that can stunt growth or kill plants outright. Seedlings need approximately 4-6 weeks of development to establish robust root systems before facing outdoor conditions. Premature exposure to outdoor environments, particularly cold soils or temperatures below a plant’s exact tolerance level, creates vulnerable plants that become easy targets for diseases and pests. Plants moved too quickly often experience transplant shock, where growth stalls completely while the seedling struggles to adapt. The timing of outdoor transitions matters tremendously, as seedlings should only begin the hardening off process when outdoor temperatures consistently meet their exact growing requirements.
Exposing Seedlings to Harsh Conditions
Tender indoor-grown seedlings can’t handle direct sun, strong winds, or heavy rainfall without prior acclimation. Sudden exposure to these elements often results in visibly damaged plants with wilted leaves, broken stems, and scorched foliage. Cold-sensitive varieties face particular danger when nighttime temperatures unexpectedly drop below their threshold. To prevent these issues, we recommend implementing a structured hardening off schedule that increases outdoor exposure incrementally – starting with just 1 hour daily and gradually building to full-day exposure over 6-10 days. Protection from midday sun during initial outdoor sessions helps prevent shock, while monitoring weather forecasts allows gardeners to adjust their hardening schedule during inclement conditions. Checking soil readiness before final transplanting ensures the ground is properly warmed and workable, preventing additional root stress during this critical transition phase.
Overcrowding Seedlings in Containers
 16")
Overcrowding seedlings is one of the most common yet detrimental mistakes in seed starting. When too many plants compete for limited space, they struggle to thrive and develop properly.
Failing to Thin Seedlings Properly
Thinning seedlings is an essential step that many gardeners overlook or avoid. Proper thinning ensures each plant has adequate space to develop without competing with neighboring seedlings for critical resources. When seedlings grow too close together, they struggle to access sufficient light, which results in weak, leggy growth as plants stretch toward limited light sources. Crowded seedlings also face increased competition for nutrients and water, leading to stunted growth and reduced vigor. We’ve found that unthinned seedling trays often develop poor air circulation, creating perfect conditions for fungal diseases and pest infestations to take hold. Selecting the strongest seedlings and removing the weaker ones might seem harsh, but it’s necessary for producing robust, healthy plants that will thrive when transplanted to your garden.
Delaying Transplanting When Necessary
Timing is crucial when it comes to transplanting seedlings from their starter containers. Seedlings that remain in their initial containers too long often become root bound, where their roots circle around the container’s edges and form tight masses. Root bound seedlings experience important stress during transplanting and show reduced growth potential once moved to their permanent locations. The ideal time to transplant varies by plant species, but we generally recommend moving seedlings when they develop their first set of true leaves (not counting the initial seed leaves or cotyledons). Waiting too long can lead to seedlings that are more vulnerable to transplant shock, with some plants never fully recovering from this stress. Regular monitoring of root development through the drainage holes can help you determine when your seedlings need more space to continue healthy growth.
Neglecting Temperature Requirements
 18")
Seeds aren’t just picky eaters—they’re also temperature sensitive. Each variety requires exact soil and air temperature ranges to trigger germination, and overlooking these requirements can lead to disappointing results.
Starting Heat-Loving Plants Too Early
Warm-season crops like tomatoes and peppers face serious risks when started too early. These heat-loving plants typically need 4-6 weeks of indoor growth before they’re ready for outdoor transplanting. Starting them too soon can result in stunted development or even death if they’re moved outside before frost-free dates arrive. We’ve seen countless gardeners grow leggy, stressed seedlings by rushing this process, only to watch their plants struggle to establish outdoors. Roots become bound in their containers when kept indoors too long, creating transplant stress that can set plants back significantly. Always check your local frost dates and count backward to determine the optimal starting time for these temperature-sensitive crops.
Ignoring Cold Stratification Needs
Many perennial and native plant seeds require a period of cold, moist conditions to break dormancy—a process known as cold stratification. Skipping this crucial step significantly reduces germination rates for species like milkweed and many perennials. Cold stratification typically requires 1-3 months of exposure to winter-like conditions, mimicking nature’s way of preparing seeds for spring growth. We can replicate this process by placing seeds in moist paper towels inside a refrigerator for the recommended period. Garden success depends on understanding these biological triggers that evolved over thousands of years. Plants requiring stratification simply won’t germinate reliably without this cold treatment, resulting in wasted time and disappointment for gardeners who overlook this vital step.
How to Avoid These Seed Starting Mistakes for a Successful Garden
Avoiding these common seed starting pitfalls can dramatically improve your gardening success. By using fresh quality seeds in proper growing medium planted at the correct depth you’re already ahead of the game.
Remember that consistent moisture without overwatering and adequate lighting are fundamental to strong seedling development. Don’t rush the process—timing is everything when it comes to starting seeds and transplanting outdoors.
Take time to properly label your trays provide good air circulation and gradually harden off your seedlings before garden planting. These simple adjustments can transform your seed starting experience from frustrating to fulfilling.
With these strategies in place you’ll be well on your way to growing healthy robust plants that will reward you throughout the growing season.
Frequently Asked Questions
What are the most common seed starting mistakes?
The most common seed starting mistakes include using the wrong soil, planting seeds too deep, inconsistent watering, insufficient light, skipping the hardening off process, overcrowding seedlings, improper timing, forgetting to label trays, poor air circulation, and using old seeds without testing viability. These issues can significantly impact germination rates and seedling health, but are easily avoidable with proper planning and care.
Why shouldn’t I use garden soil for starting seeds?
Garden soil is too dense for seed starting and may contain pathogens harmful to young seedlings. It often creates drainage issues that can lead to root rot and disease. Instead, use professional seed-starting mixes that are sterile, lightweight, and provide the perfect balance of moisture retention and drainage, giving your seeds the best environment for successful germination.
How deep should I plant my seeds?
Seed planting depth varies by variety, but a general rule is to plant seeds at a depth equal to 2-3 times their diameter. Seeds planted too deep struggle to reach the surface, while those planted too shallow may dry out or be exposed to pests. Always check seed packet instructions for specific guidance, as some seeds even require light for germination and should barely be covered.
What is the proper way to water seedlings?
Water seedlings gently from below when possible to avoid disturbing delicate stems and roots. Keep soil consistently moist but not soggy—overwatering leads to damping off disease, while underwatering causes stunted growth. Using a spray bottle, watering tray, or seedling-specific watering can helps deliver appropriate moisture. Monitor daily as seedling trays dry out quickly under grow lights.
Do seedlings really need grow lights?
Yes, seedlings typically need supplemental lighting as window light alone is rarely sufficient. Seedlings require 12-14 hours of consistent, direct light daily for healthy development. Without adequate light, seedlings become leggy, weak, and pale. Position grow lights 6-12 inches above seedlings, adjusting height as plants grow, and provide 8 hours of darkness for proper development.
What is hardening off and why is it important?
Hardening off is the process of gradually acclimating indoor-grown seedlings to outdoor conditions before transplanting. This crucial step exposes seedlings incrementally to wind, direct sunlight, and temperature fluctuations over 7-10 days. Skipping this process can result in transplant shock, sunscald, broken stems, or even seedling death, as plants grown indoors are not prepared for harsh outdoor elements.
How can I tell if my seeds are still viable?
Test seed viability before planting by conducting a simple germination test: place 10 seeds between damp paper towels in a plastic bag for a week, checking germination rates. Alternatively, try the water test for larger seeds—viable seeds sink while dead seeds float. Most vegetable seeds remain viable for 2-3 years when stored properly in cool, dry conditions.
When is the right time to start seeds indoors?
The right time depends on your local last frost date and the specific crop’s growing requirements. Calculate backward from your transplanting date (usually after danger of frost has passed) using the seed packet’s “days to maturity” or “weeks before last frost” guidance. Most warm-season vegetables like tomatoes and peppers should be started 6-8 weeks before your last frost date.
How do I prevent my seedlings from becoming leggy?
Prevent leggy seedlings by providing adequate light (12-14 hours daily with proper intensity), maintaining appropriate temperatures (65-75°F for most seedlings), avoiding overcrowding, and ensuring good air circulation. Position grow lights just 2-3 inches above seedlings and raise them as plants grow. Consider using a small fan to strengthen stems and prevent damping off disease.
When should I transplant my seedlings to larger containers?
Transplant seedlings to larger containers when they develop their first set of true leaves (not the initial seed leaves or cotyledons) or when roots begin growing through drainage holes. This usually occurs 3-4 weeks after germination. Delaying transplanting leads to root-bound seedlings that grow poorly. Water thoroughly before transplanting and handle seedlings by their leaves to avoid damaging delicate stems.